background image

 26

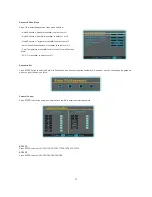
Digital Closed Captions

This item allows you to set the closed caption, and press ENTER to enter Closed Caption Options menu as below:

- Style: press

Ż

/

Ź

 to select one of Automatic and Custom, when you select automatic, the others are disable and can not be adjusted. 

- Size: press Enter to select one of Normal/Large and Small. 

- Font: press Enter to select one of Default and from Font1 to Font7. 

- Text Color: press Enter to select one of Red/Green/Blue/Yellow/Magenta/Cyan/Black and White.

- Text Opacity: press Enter to select one of the Solid/Flashing/Transparent/Translucent. 

- Background Color: press Enter to select one of the Black/White/Red/Green/Blue/Yellow/Magenta/Cyan. 

- Background Opacity: press Enter to select one of the Solid/Flashing/Transparent/Translucent. 

- Edge Effect press Enter to select one of the None/Raised/Depressed/Uniform/Left Shadow/Right Shadow.

- Edge Color press Enter to select one of the Black/White/Red/Green/Blue/Yellow/Magenta/Cyan.

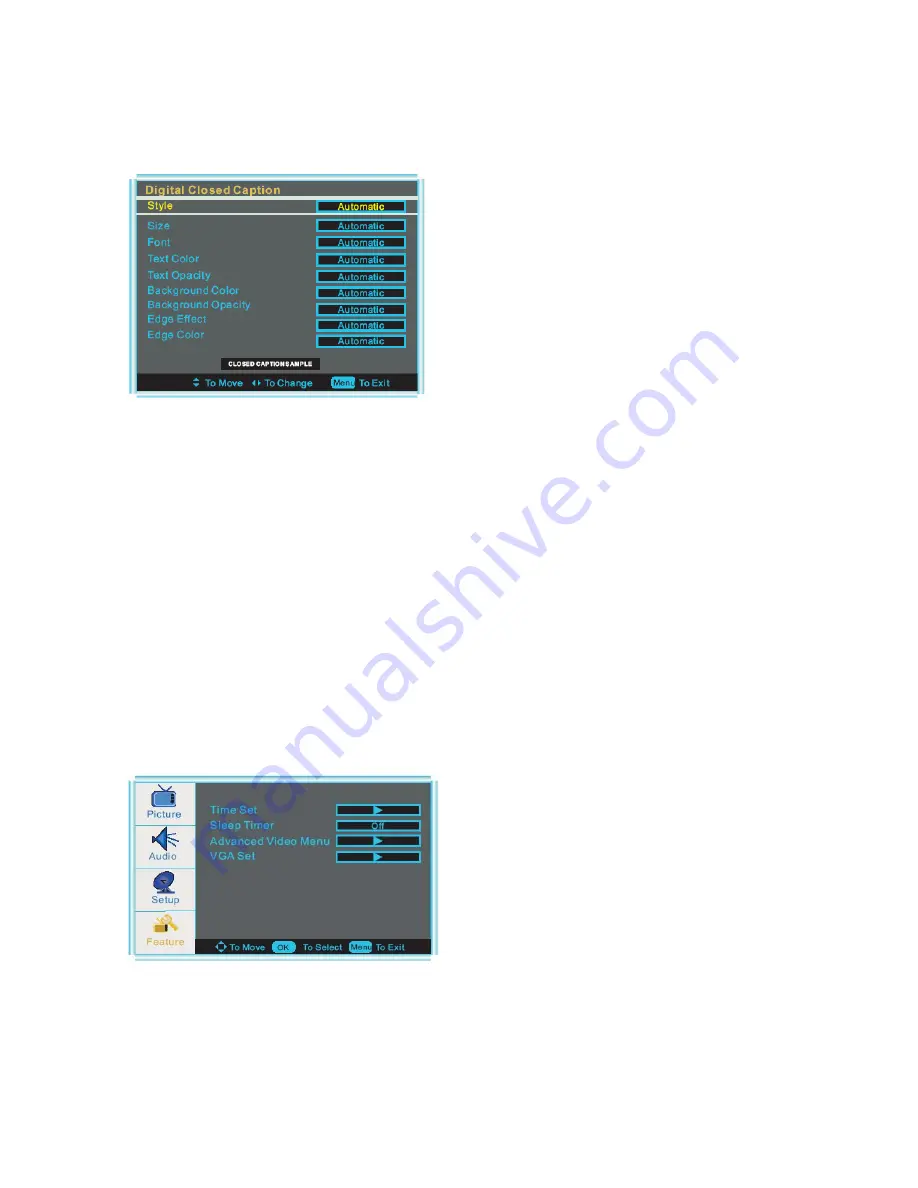
Feature menu options VGA 

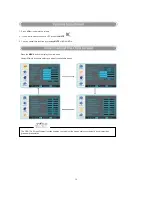
Press MENU on the front panel or on the remote control and then use 

Ÿ

/

ź

 and OK to select the Feature menu in VGA mode. 

1.Press 

Ź

/

ENTER

 to enter the Feature menu 

2. Press 

Ÿ

/

ź

button to move the cursor to the item to be 

selected. 

3 .Use  

Ź

/

ENTER

 button to select what you want to adjust 

in the

 Feature

 menu 

4. Press

Ż

/

Ź

 button to adjust. 

5. When you are satisfied with your adjustment, press 

MENU 

or 

EXIT

 to exit the main menu.

Summary of Contents for PVQ42VGB

Page 1: ...1 PLASMA TV USER MANUAL Please READ this manual carefully before operating your TV and retain it for future reference MODEL PVQ42VGB...

Page 2: ...and maintenance of the product Read the following safety instruction before starting the operation The User Manual uses the following symbols to ensure a safe operation and prevent any damage to opera...

Page 3: ...tacles and the point where they exit from the apparatus 11 Only use attachments accessories specified by the manufacturer 12 Use only with the cart stand tripod bracket or table specified by the manuf...

Page 4: ...to use manual will guide you in getting the best use of your product Remember to record the model and serial number They are on label in back of the unit Model number Serial number Date of purchase S...

Page 5: ...ons 4 Controls 5 Connection Options 7 Universal Remote Control 8 Accessories 9 Antenna Connection 10 External Equipment Connections 11 Operation 17 Menu Operation 18 Maintenance 30 Cleaning the screen...

Page 6: ...t source mode In the MENU INPUT screen these buttons serve as ENTER buttons 2 MENU Menu display 3 CH Press to scan through channels To scan quickly through channels press and hold down either In the M...

Page 7: ...eo Left Audio In 13 YPbPr 2 Pr In 4 YPbPr 1 Y in 14 PC Audio In 5 YPbPr 1 Pb In 15 PC RGB In 6 YPbPr 1 Pr In 16 HDMI 1 In 7 CVBS In 17 HDMI 2 In 8 YPbPr 1 Right Audio In 18 S Video In 9 YPbPr 2 Right...

Page 8: ...8 CC closed caption Select a closed caption 9CHANNEL UP DOWN Press to scan through channels To scan quickly through channels press and hold down either 10 Display Display present mode 11 16 UP DOWN 14...

Page 9: ...9 Accessories Remote control User manual Power cable Attention Card Quick Start Guide English Version Quick Start Guide French Version...

Page 10: ...tenna socket Wall Antenna Socket Bronze Wire RF Coaxial Wire 75 VHF Antenna UHF Antenna Single family Dwellings Houses Connect to wall jack for outdoor antenna Outdoor Antenna Turn clockwise to tighte...

Page 11: ...ch to channel 3 or 4 and then tune the TV to the same channel number Connection Option 2 1 Connect the audio and video cables from the VCR s output jacks to the TV input jacks as shown in the figure W...

Page 12: ...outputs COMPONENT to the Y Pb Pr jacks on the TV and connect the DVD audio outputs to the Y Pb Pr Audio IN jacks on the TV as shown in the figure 2 If your DVD only has an S VIDEO output jack connect...

Page 13: ...fer to the owner s manual for the digital set top box 2 Use INPUT on the remote control to select COMPONENT PC or HDMI DVI source Signal Component HDMI DVI 480i Yes Yes 480p Yes Yes 720p Yes Yes 1080i...

Page 14: ...menu When the source device DVD player or Set Top Box supports DVI How To Connect 1 Connect the source device to HDMI port of this TV with a HDMI to DVI cable not supplied with this product 2 A separa...

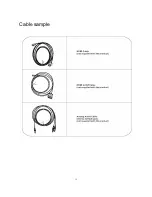
Page 15: ...15 Cable sample...
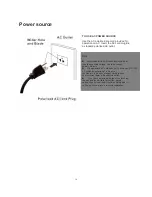
Page 16: ...ed voltage Use the attached power cord only If the polarized AC cord does not fit into a nonpolarized AC outlet do not attempt to file or cut the blade It is the user s responsibility to have an elect...

Page 17: ...e TV set 1 First connect power cord correctly 2 Select the viewing source by using INPUT button on the remote control 3 When finished using the TV press the POWER button on the remote control The TV r...

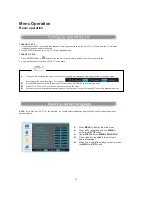
Page 18: ...ed for displaying menus and indications z When you are operating the menu there are some cueing informations on the bottom of the menu it can clues you to operat the menu favoringly For example z Pres...

Page 19: ...3 You can cancel this function by pressing MUTE or VOL VOL Press the MENU button to display the main menu Use buttons to select and adjust the available menus The OSD On Screen Display function enabl...

Page 20: ...utton z To select 2 digit channel e g Channel 20 Press the 2 and 0 buttonts then press ENTER button z To select 3 digit channel e g Channel 103 Press the 1 and 0 and 3 buttods then press ENTER button...

Page 21: ...then use to adjust the tint of picture But this function is available in the NTSC which is one of the color system Aspect Ratio Press ENTER button to select the ratio of picture display such as Norma...

Page 22: ...available when the channel that you are viewing is DTV or the input source is HDMI Setup menu options Press MENU on the front panel or on the remote control then use and ENTER to select Setup the men...

Page 23: ...dd new channels to the channel list Manual Ch Set Press ENTER button to display a channel list that you can select channel as below Channel labels Allows you to name the channel that is selected Use t...

Page 24: ...d auto the item of year date and time will be disabled and can not to adjust When select the manualmode you can press and to set the corresponding functions Time Zone Press to select the time zone suc...

Page 25: ...the sub menu and then use the 0 9 to enter the correct password NTSC CC Press ENTER to select CC1 CC2 CC3 CC4 TEXT1 TEXT2 TEXT3 TEXT4 ATSC CC Press ENTER to select CS1 CS2 CS3 CS4 CS5 CS6 Noise Reduc...

Page 26: ...Enter to select one of the Black White Red Green Blue Yellow Magenta Cyan Background Opacity press Enter to select one of the Solid Flashing Transparent Translucent Edge Effect press Enter to select o...

Page 27: ...Auto Adjust Press button and then use ENTER button to do auto adjust that automatically adjusts the available options for the best viewing configuration Setting Press Enter to do preset that can retu...

Page 28: ...time set menu as below that allows you to set the time the TV will display 1 Press ENTER to enter the Feature menu 2 Press button to move the cursor to the item to be selected 3 Use ENTER button to se...

Page 29: ...ions in S Video and Composite Rear Press MENU on the front panel or on the remote control and then use and ENTER to select the Feature menu in S Video mode 1 Press ENTER to enter the Feature menu 2 Pr...

Page 30: ...and a little fabric softener or dish washing detergent Wring the cloth until it s almost dry and then use it to wipe the screen 2 Make sure the excess water is off the screen and then let it air dry b...

Page 31: ...equirement 100 240V AC 50 60Hz Power mode Normal Standby Normal Power Dissipation 280W Standby Power Dissipation 1W Plug and Play PnP Support All powerful remote control Support The whole machine para...

Page 32: ...relative instructions in the Manual for color adjusts Spots with some or all pictures Verify if the antenna is correctly connected Verify if the antenna is in good condition Make fine adjustment of ch...

Reviews: