


9
1. NAME & FUNCTION
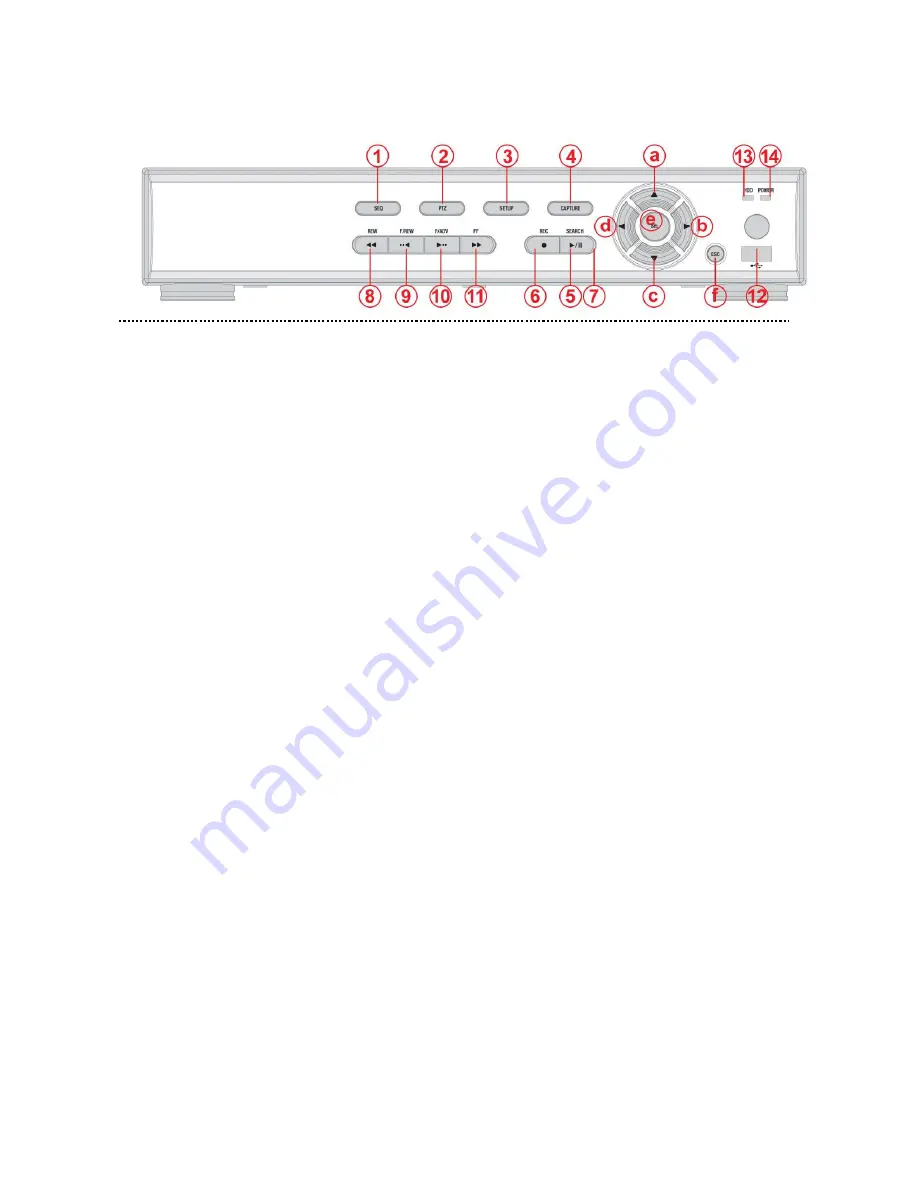
1-1. Front panel
①
SEQ:
To start auto sequencing of the screen in full screen mode. (Toggle)
②
PTZ:
To control PTZ operation (not working in this model.)
③
SETUP:
To launch SETUP menu.
④
CAPTURE:
To start operations of backup in live or playback mode.
⑤
SEARCH:
To go to the search menu.
⑥
REC:
To start and stop manual recording.
⑦
PLAY/PAUSE:
To play or to pause the footage in playback mode.
⑧
REW:
To rewind the footage at 1x, 2x, 4x, and 8x speed during playback.
⑨
F/REW : During playback -
To move the playback position 60 seconds backward.
During pause -
To move the playback position 1 frame backward.
⑩
F/ADV: During playback -
To move the playback position 60 seconds forward.
During pause -
To move the playback position moves 1 frame forward.
⑪
FF:
To fast forward the footage at 1x, 2x, 4x, and 8x speeds during playback.
⑫
USB port:
To connect USB Thumb drive to backup data.
⑬
HDD:
The indicator blinks during recording and playback.
⑭
POWER:
The indicator blinks when the AC adaptor is connected.
Direction button
During setting
ⓐ
To move the cursor Upward.
ⓑ
To move the cursor to the Right or to change the setting values.
ⓒ
To move the cursor Down.
ⓓ
To move the cursor to the Left or to change the setting values.
During Live/playback & Entering password
ⓐ
To select camera 1 or To enter No. 1
ⓑ
To select camera 2 or To enter No. 2.
ⓒ
To select camera 3 or To enter No. 3.
ⓓ
To select camera 4 or To enter No. 4.
ⓔ
To select full screen or quad screen view in live/playback or To select desired menu item or to store the setup value.
ⓕ
To return to previous menu screen or To exit from playback.


