14
Crucial evidence. Always.
SLR-A75 Series
| Solar Surveillance
1. Install the free app from the App Store for iOS (iDMSS Plus) or Play Store for Android (gDMSS Plus).
2. Open the iDMSS Plus/gDMSS Plus app you have installed on your device and select “Camera”
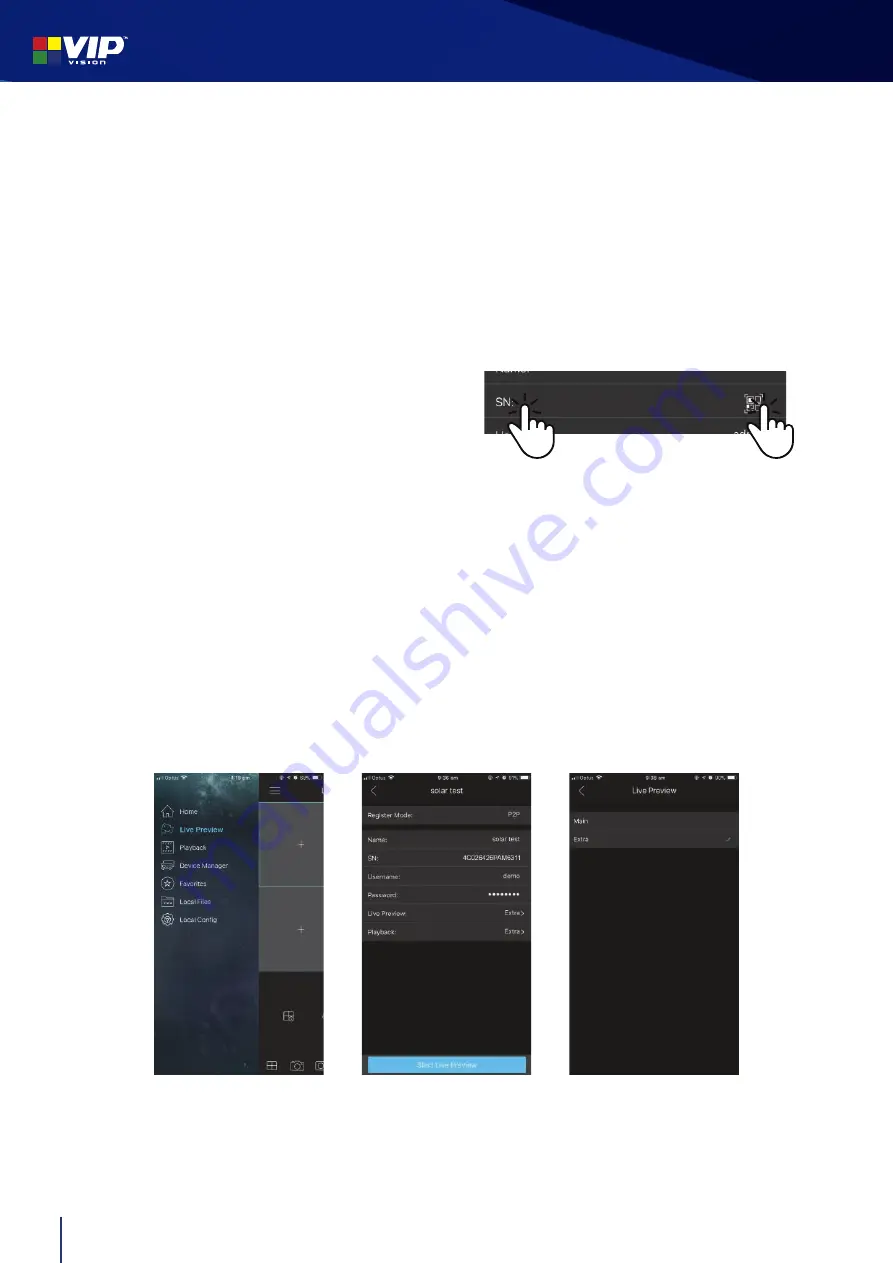
3. Select Menu, then select “Device Manager”.
(Fig. 3.2c)
4. Press the “Add” button and tap “OK” when prompted.
5. Select “Wired device”
6. Select “P2P” & enter a name for the camera. This name is for reference only and can be set to
anything.
7. Enter the serial number of the camera into the
“SN:” text box,
OR
select the image of the QR
code
(pictured)
and use your phone to scan the
QR code included with the kit. Make sure the
app is permitted to access your phone’s camera.
8. Enter the default username
admin
and password (
refer to configuration sheet inside junction
box).
For extra security, be sure to change these details before completing installation.
9. In Live Preview, you can choose between using Main or Extra stream. (
Fig. 3.2e)
Main displays a
higher quality stream but uses up more data and has a slower connection, while Extra consumes
less data and bandwidth but has lower image quality.
10. When using Playback, ensure that Live Preview is set to Main. If set to Extra, the screen will
be black. This is because the camera has been preset to only record the Main stream to the
microSD card (you can change this setting).
11. Select “Start Live Preview”. If the details were entered correctly, your phone should connect to
your recorder and you will see the live camera display.
For more information on how to configure the camera, refer to the camera’s Quick Start Guide
(included).
QR code remote access setup
(4G)
Fig. 3.2d
Camera details
Fig. 3.2e
Live Preview stream
selection
Fig. 3.2c
Main Menu


