background image

28

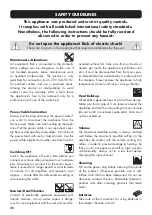
SAFETY GUIDELINES

This appliance was produced under strict quality controls.

It complies with all established international safety standards.

Nonetheless, the following instructions should be fully read and

observed in order to prevent any hazard:

Do not open the appliance! Risk of electric shock!

There are no parts in the appliance that require maintenance by the user.

Maintenance/Alterations

All equipment that is connected to the domestic 
mains voltage can be dangerous to the user if 
not handled properly. Leave maintenance work 
to qualified professionals. The product is only 
permitted for connection to AC 230 Volt/50 Hz,  
for earthed sockets and use in enclosed areas.  
Altering the product or manipulating its serial 


number voids the warranty. After a fault, leave 
the appliance’s fuse to be replaced only by a  
professional with one of the same kind.

Power Cable Connection

Always pull the plug and never the power cable if
you want to disconnect the appliance from the 
mains power. Make sure when setting up the appli-
ance that the power cable is not squashed, sever-
ely bent or damaged by sharp edges. Do not touch 
the power lead with wet or damp hands. Use the 
power cable supplied or another one from Vincent.

Switching Off

Switch the appliance off every time before you 
connect or remove other components or loudspea-
kers, disconnect or connect it to the mains power, 
leave it unused for a longer period or want to clean 
its outside. On all amplifiers and receivers, wait 
approx. 1 minute after this before disconnecting or 
reconnecting the cable.

Moisture/Heat/Vibration

Contact of electrically operated equipment with 
liquids, moisture, rain or water vapour is dange- 
rous for such equipment and the user and must be 

avoided without fail. Take care that no liquids or 
objects get inside the appliance (ventilation slots 
etc.). It must be disconnected from the mains pow-
er immediately and examined by a professional if 
this happens. Never expose the appliance to high 
temperatures (direct sunshine) or strong vibration.

Heat Build-up

All amplifiers generate heat as part of their design. 
Make sure that a gap of 5 cm remains around the 
appliance and that the surrounding air can circulate 
(do not install in enclosed cupbo-ards). Vents must 
not be covered up.

Volume

The maximum tolerable volume is always reached 
well below the maximum possible setting on the 
amplifier. Be careful with the volume setting, the-
refore, in order to prevent damage to hearing. So 
that you do not expose yourself to high volumes 
unintentionally, always set to a low level before 
changing the input channel.

Cleaning

Pull out the power plug before cleaning the outside
of the product. Whenever possible, use a soft, 
lintfree cloth that has been dampened. Do not use 
abrasives, solvents, thinners, flammable chemicals, 
polishes and other cleaning products that leave 
marks.

Batteries

Take note of the instructions for using batteries in 
the chapter “Remote Control”.

Summary of Contents for SV-228

Page 1: ...Bedienungsanleitung deutsch Instructions for use english Manuel d utilisation fran ais SV 228 Hybrid Stereovollverst rker Integrated Hybrid Stereo Amplifier Amplificateur hybride int gr st r o...

Page 2: ...your system and obtaining the best possible performance even if it was installed by your dealer Please follow the security precautions though some of those things may seem obvious In the appendix to...

Page 3: ...Other instructions 29 Included in delivery 30 Description of the appliance 30 Remote control 34 Installation 36 Operating the appliance 45 Tips 47 Search for errors 48 Technical Specifications 50 Glo...

Page 4: ...en es l ngere Zeit nicht benutzen oder dessen Oberfl che reinigen wollen Warten Sie danach bei Vollverst rkern Endstufen und Receivern ca eine Minute bevor Sie Kabelver bindungen trennen bzw herstell...

Page 5: ...pan nungsger te Erkl rungen Hinweise Dieses Dokument ist ein Produkt der Sintron Distribution GmbH 76473 Iffezheim und darf ohne ausdr ckliche und schriftliche Ge nehmigung weder komplett noch auszugs...

Page 6: ...SV 228 ist ein fernbedienbarer Stereo Vollverst rker Er wurde als der bestausgestattete Hybrid Vollverst rker ins Programm von Vincent genommen Das Hauptaugenmerk wurde aber auf die Verst rker Schaltu...

Page 7: ...r Schaltet das Ger t ein und aus das Ger t ist im ausgeschalteten Zustand vom Netz getrennt Im eingeschalteten Zustand wird an den Ausg ngen POWER CONTROL 19 das Einschaltsignal ausgegeben 8 TREBLE H...

Page 8: ...8 R CKANSICHT 18 12 13 14 21 19 20 17 16 15 22 23 24...

Page 9: ...schlossen werden darf Der Eingang darf auch nicht mit dem Vorverst rkerausgang Pre Output 14 verbunden werden 18 Colour VU METER Mit diesem Schalter k nnen Sie die Farbe der Hin tergrundbeleuchtung de...

Page 10: ...nnern des Batteriegeh uses angezeigt ist Verwenden Sie neue und verbrauchte Batterien nicht gemeinsam um die Batterielebensdauer voll auszusch pfen Achten Sie darauf nur Batterien gleichen Typs einzul...

Page 11: ...14 und Aufnahmeausgang REC OUT 15 sowie den Kopfh rer 10 ab 26 Eingangswahltasten Dienen der Auswahl des Eingangsger tes das Sie h ren m chten 27 VOLUME und VOLUME Lautst rketasten Ver ndern Sie hier...

Page 12: ...l schwarz oder wei f r den linken Kanal Lautsprecheranschluss Es ist empfehlenswert konfektionierte Lautsprecher kabel zu verwenden anstatt die Innenleiter Litze der Kabel direkt anzuklemmen Bananenst...

Page 13: ...nthalten bereits diese Vorstufe und k nnen direkt an geschlossen werden Weitere Informationen erhalten Sie in der Bedienungsanleitung dieses Ger tes Oftmals l sst sich unter Zuhilfenahme von Adaptern...

Page 14: ...tsprecherumschalter 4 sowie dem Einstecken eines Kopfh rers 10 ANSCHLUSS EINES AUFNAHMEGER TES Cinch Verbindung z B Kassettenrecorder LINE IN Verbinden Sie dazu diesen Signalausgang mittels Cinch Kabe...

Page 15: ...instellung am Lautsprecherumschalter 4 und dem Einstecken eines Kopfh rers ANSCHLUSS ZWEIER ZUS TZLICHER ENDSTUFENKAN LE Dieser Stereovollverst rker ist mit einem Eingangsanschluss S6 versehen 17 dess...

Page 16: ...ALTEN DER SPANNUNG Bitte den Umschalter niemals im laufenden Betrieb bet tigen Die Umschaltung der Span nung darf nur von einem Techniker durchgef hrt werden da nach Bet tigung des Umschalters auch di...

Page 17: ...schrie benen Kabelverbindungen wegzulassen Der SV 228 besitzt zwei Ausgangsanschl sse f r die Einschaltsteuerung Damit kann er das Schaltsig nal f r weitere Komponenten einer Stereoanlage erzeugen und...

Page 18: ...enn sie aktiviert sind 4 F r jeden Lautsprecher finden Sie am Ger t zwei Lautsprecherklemmen positiv und negativ welche mit einer Seite eines Lautsprecherkabels verbunden werden An jedem Klemmenpaar f...

Page 19: ...wei Stecker eines jeden Lautsprecherkabels mit den zwei zugeh rigen Klemmen zu verbinden Die Schraubkappe der Klemme sollte im Uhrzeigersinn festgedreht werden Sollen Kabelschuhe verwendet werden muss...

Page 20: ...Verst rker nur mit einem Lautsprecherpaar A oder B betrieben k nnen alle Lautspre chertypen mit einer Nenn impedanz von mindestens 4 Ohm angeschlossen werden Achten Sie auf die richtige Polung der La...

Page 21: ...erh hen und im Gegenuhrzeigersinn um die Lautst rke zu verringern An der Fernbedienung Halten Sie die Taste VOLUME gedr ckt um die Lautst rke zu erh hen Verwenden Sie VOLUME um diese zu verringern Die...

Page 22: ...Funktion wird mit diesem Knopf an der Ger tevorderseite bet tigt Sie ist ein Leistungsmerkmal von Audio Verst rkern das es dem Bediener erm glicht per Knopfdruck tiefe und hohe Frequenzen anzuheben D...

Page 23: ...ls netz betriebene und mit dem Schutzleiter des Stromnet zes verbundene Ger t dieses Problem hervorrufen Dieses Ph nomen wird erfahrungsgem entweder durch den Antennenanschluss des Tuners bzw Fernsehe...

Page 24: ...ind die Lautsprecher abgeschaltet Am Drehknopf SPEAKERS 4 wurden angeschlossene Lautsprecherpaare abgeschaltet Die Lautsprecherkabel sind nicht richtig mit den Anschlussklemmen des Verst rkers verbund...

Page 25: ...ignal weg zwischen Plattenspieler und Verst rker an ber die Fernbedienung k nnen keine Funktionen ausgef hrt werden Keine Batterien in das Handger t einge legt Batterien nicht richtig eingelegt oder v...

Page 26: ...Out 4 x 2 Lautsprecherklemmen R hren 1 x 6N4 2 x ECC82 Abspielbare Digitalformate WAV FLAC APE LPCM MP3 AAC AC3 WMA Farbe Schwarz Silber Gewicht 15 5 kg Abmessungen B x H x T 430 x 152 x 450 mm WEITE...

Page 27: ...Eingang Pegel Eine Art der Darstellung jeder physikalischen Gr e gebr uchliches Ma f r Signalspannungen und Lautst rke Wird in Dezibel dB angege ben Als Spannungen auf Line Pegel werden Signalspannung...

Page 28: ...mains power leave it unused for a longer period or want to clean its outside On all amplifiers and receivers wait approx 1 minute after this before disconnecting or reconnecting the cable Moisture Hea...

Page 29: ...document is a product of Sintron Distribution GmbH 76473 Iffezheim and may not be copied or distributed partly or in full without express written consent Vincent is a registered trademark of Sintron D...

Page 30: ...lity stereo integrated amplifiers are preferred The SV 228MK is a remote controlled stereo integrated amplifier It has been included in Vincent s range as the best equipped hybrid integrated amplifier...

Page 31: ...witched off the device is disconnected from the mains The switching operation is signalled via the cables connected in the terminal POWER CONTROL 18 8 TREBLE For setting the treble proportions high fr...

Page 32: ...32 REAR VIEW 18 12 13 14 21 19 20 17 16 15 22 23 24...

Page 33: ...o S6 It is also not allowed to connect this to the Pre Out 14 of the unit 18 Colour VU Meter Use this switch to change the colour of the VU Me ter 19 POWER CONTROL 12V These jack connectors 3 5 mm sen...

Page 34: ...n order to make full use of the batteries life do not mix new and used batteries Make sure that you insert batteries of the same type Some batteries are rechargeable others are not however Take note o...

Page 35: ...t 15 and the preamplifier output 14 Pressing it again re turns to the original volume 26 Input selector buttons Select the input source you want to listen to with these buttons 27 VOLUME and VOLUME Th...

Page 36: ...nstead of connecting the cab le s central wire strand directly to the terminals Banana plugs or cable lugs ensure high security from short circuits and damage to loudspeakers or amplifier Ensure that...

Page 37: ...the high level inputs Some models of record player already include this preamplifier and can be connected directly You will find further information in this appliance s operating manual The stereo so...

Page 38: ...g the Loudness function the tone settings BASS TREBLE TONE the position of the speaker switch 4 and the plugging in of the headphones 10 CONNECTION OF A RECORDING DEVICE Connect this signal output to...

Page 39: ...ITIONAL MAIN AMPLIFIER CHANNELS This stereo amplifier is equipped with a main amplifier input S6 also known as unity gain input 17 The input signals will bypass the internal preamplifier stage and are...

Page 40: ...age from 230 V to 110 V SWITCHING THE VOLTAGE Please never actuate the switch during operation The voltage must only be swit ched by a technician since the device fuse must also be replaced after actu...

Page 41: ...support it all you have to do is leave out these cable connections The SV 228 is equipped with two output connectors for the power control Here the switching signal generated by the SV 228 is availab...

Page 42: ...activated 4 For each loudspeaker you will find two connector screws positive und negative at the amplifier s backside One side of the speaker cable must be attached here Each pair of screws has a labe...

Page 43: ...nding way If you are using ready made loudspeaker cables with 4 mm banana plugs all you need to do is connect the two plugs on each loudspeaker cable end to the two associated speaker connectors Turn...

Page 44: ...hm If only one pair of speakers is used A or B all types of loudspeakers with a minimal nominal impedance of 4 Ohm can be utilised Consider correct polarity the positive contact is mostly marked red o...

Page 45: ...nt panel Turn the knob VOLUME clockwise to turn up the volume and counter clockwise to turn it down Using the remote control Hold down the button VOLUME to turn the volume up Use VOLUME to turn it dow...

Page 46: ...mpared with middle frequencies at the touch of a button It thereby corrects the impression of volume at low volume In an audio system when the volume is small low and high frequency ranges are insuffi...

Page 47: ...woofers record players or headphone amplifiers that are connected to the audio inputs of the amplifier Another possible reason for humming noise is electromagnetic in terference of other components po...

Page 48: ...f The loudspeakers connected have been turned off with the SPEAKERS dial 4 The speaker cables are not properly connected to the amplifier s terminals or are defective Switch on the source unit and beg...

Page 49: ...cannot perform any functions No batteries inserted in the remote control batteries are not inserted correctly or are depleted The line of sight between the remote control and the unit is obstructed t...

Page 50: ...ts 1 x Stereo Pre Out 1 x Stereo Rec Out 4 x 2 Speaker Terminals Tubes 1 x 6N4 2 x ECC82 Playable Digital Formats WAV FLAC APE LPCM MP3 AAC AC3 WMA Colour Black Silver Weight 15 5 kg Dimensions W x H...

Page 51: ...inputs must not be confused with inputs that accept preamplified signals Dynamic The volume difference between the quietest and the loudest sounds possible in audio signals without distortion or tran...

Page 52: ...er du secteur ou de le raccorder au secteur si vous ne l utilisez pas pendant une longue p riode ou si vous voulez nettoyer sa surface Attendez environ une minute avant de brancher ou de d brancher le...

Page 53: ...g par la soci t Sintron Distribution GmbH 76473 Iffezheim qui ne doit tre ni copi ni distribu dans sa totalit ou en partie sans accord explicite et crit Vincent est une marque enregistr e de la soci t...

Page 54: ...commande Il a t inclus dans le programme de Vincent en tant qu amplificateur de puissance hybride b n ficiant du meilleur quipement L accent a t port sur la technique des circuits d amplification qui...

Page 55: ...ss du r glage de la tonalit qui a t r gl e l aide des boutons tournants BASS et TREBLE 6 BASS Sert au r glage de la partie basse du son basses 7 POWER Interrupteur secteur Met l appareil en MARCHE ou...

Page 56: ...56 FACADE ARRIERE 18 12 13 14 21 19 20 17 16 15 22 23 24...

Page 57: ...E OUTPUT 14 18 Colour VU Meter Interrupteur pour l clairage du VU m tre Permet le r glage de l intensit d clairage 19 POWER CONTROL 12V Les signaux de commande de mise sous tension Trigger sont envoy...

Page 58: ...s rep res pr sents l int rieur du bo tier des piles N utilisez pas des piles neuves et usag es en m me temps pour utiliser la dur e de vie enti re des piles Faites attention utiliser des piles de m me...

Page 59: ...teur PRE OUTPUT 14 et de la sortie pour enregistre ment REC OUTPUT 15 26 Touches de s lection d entr es Servent la s lection de l appareil source raccor d dont on veut couter la reproduction 27 VOLUME...

Page 60: ...ou les cosses de c ble offrent une plus grande s curit contre les courts circuits ou l endommagement des haut parleurs ou de l amplificateur Assurez vous que les fils des haut parleurs d nud s ne pui...

Page 61: ...ur Certains mod les d platine tourne disque en sont d j quip s et peuvent donc tre directement branch s Vous trouverez des informations compl mentaires dans les instructions de service de cet appareil...

Page 62: ...es haut parleurs 4 ainsi que du raccordement d un casque d coute 10 RACCORDEMENT D UN APPAREIL D ENREGISTREMENT Reliez pour cela cette sortie de signal par une paire de c bles RCA l entr e du signal L...

Page 63: ...mplificateur int gr est quip d une entr e S6 dont le signal contourne le pr amplificateur appel e entr e unity gain Ceci permet de relier celui ci avec la sortie de pr amplificateur d un autre apparei...

Page 64: ...s COMMUTATION DE TENSION Ne man uvrer sous aucun pr texte le commutateur pendant le fonctionnement de l appareil La commutation de tension ne peut tre effectu e que par un technicien qua lifi car apr...

Page 65: ...t ci dessus n est pas souhait il suffit la plupart du temps de renoncer aux liaisons c bl es d crites dans ce paragraphe L appareil SV 228 poss de deux prises de sortie pour la commande de commutation...

Page 66: ...appareil deux bornes de serrage positive et n gative auxquelles vous pouvez raccorder une extr mit d un c ble de haut parleur Sur chaque paire de bornes de serrage vous trouverez une d signation R ou...

Page 67: ...uffira seulement de relier les deux fiches de chaque c ble de haut parleur avec les bornes correspondantes Les molettes de fixation devront tre serr es en les tournant dans le sens horaire Si on utili...

Page 68: ...teur n est utilis qu avec une seule paire de haut parleur A ou B tous les types de haut parleurs ayant une imp dance nominale d au moins 4 Ohm peuvent tre raccord s Veuillez la bonne polarit des racco...

Page 69: ...st actuellement s lectionn e R glage volume sonore VOLUME 3 VOLUME 27 Sur l appareil tournez le bouton tournant VOLUME dans le sens horaire pour augmenter le volume dans le sens antihoraire pour le di...

Page 70: ...ble volume les fr quences hautes et basses moins fort que les fr quences moyennes pression acoustique identique fr quences sonores autour de 1 kHz Cette fonction ne devrait tre utilis e qu avec un vol...

Page 71: ...ue qui sont connect s aux entr es audio de l amplificateur Une autre cause possible du ronflement est une interf rence lectromagn tique entre l alimentation d autres appareils p ex amplificateur r cep...

Page 72: ...pareil source n est pas ou est mal raccord e ou pas raccord e la bonne borne d entr e de l amplificateur Le mauvais canal d entr e a t s lectionn l amplificateur Le volume VOLUME est r gl trop bas L a...

Page 73: ...t desserr es les connexions encrass es ou un c ble est d fectueux Une platine a t raccord e un niveau lev sans un pr amplificateur phono Les r glages de tonalit des boutons TREBLE ou BASS ne sont pas...

Page 74: ...x Stereo Main In Sorties 1 x Stereo Pre Out 1 x Stereo Rec Out 4 x 2 bornes des haut parleurs Format de fichier WAV FLAC APE LPCM MP3 AAC AC3 WMA Tubes 1 x 6N4 2 x ECC82 Variante de couleur noir arge...

Page 75: ...l entr e phono MC Niveau dB Une mani re de repr senter toute grandeur phy sique mesure usuelle des tensions de signal et du volume Est indiqu en d cibels dB On d signe par tensions au niveau Line les...

Page 76: ...eceipt is your proof for the beginning of the warranty period Note the serial number in the following box you can read it from the rear side of the device Gardez soigneusement la facture d achat et le...

Reviews: