ENGLISH - 13
7. USING THE ELECTRONIC PROGRAMMABLE TIME SWITCH.
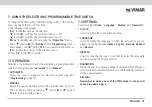
To configure the time switch, from the starting screen of the display,
press any one of the four front buttons.
• The following icons appear:
- “
Esc
” (button
A
): cancels the selection.
- “ ” (button
B
): switches the controlled load on or off.
- “ ” (button
C
): switches the controlled load on or off.
- “
Menù
” (button
D
): used for accessing the
“
Operation
”
menu.
• Press “ ” (button
B
): the
“
Settings
”
and
“
Programming
”
menu
items appear; use “ ” (button
C
) to scroll upward in the menu, or
“
Esc
” (buttton
A
) to return to the previous menu.
• Press “
Ok
” (button
D
) to confirm.
7.1 OPERATION.
Selection of operating mode for the electronic programmable time
switch, choosing between
“Automatic”
and
“Manual”
.
• AUTOMATIC.
Allows the user to configure the desired program type (see
“
Programming
”
, page 14).
• MANUAL.
Allows the user to manually switch the controlled load on or off.
This can also be done by pressing “ ” (button
B
) or “ ” (button
C
) from the main display screen.
7.2 SETTINGS.
Used for setting “
Clock
”, “
Language
”, “
Display
” and “
Password
”.
• CLOCK.
Used for setting the current date and time.
• LANGUAGE.
Used for setting the language in which the instructions are dis-
played, choosing between
Italiano
,
English
,
Français
,
Español
and
Deutsch
.
• DISPLAY.
Used for choosing the type of icon that indicates the relay state
and for adjusting the display contrast.
• PASSWORD.
Allows the user to configure, change or disable a 3-digit PIN pass-
word to prevent unauthorized access to the thermostat functions,
settings and programs.
Attention!
Remember to make a note of the PIN number in the special
space provided on pg. 8.


