background image

Do the following to adjust the screen image:

1

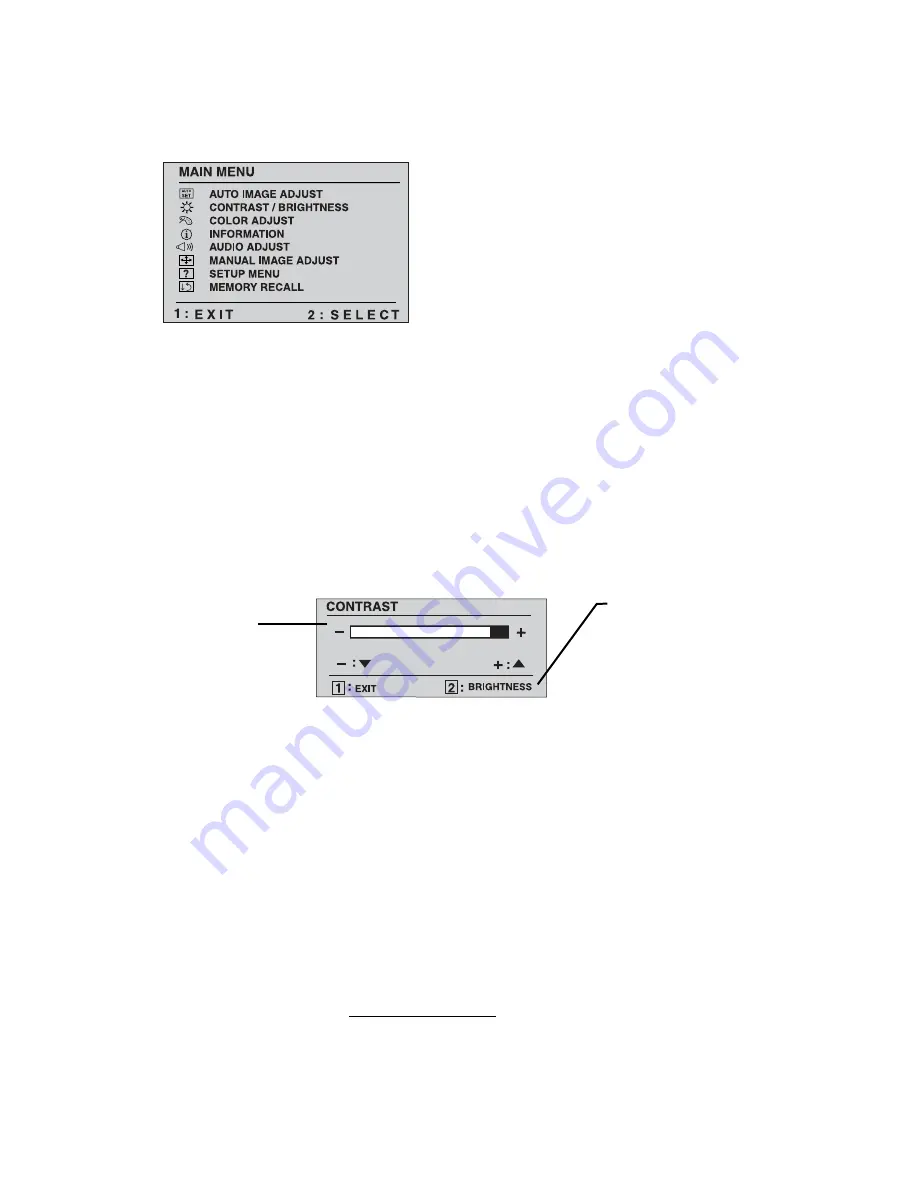
To display the Main Menu, press button [1]. 

NOTE:

 All OnView menus and adjustment screens disappear automatically 

after about 30 seconds. This time period is adjustable through the Setup 
menu and the OSD timeout control described on page 11. 

2

To highlight a control you want to adjust, press 

 or 

 to scroll up or down 

the Main Menu.

3

To select the highlighted control, press button [2]. A control screen appears 
like the example shown below.

4

To adjust the control, press the up 

 or down 

 buttons.

5

To save the adjustments and exit the menu, press button [1] 

twice

.

The following tips may help you optimize your display: 

• Adjust your computer's graphic card so that it outputs a video signal 1280 x 

1024 @ 60 Hz to the LCD display. (Look for instructions on "changing the 
refresh rate" in your graphic card's user guide.)

• If necessary, make small adjustments using H POSITION and V POSITION 

until the screen image is completely visible. (The black border around the 
edge of the screen should barely touch the illuminated "active area" of the 
LCD display.)

The 

down 

arrow decreases, 

 up arrow 

increases

The line at the 
bottom of the screen 
tells you what you 
can do next - in this 
example, either EXIT 
or select the 
BRIGHTNESS
control.

 8

        ViewSonic

   VG900

_

VG900

b

Summary of Contents for VG900 - 19" LCD Monitor

Page 1: ...0 LCD Display User Guide Guide de l utilisateur Bedienungsanleitung Gu a del usuario Guida dell utente Guia do usu rio Anv ndarhandbok K ytt opas Instrukcja obs ugi Full 19 Diagonal Viewable Screen VG...

Page 2: ...CD Display Setting the Timing Mode 6 OSD and Power Lock Settings 6 Adjusting the Screen Image 7 Main Menu Controls 9 Other Information Specifications 13 Troubleshooting 14 Customer Support 15 Cleaning...

Page 3: ...his product In the interest of continuing product improvement ViewSonic Corporation reserves the right to change product specifications without notice Information in this document may change without n...

Page 4: ...ors ViewSonic recommends that you install both files Precautions Sit at least 18 from your LCD display Avoid touching the screen Skin oils are difficult to remove Never remove the rear cover Your LCD...

Page 5: ...click on the CD ROM icon in the Windows Explorer then double click on viewsonic exe 2 Follow the on screen instructions 6 Audio Installation optional Speakers Connect the audio cable lime colored to t...

Page 6: ...unted display do the following 1 Disconnect Power 2 Lay the LCD display face down on a towel or blanket Notice the four screw holes for the wall mount on the back as shown on the left 3 Attach the mou...

Page 7: ...y result in permanent damage to your LCD display OSD and Power Lock Settings You can lock the On Screen Displays OSDs and or the power button to prevent unwanted changes to the current image settings...

Page 8: ...rolls through menu options and adjusts the displayed control Also a shortcut to display the Contrast adjustment control screen Power On Off Displays the control screen for the highlighted control Also...

Page 9: ...save the adjustments and exit the menu press button 1 twice The following tips may help you optimize your display Adjust your computer s graphic card so that it outputs a video signal 1280 x 1024 60...

Page 10: ...sts background black level of the screen image Color Adjust provides several color options preset color temperatures and User which allows you to adjust red R green G and blue B The factory setting fo...

Page 11: ...the resolution is 1280 x 1024 and the refresh rate is 60 Hertz Audio Adjust Volume increases the volume decreases the volume and mutes the audio Mute temporarily silences audio output Manual Image Ad...

Page 12: ...used in the menus and control screens Resolution Notice advises the optimal resolution to use After selecting Resolution Notice a sub menu appears asking if you want to Disable or Enable the notice I...

Page 13: ...e original factory settings if the display is operating in a factory Preset Timing Mode listed in this user guide Exception This control does not affect changes made with the User Color control Contro...

Page 14: ...0 240 VAC 50 60 Hz auto switch Display area Full Scan 376 32 mm H x 301 05 mm V 14 82 H x 11 85 V Operating conditions Temperature Humidity Altitude 32 F to 104 F 0 C to 40 C 10 to 90 no condensation...

Page 15: ...ck of the computer If the other end of the video cable is not attached permanently to the LCD display tightly secure it to the LCD display Adjust brightness and contrast If you are using an Macintosh...

Page 16: ...ewsoniceurope com T 0800 833 648 F 01293 643910 service eu viewsoniceurope com Europe Middle East Baltic countries and North Africa viewsoniceurope com Contact your reseller service eu viewsoniceurope...

Page 17: ...nd wipe the screen To clean the case 1 Use a soft dry cloth 2 If still not clean apply a small amount of a non ammonia non alcohol based mild non abrasive detergent onto a clean soft lint free cloth t...

Page 18: ...e your product s serial number 2 To obtain service under warranty you will be required to provide a the original dated sales slip b your name c your address d a description of the problem and e the se...

Page 19: ...inner conductors AC PLUG CORD PRECAUTIONS FOR THE UNITED KINGDOM FOR YOUR SAFETY PLEASE READ THE FOLLOWING TEXT CAREFULLY IF THE FITTED MOULDED PLUG IS UNSUITABLE FOR THE SOCKET OUTLET THEN THE PLUG...

Page 20: ...re of the following measures Reorient or relocate the receiving antenna Increase the separation between the equipment and receiver Connect the equipment into an outlet on a circuit different from that...

Page 21: ...ViewSonic Corporation...

Reviews: