background image

3

Music

On the Main Menu, select the Music icon then press [ 

 ] to listen to Music, press 

[▲/▼] to adjust volume, and press [◄/►] to go to the previous or advance to the next 

song, press and hold [ 

 ] to display a submenu:

1) Repeat : press [ 

 ] to select among Once, One and All. 

2) Play Sequence : select from either random or in sequential order.
3) Screen Saver : on / off.

Note:

 If you want to play music by random, please select Repeat function to All first.

Calendar

Press the   bu

tton to toggle to the Clock Menu. Press [▲/▼] to adjust brightness, 

and press [◄/►] to change theme color, press [ 

 ] to go into Calendar setting:

1) Mode : 24 Hour or 12 Hour.
2) Time : press [ 

 ] first, and then press[▲/▼]to adjust time, use the [◄/►] button 

to move between fields, press [ 

 ] button to enter.

3) Calibration : the number of second can be added or subtracted from a day (0, 0.5, 

1, 1.5, 2, 2.5, 3, 3.5, 4, -4, -3.5, -3, -2.5, -2, -1.5, -1, -0.5).

4) Date : press [ 

 ] first, and then press [▲/▼] to adjust date.

5) Date Format : Three formats are available.
6) Week Beginning : Mon., Tue., Wed., Thu., Fri., Sat., Sun..
7) Background : Photo / Black

Setup

On the Main Menu, select the Setting icon then press the [ 

 ] button to enter the 

Setting Menu. For Calendar Settings, please see Calendar sections above.

Alarm Clock

 : Press the [▼] button to select Alarm Setting, and then press [ 

 ] to 

                        enter.

1) Alarm : off / on

2) Time : Use the navigation buttons to move between fields and make changes, 

press [ 

 ] button to enter.

3) Frequency : everyday, Mon.-Fri., Mon.-Sat., once.
4) Ring tone : Five ring tones are available.
5) Volume : Low, Medium, and Loud.

Timer

 :  Press the [▼] button to select Timer Setting, and then press [ 

 ] to enter.

1) Timer : off / on.
2) Turn on : set the time for the unit to power on automatically.
3) Turn off : set the time for the unit to power off automatically.
4) Frequency : how often you want the unit to use the timer after the timer is enable. 

Available options are: Everyday, Mon.-Fri., Mon.-Sat., and Once.

Summary of Contents for VFM820

Page 1: ...ing your product for future service Warranty information contained in this User Guide will describe your limited coverage from ViewSonic Corporation which is also found on our web site at http www viewsonic com in English or in specific languages using the Regional selection box in the upper right corner of our website Antes de operar su equipo lea cu idadosamente las instrucciones en este manual ...

Page 2: ... EC and Low Voltage Directive 2006 95 EC Following information is only for EU member states The mark is in compliance with the Waste Electrical and Electronic Equipment Directive 2002 96 EC WEEE The mark indicates the requirement NOT to dispose the equipment including any spent or discarded batteries or accumulators as unsorted municipal waste but use the return and collection systems available If...

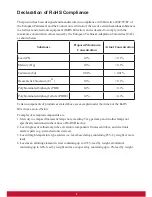
Page 3: ...ted biphenyls PBB 0 1 0 1 Polybrominated diphenyl ethers PBDE 0 1 0 1 Certain components of products as stated above are exempted under the Annex of the RoHS Directives as noted below Examples of exempted components are 1 Mercury in compact fluorescent lamps not exceeding 5 mg per lamp and in other lamps not specifically mentioned in the Annex of RoHS Directive 2 Lead in glass of cathode ray tubes...

Page 4: ...ent may change without notice No part of this document may be copied reproduced or transmitted by any means for any purpose without prior written permission from ViewSonic Corporation For Your Records Product Name Model Number Document Number Serial Number Purchase Date VFM820 ViewSonic Digital Photo Frame VS14890 VFM820_UG_ENG Rev 1a 06 07 12 ______________________________ _______________________...

Page 5: ...Protect the power cord Route power cords appropriately to avoid trip over by someone else or pinched by items placed on or against them Pay particular attention to the point where the cord attaches to Digital Photo Frame Only use the AC adapter included with the Digital Photo Frame Using any other power adapter will void your warranty Unplug the power cord from the outlet when the unit is not in u...

Page 6: ...ecified by the manufacturer Do not step on the power cable plug or adapter to avoid electrical shock Do not attempt to service this device yourself There are no user serviceable parts inside Opening or removing covers may expose you to electrical shock or other hazards Refer all services to a qualified service personnel Please unplug this device during the thunderstorm or not in use for a long per...

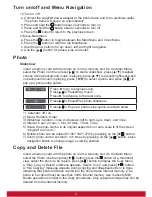
Page 7: ...o Pause Play photo slideshow Press to Pop up a photo setup option as shown below 1 Calendar off on 2 Mode Random Order 3 Slideshow random cross mid spread left to right up to down and none 4 Interval 5 sec 20 sec 1 min 30 mins 1 hour 1 day 5 Scale the photo can be in its original aspect ratio or auto scale to fit the screen Original and Auto 6 Rotate photo can be rotated 0o 90o 180o 270o by pressi...

Page 8: ... 5 4 4 3 5 3 2 5 2 1 5 1 0 5 4 Date press first and then press to adjust date 5 Date Format Three formats are available 6 Week Beginning Mon Tue Wed Thu Fri Sat Sun 7 Background Photo Black Setup On the Main Menu select the Setting icon then press the button to enter the Setting Menu For Calendar Settings please see Calendar sections above Alarm Clock Press the button to select Alarm Setting and t...

Page 9: ...wer on even when the device is connected to an electrical outlet Check whether the AC power adapter rating is correct and it is securely plugged to the device and to an electrical outlet Screen is off or too dark Check whether the screen brightness is set to a low level in the Setup menu Screen freeze and does not respond to control anymore Unplug the device and plug it again Cannot playback pictu...

Page 10: ...a Columbia www viewsonic com la T 01800 9 157235 soporte viewsonic com Latin America Mexico www viewsonic com la T 001 8887328722 soporte viewsonic com Renta y Datos 29 SUR 721 COL LA PAZ 72160 PUEBLA PUE Tel 01 222 891 55 77 CON 10 LINEAS Electroser Av Reforma No 403Gx39 y 41 97000 Merida Yucatan Tel 01 999 925 19 16 Other places please refer to http www viewsonic com la soporte index htm Mexico ...

Page 11: ... product for an extended period of time 4 Removal installation one way transportation insurance and set up service charges How to get service 1 For information about receiving service under warranty contact ViewSonic Customer Support please refer to Customer Support page You will need to provide your product s serial number 2 To obtain warranted service you will be required to provide a the origin...

Page 12: ...ng service under warranty contact ViewSonic Customer Support Please refer to the attached Customer Support page You will need to provide your product s serial number so please record the product information in the space provided below on your purchase for your future use Please retain your receipt of proof of purchase to support your warranty claim For Your Records Product Name Model Number Docume...

Page 13: ...oluglobales com Cuernavaca Compusupport de Cuernavaca SA de CV Francisco Leyva 178 Col Miguel Hidalgo C P 62040 Cuernavaca Morelos Tel 01 777 3180579 01 777 3124014 E Mail aquevedo compusupportcva com Distrito Federal QPLUS S A de C V Av Coyoacán 931 Col Del Valle 03100 México D F Tel 01 52 55 50 00 27 35 E Mail gacosta qplus com mx Guadalajara Jal SERVICRECE S A de C V Av Niños Héroes 2281 Col Ar...

Page 14: ......

Reviews: