background image

ViewSonic

VA503m

10

Main Menu Controls

Adjust the menu items shown below by using the up 

S

 and down 

T

 buttons.

Control

Explanation

Auto Image Adjust

 automatically sizes, centers, and fine tunes the video signal 

to eliminate waviness and distortion. Press the [2] button to obtain a sharper 
image.

NOTE: 

Auto Image Adjust works with most common video cards. If this 

function does not work on your LCD display, then lower the video refresh rate 
to 60 Hz and set the resolution to its pre-set value.

Contrast

 adjusts the difference between the image background


(black level) 

and the foreground (white level).

Brightness

 adjusts background black level of the screen image.

Audio Adjust
Volume

 increases the volume, decreases the volume, and mutes the audio.

Mute

 temporarily silences audio output.

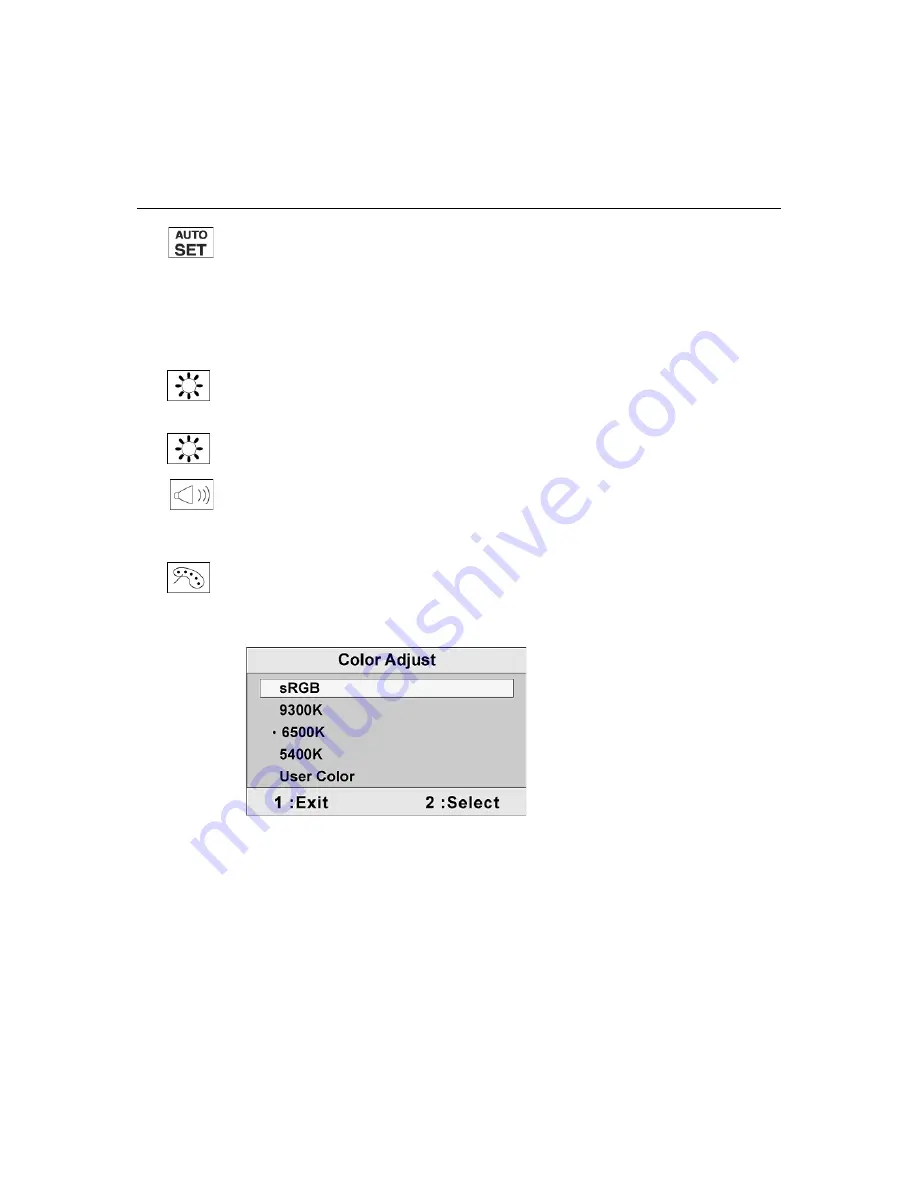
Color Adjust

 provides several color adjustment modes, including preset color 

temperatures and a User Color mode which allows independent adjustment of 
red (R), green (G), and blue (B). The factory setting for this product is 6500K 
(6500 Kelvin).

sRGB-

This is quickly becoming the industry standard for color management, 

with support being included in many of the latest applications. Enabling this 
setting allows the LCD display to more accurately display colors the way they 
were originally intended. Enabling the sRGB setting will cause the Contrast and 
Brightness adjustments to be disabled.

9300K-

Adds blue to the screen image for cooler white (used in most office 

settings with fluorescent lighting).

6500K-

Adds red to the screen image for warmer white and richer red.

5400K-

Adds green to the screen image for a darker color.

Summary of Contents for VA503m

Page 1: ...ViewSonic VA503m LCD Display Model No VS11357...

Page 2: ...Getting Started Package Contents 4 Precautions 4 Quick Installation 5 Wall Mounting Optional 6 Using the LCD Display Setting the Timing Mode 7 OSD and Power Lock Settings 7 Adjusting the Screen Image...

Page 3: ...Energy Energy saving mode after a certain time beneficial both for the user and the environment Electrical safety Emissions Electromagnetic fields Noise emissions Ecology The product must be prepared...

Page 4: ...crease the separation between the equipment and receiver Connect the equipment into an outlet on a circuit different from that to which the receiver is connected Consult the dealer or an experienced r...

Page 5: ...es and a third grounding prong The wide blade and the third prong are provided for your safety If the plug does not fit into your outlet consult an electrician for replacement of the outlet 10 Protect...

Page 6: ...oration reserves the right to change product specifications without notice Information in this document may change without notice No part of this document may be copied reproduced or transmitted by an...

Page 7: ...oth the INF and ICM files Precautions Sit at least 18 from the LCD display Avoid touching the screen Skin oils are difficult to remove Never remove the rear cover This LCD display contains high voltag...

Page 8: ...ur computer does not have a CD ROM drive see Customer Support on page 15 Wait for the CD ROM to auto start NOTE If the CD ROM does not auto start double click on the CD ROM icon in the Windows Explore...

Page 9: ...wer button is turned Off then disconnect the power cord 2 Lay the LCD display face down on a towel or blanket 3 Remove the Plastic Covers from the back of the LCD display 4 Remove the four screws atta...

Page 10: ...te See your graphic card s user guide for instructions WARNING Do not set the graphics card in your computer to exceed the maximum refresh rate of 85Hz doing so may result in permanent damage to your...

Page 11: ...enu with OSD controls Front Control Panel shown below in detail Scrolls through menu options and adjusts the displayed control Also a shortcut to display the Contrast adjustment control screen Display...

Page 12: ...e up S or down T buttons 5 To save the adjustments and exit the menu press button 1 twice The following tips may help you optimize your display Adjust the computer s graphics card so that it outputs a...

Page 13: ...e decreases the volume and mutes the audio Mute temporarily silences audio output Color Adjust provides several color adjustment modes including preset color temperatures and a User Color mode which a...

Page 14: ...ignal input coming from the graphics card in the computer the LCD model number the serial number and the ViewSonic website URL See your graphics card s user guide for instructions on changing the reso...

Page 15: ...dvises the optimal resolution to use OSD Position allows the user to move the OSD menus and control screens OSD Timeout sets the length of time the OSD screen is displayed For example with a 15 second...

Page 16: ...400 70 Hz Power Voltage 100 240 VAC 50 60 Hz auto switch 1 2A Display area Full Scan 304 1 mm H x 228 1 mm V 11 97 H x 8 98 V Operating conditions Temperature Humidity Altitude 32 F to 104 F 0 C to 4...

Page 17: ...computer If the other end of the video cable is not attached permanently to the LCD display tightly secure it to the LCD display Adjust brightness and contrast If you are using an Macintosh older tha...

Page 18: ...North Africa www viewsoniceurope com Contact your reseller Australia and New Zealand www viewsonic com au support AUS 1800 880 818 NZ 0800 008 822 service au viewsonic com Singapore Malaysia Thailand...

Page 19: ...n soft lint free cloth and wipe the screen To clean the case 1 Use a soft dry cloth 2 If the case still not clean apply a small amount of a non ammonia non alcohol based mild non abrasive detergent on...

Page 20: ...out receiving service under warranty contact ViewSonic Customer Support You will need to provide your product s serial number 2 To obtain service under warranty you will be required to provide a the o...

Page 21: ......

Reviews: