


9
Do the following to adjust the display setting:
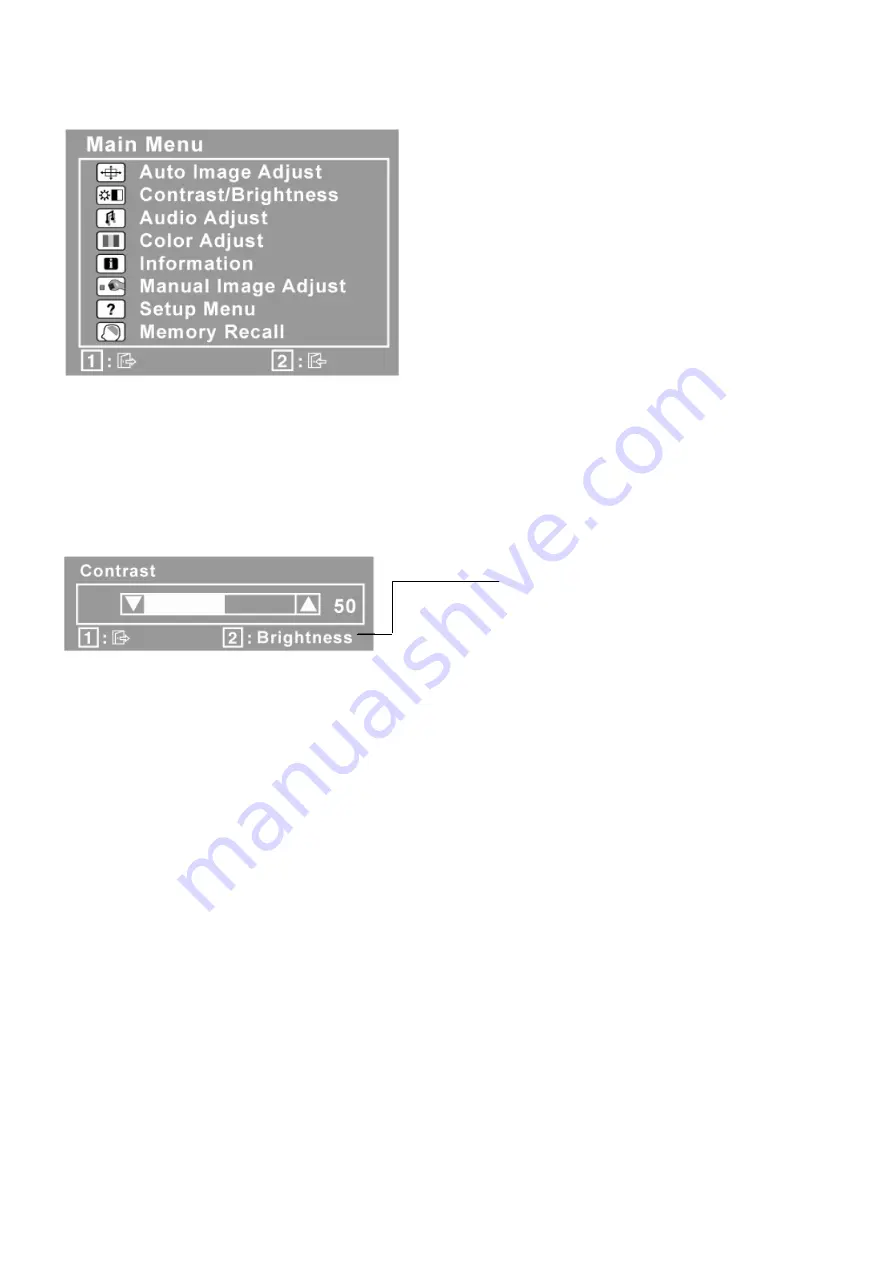
1.
To display the Main Menu, press button [1].
NOTE: All OSD menus and adjustment screens disappear automatically after about 15 seconds. This is adjustable
through the OSD timeout setting in the setup menu.
2. To select a control to adjust, press
▲
or
▼
to scroll up or down in the Main Menu.
3. After the desired control is selected, press button [2]. A control screen like the one shown below appears.
4. To adjust the control, press the up
▲
or down
▼
buttons.
5. To save the adjustments and exit the menu, press button [1] twice.
The following tips may help you optimize your display:
• Adjust the computer's graphics card so that it outputs a 1600 x 900 @ 60Hz video signal to the LCD display. (Look
for instructions on “changing the refresh rate” in the graphics card's user guide.)
• If necessary, make small adjustments using H. POSITION and V. POSITION until the screen image is completely
visible. (The black border around the edge of the screen should barely touch the illuminated “active area” of the LCD
display.)
The line at the bottom of the screen
shows the current functions of buttons 1
and 2: Exit or select the Brightness
control.
Summary of Contents for VA2013wm-4
Page 7: ...7 2 Specification...
Page 14: ...14 Pin Assignment...
Page 15: ...15...
Page 25: ...25 This tool can auto detect the right SCALAR programe speed the process as follow...
Page 26: ...26...
Page 32: ...32 d Unit appears the following Fig writer completed 12 codes for example...
Page 33: ...33 6 Troubleshooting Flow Chart...
Page 45: ...45 9 PCB Layout Diagrams 9 1 Main Board...
Page 46: ...46...
Page 47: ...47 9 2 Power Board...
Page 48: ...48...
Page 49: ...49 9 3 Key Board...
Page 50: ...50 10 Exploded Diagram and Spare Parts List 10 1 EPL...


