background image

ViewSonic N3200w 11

Notes on the Remote Control

• The remote control’s effective range is 5 meters from the LCD screen at an angle of up to 

±30°.

• Direct light may affect the remote controls effective range.
• Avoid subjecting the remote control to shocks or vibrations.
• Avoid placing the remote control in humid and hot environments such as direct sunlight.
• Remove the batteries when not using the remote control for long periods.

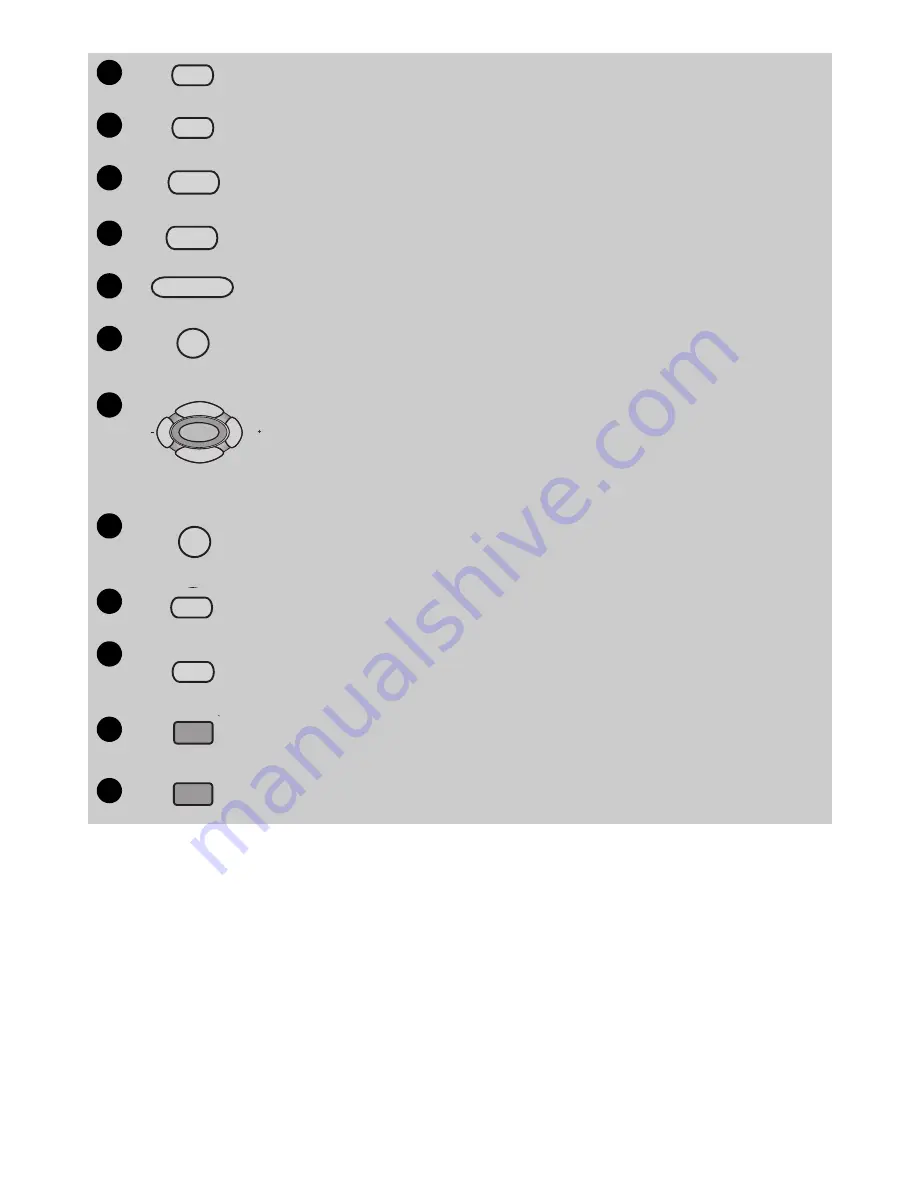
POSITION

Changes the display position of the Sub Picture in PIP mode.

SWAP

Toggles between input sources for the Main and Sub pictures.

WIDE

Selects the Video Display format.

DISPLAY

Displays the sources, time, and channel information.

FAV CH

Decrease/Increase the favorite channel.

VIDEO MUTE

Used to display a blank screen.

MENU and Arrow Buttons

During normal TV viewing, the 

W

/

X

 buttons change the volume while 

the 

S

/

T

 buttons change the channel.

The 

MENU

 button displays the on-screen menu and the 

S

/

T

/

W

/

X


buttons are used to move between items or adjust values.

AUDIO AI

Used to automatically adjust the volume depending on the audio 
input signal’s strength.

CARD

Used for entering memory card playback mode.

PREVIEW FULL

Switch screens between picture preview and individual picture play-
back mode.

3:2 PULL DOWN

Enables or disables the 3:2 pull-down feature.

CCD

Activates the Closed Caption feature.

22

POSITION

Ѐ

Ё

23

SWAP

Ѐ

Ё

24

WIDE

Ѐ

Ё

25

DISPLAY

Ѐ

Ё

26


ϰ


ϧ

FAV  CH

Ѐ

Ё

27

VIDEO

 MUTE

28

ϧ

ϰ

MENU

ϧ

ϧ

VOL

CH+/-

VOL

29

AUDIO AI

30

CARD

Ѐ

Ё

31

FULL

PREVIEW

Ѐ

Ё

32

Ѐ

Ё

       3:2 
PULL DOWN

33

Ѐ

Ё

CCD

Summary of Contents for N3200W - NextVision - 32" LCD TV

Page 1: ...Eeglish Français Español N3200w LCD TV User Guide ...

Page 2: ......

Page 3: ...ents 5 Front View of the Product 6 Card Reader 7 Rear View of the Product 8 Remote Control 9 Notes on the Remote Control 11 Installation 12 OSD Functions Source Input TV AV S video 16 Source Input PC 27 Source Input DVI D 29 Appendix Specifications 30 Troubleshooting 31 Customer Support 32 Limited Warranty 33 Safety Guidelines 34 Compliance Information for USA 34 Contents ...

Page 4: ... performance or use of this product In the interest of continuing product improvement ViewSonic Corporation reserves the right to change product specifications without notice Information in this document may change without notice No part of this document may be copied reproduced or transmitted by any means for any purpose without prior written permission from ViewSonic Corporation Product Registra...

Page 5: ...protect it from overheating these openings must not be blocked or covered Do not block the openings by placing the product on a bed sofa rug or other similar surface Do not place the product in a built in installation such as a bookcase or rack unless proper ventilation is provided or the manufacturer s instruction have been adhered to 5 Other Notices Avoid exposing the N3200w to direct sunlight o...

Page 6: ...D and wait for the weather to improve 3 Power Lines An outside antenna system should not be located in the vicinity of overhead power lines or other electric light or power circuits When installing an outside antenna system extreme care should be taken to keep from touching the power lines or circuits as contact with them may be fatal Cleaning the LCD MAKE SURE THE LCD IS TURNED OFF NEVER SPRAY OR...

Page 7: ...play Important Save the original box and all packaging material for future shipping needs Package Contents Please confirm that the following accessories are present when you unpack the box LCD TV Remote Control batteries included Power Cord AV RCA Cable Quick Start Guide User Guide Speakers x 2 ...

Page 8: ...ng headphones to the TV SOURCES Switch between display input sources MENU Display menu screen VOL Used for changing the volume CH S T Changes the channel POWER Turns the TV on and off A green light indicates that TV is on and red that it is off HEADPHONE MENU VOL CH POWER SOURCES CF SD MMC SM MS POWER CH VOL MENU SOURCES HEADPHONE 4 1 5 8 7 6 1 3 2 1 2 3 4 5 6 7 8 ...

Page 9: ... stored on the memory card ie JPEG files The device supports all JPEG formats as created by digital cameras but does not support other graphic formats You can insert CF SD MMC SMC and MS cards Other cards are not supported Two cards can not be used at the same time CF MS SM SD MMC ID 16MB 8 M B C o m p a c t F l a s h 8MB Compact Flash LOCK LOCK SD MMC CF MS SMC ...

Page 10: ...your PC ANT Connect to an antenna or cable service NOTE The AV tuner box and the antenna must be far away from high voltage source during installation AUDIO OUT Used for connecting to an external stereo system DVI AUDIO IN Connect an audio cable to the audio output on your PC COMPONENT 1 YPbPr YCbCr IN Connect external audio video devices with component out to these jacks R L R ANT L R L R Y L S R...

Page 11: ...e displayed on the main screen The two groups are Group 1 with TV AV S source signals and Group 2 with Component 1 2 PC DVI source signals MTS ϧ ϰ AUTO PLAY ROTATE CARD POWER MUTE 5 PC DVI WIDE SURROUND AUDIO AI DISPLAY PIP POP SUB SOURCE SWAP POSITION MENU VIDEO MUTE FULL PREVIEW ϧ ϧ 1 2 3 4 6 7 8 9 ϧ ϰ ϰ ϧ 1 2 FAV CH COMPONENT Ѐ Ё 1 6 2 5 4 3 7 10 9 8 14 13 12 11 10 10 10 10 10 15 10 10 10 10 10...

Page 12: ...pictures from the Memory Card Reader ROTATE Clockwise rotation of digital pictures VIDEO MODE Switches to video mode V CHIP Activates the parental control V Chip feature by pressing the password to enter Default password is 0000 MUTE Turns the sound on and off POWER Turns the power on and off S VIDEO Switches to S Video input SLEEP Sets the time to turn off the unit CH S T TV Channel up down adjus...

Page 13: ...FAV CH Decrease Increase the favorite channel VIDEO MUTE Used to display a blank screen MENU and Arrow Buttons During normal TV viewing the W X buttons change the volume while the S T buttons change the channel The MENU button displays the on screen menu and the S T W X buttons are used to move between items or adjust values AUDIO AI Used to automatically adjust the volume depending on the audio i...

Page 14: ...s shown 3 Repeat these steps to attach the second speaker Attaching the AV Tuner Box The AV Tuner Box generally has pre installaed on the LCD TV Please follow these steps for installation otherwise 1 Slide part A upwards then remove 2 Remove the screws from part B and remove the part 3 Attach part C using screws Part C and the screws are in the accessory pack Note the shape of the screws 4 Replace...

Page 15: ...Only use the specified AAA batteries Do not mix new and old batteries This may result in cracking or leakage which may pose a fire risk or lead to personal injury Insert batteries according to the and markings Inserting the batteries incorrectly may result in cracking or leakage which may pose a fire risk or lead to per sonal injury Dispose of batteries in accordance with local laws and regulation...

Page 16: ...and the screen will appear after 5 seconds 2 Press the power button again to turn it off ANT VGA IN DVI IN R L I N C O M P O N E N T 2 I N C O M P O N E N T 1 I N A U D I O D V I O U T A U D I O R L R L Cr Pr Cb Pb Y S I N A V I N I N A U D I O V G A Y Cb Cr Video OUT L R Audio OUT Audio OUT L R DVI AUDIO OUT L R AUDIO IN S VIDEO R L AV OUT R L VIDEO Y Cb Cr Video OUT L R Audio OUT R L Cr Pr Cb Pb...

Page 17: ...ENU button to select the OSD menu you want Press the CH S T or the S T buttons to select an OSD menu item Press the VOL or the W X buttons to change the values of the selected menu item Press the MENU button to exit the OSD BRIGHTNESS CONTRAST COLOR TINT SHARPNESS VIDEO MODE NEXT SELECT ADJUST 50 100 0 0 0 MENU PRESET MTS ϧ ϰ AUTO PLAY ROTATE CARD PC DVI WIDE SURROUND AUDIO AI DISPLAY MENU VIDEO 2...

Page 18: ...adjustment COLOR Color adjustment TINT Tint adjustment SHARPNESS Sharpness adjustment VIDEO MODE Select TV image display Preset Factory default settings Soft Picture settings result in softer colors and less sharp images User User defined settings BRIGHTNESS CONTRAST COLOR TINT SHARPNESS VIDEO MODE NEXT SELECT ADJUST 50 100 0 0 0 MENU PRESET ...

Page 19: ... speaker balance AUDIO MODE Select audio settings Preset Factory default settings Soft Picture settings result in softer colors and less sharp images User User defined settings SPEAKER Turns the speaker on and off same as mute MTS Sets the audio mode to STEREO SAP or MONO VOLUME TREBLE BASS BALANCE AUDIO MODE SPEAKER MTS NEXT SELECT ADJUST MENU 34 0 PRESET MONO 50 50 ...

Page 20: ...the TV on timer TV ON TIMER Enables you to set a time for the TV to power on SLEEP TIMER Set the sleep time on tv from off 10 20 30 40 50 60 70 80 90 min utes LANGUAGE Choose OSD language English French Spanish NR Noise Reduction adjustment CURRENT TIME TV ON STATUS TV ON TIMER SLEEP TIMER LANGUAGE NR NEXT SELECT ADJUST MENU on M ENGLISH 100 ...

Page 21: ...g for TV channels automatically CH SKIPPED Enables or disables viewing of the channel when using the channel up down keys to change channels CH SELECT Selects the desired channel PREFERENCE Sets up to 10 preferred channels as your favorite channels AIR CABLE AIR AUTO SCAN NO CH SKIPPED NO CH SELECT 44 PREFERENCE NO NEXT SELECT ADJUST MENU ...

Page 22: ...g TV AV S component and YPbPr computer input for the main screen POP Enables or disables picture on picture POP function SWAP Swaps the main and mini screen around i e the main screen becomes the mini screen and vice versa When in POP mode only the subtitles are swapped SCREEN MODE Selects the screen display format PIP PIP POSITION SOURCE POP SWAP SCREEN MODE EXIT OSD SELECT ADJUST MENU 4 COMPONEN...

Page 23: ...al is weak or if there are problems with the broadcast system This does not necessarily indicate a problem with the settings on your LCD TV Function Name Explanation MODE Selects mode for closed captions OFF CC or TEXT CH NUMBER Selects channel number between 1 and 4 for the closed caption mode MODE CH NUMBER NEXT SELECT ADJUST MENU 1 off ...

Page 24: ...cking lower age based ratings will block all higher age based ratings regardless of the content rating settings To access the V CHIP menu the password must be entered If the wrong password is entered an error message is displayed Function Name Explanation V CHIP Enables or disables the V CHIP MPAA RATINGS Allows you to set the V CHIP for MPAA ratings TV GUIDELINES Allows you to set the V CHIP for ...

Page 25: ...terial may not be suitable for children PG 13 PARENTAL STRONGLY CAUTIONED Some material may be inappropriate for children under 13 R RESTRICTED Children under 17 are required to be accompanied by their parents or adult guardians NC 17 No one 17 and under admitted X X is an older rating that is unified with NC 17 but may be included in the data of older movies G PG PG 13 R NC 17 X RETURN SELECT ADJ...

Page 26: ...he arrow keys to select the desired ratings and press the MENU button to return to the V CHIP menu TV Y TV Y7 TV G TV PC TV 14 TV MA CONTENT RETURN SELECT ADJUST MENU TV GUIDELINES look look look look look look FV V S L D RETURN SELECT ADJUST MENU look look look look look CONTENT ...

Page 27: ...ence this program is suitable for all ages TV PG Parental Guidance Suggested This program contains material that may be not suitable for younger children D Some suggestive dialog L Infrequent coarse language S Some sexual situations V Moderate violence TV 14 Parents Strongly Cautioned This program contains material that are not suitable for children under 14 years of age D Intense suggestive dialo...

Page 28: ...ls have been locked the screen will display the fol lowing message with the rating information To disable the V Chip at this stage press the MENU button and enter the correct password to turn off the to V CHIP settings U S TV PARENTAL GUIDELINE RATING TV 14 ...

Page 29: ...nt SHARPNESS Sharpness adjustment H POSITION Adjust horizontal position on the image V POSITION Adjust vertical position on the image PHASE Adjust the phase of screen to obtain the best output CLOCK Adjust screen s horizontal size AUTO Automatically adjusts the screen according to the input sig nal source BRIGHTNESS CONTRAST SHARPNESS H POSITION V POSITION PHASE CLOCK AUTO NEXT SELECT ADJUST 50 10...

Page 30: ...ution of 1280 x 768 at 60Hz is recom mended Function Name Explanation RED Adjusts the red color GREEN Adjusts the green color BLUE Adjusts the blue color COLOR TEMPERATURE Color temperature adjustment cool warm and nature RED GREEN BLUE COLOR TMPERATURE NEXT SELECT ADJUST 47 47 50 USER MENU ...

Page 31: ...e light level intensity of the screen CONTRAST Adjusts the light and dark level difference of the screen SHARPNESS Adjusts the sharpness level of the screen H POSITION Adjusts the screen s horizontal position V POSITION Adjusts the screen s vertical position AUTO Auto adjusts the phase clock and position of the image BRIGHTNESS CONTRAST SHARPNESS H POSITION V POSITION AUTO NEXT SELECT ADJUST 50 10...

Page 32: ...24 75 Hz 800 x 600 56 60 70 75 Hz 640 x 480 60 70 75 Hz 720 x 400 70 Hz Speaker Output 12 W Power Voltage 100 240 VAC 50 60 Hz auto switch 190W Operating conditions Temperature 0 C to 40 C 32 F to 104 F Humidity 10 to 90 no condensation Altitude To 3000 feet Storage conditions Temperature 20 C to 60 C 4 F to 140 F Humidity 10 to 90 no condensation Altitude To 12 000 feet Dimensions Physical 1054 m...

Page 33: ...olume Up button on the remote control Remote control unit does not operate Make sure batteries are inserted correctly see also page 13 Batteries could be weak or dead Replace batteries Is a fluorescent light illuminated near the remote control sensor The path of the remote control beam may be blocked Make sure the path is clear and that the remote control is aimed at the remote control sensor on t...

Page 34: ...ow or contact your reseller NOTE You will need the product serial number Country Region Web site T Telephone F FAX E mail United States viewsonic com support T 800 688 6688 F 909 468 1202 service us viewsonic com Canada viewsonic com support T 800 688 6688 F 909 468 1202 service ca viewsonic com ...

Page 35: ...u will need to provide your product s serial number 2 To obtain service under warranty you will be required to provide a the original dated sales slip b your name c your address d a description of the problem and e the serial number of the product 3 Take or ship the product freight prepaid in the original container to an authorized ViewSonic service center or ViewSonic 4 For additional information...

Page 36: ...s B digital device pursuant to part 15 of the FCC Rules These limits are designed to provide reasonable protection against harmful inter ference in a residential installation This equipment generates uses and can radiate radio frequency energy and if not installed and used in accordance with the instructions may cause harmful interference to radio communications However there is no guarantee that ...

Reviews: