background image

Push          key  on  live  channel  and  the 
Audio list will be displayed. 
Select  a  desired  audio  level  by  using  the 
left/right keys (

◀·▶

). 

 
Select  a  desired  audio  language  from  the 
list  by  using  the  up/down  keys  (

▲·▼

)  and 

OK key.   
 
You  push          key  once  more,  the  cursor 
moves  to  another  window.  It  enables  you 
to  select  an  audio  mode  by  using  the 
left/right keys (

◀·▶

).   


You can zoom in on the screen by using        key. To move the zooming part, use (

◀∙▶

▲·▼

) key. Zoom size increases as two steps, x4 and x16. 


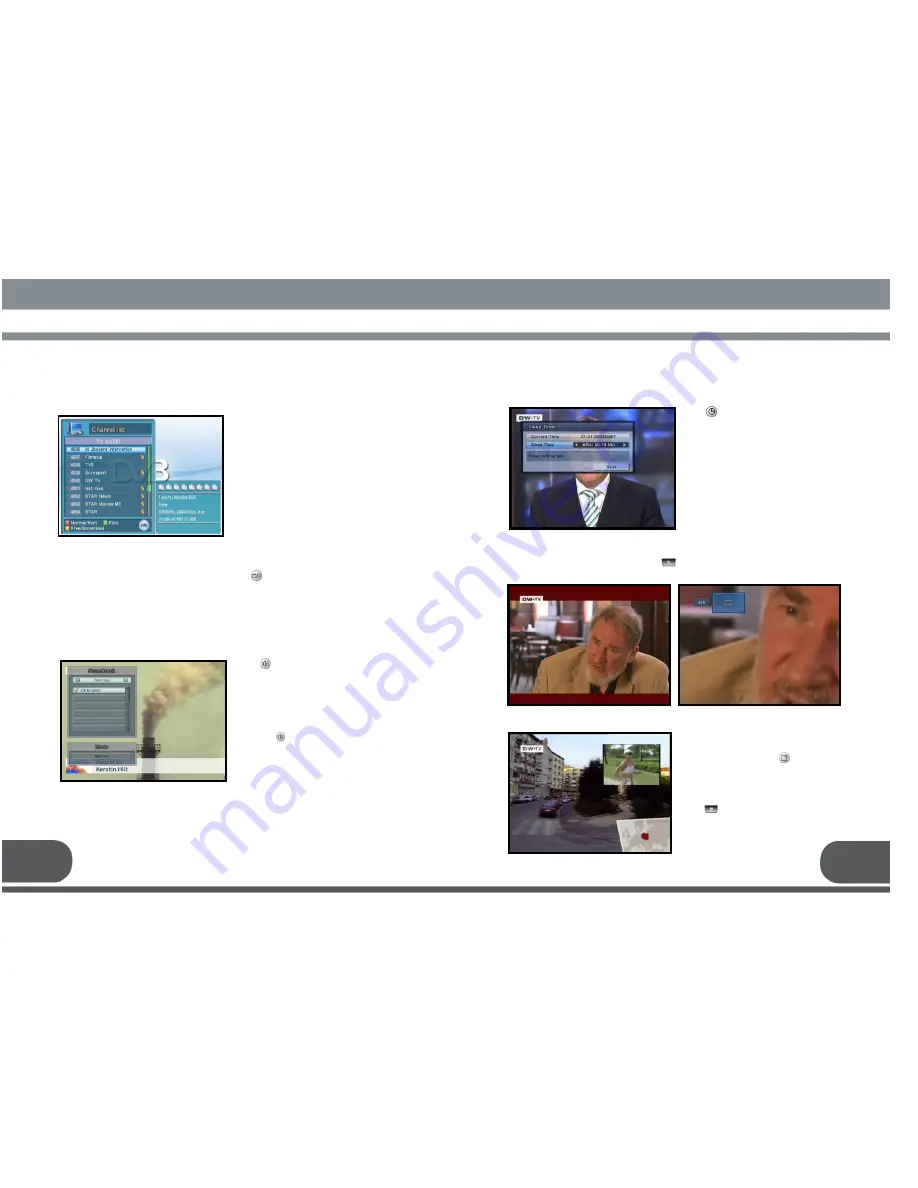
This  menu  helps  you  to  easily  select  the 
channel that you wish to watch. 
Push OK key on live channel, and the 
channel list will be displayed. 
 
The list provides information such as 
channel number, channel name, and if the 
program is scrambled or locked.     

To watch a specific channel, select it by using the up/down keys (

▲∙▼

). Then push OK 

key.   
If you push OK key again, the list disappears.   
To change the list between TV and Radio, use the          key. 
 
* Red: Sort the channels by Alphabet 
* Green: Find a channel name manually 
* Yellow: Sort out Free or Scrambled channels only 


8.3. CHANNEL LIST


8.4. AUDIO LANGUAGE


8.7. PIP (Picture In Picture)


8.6. ZOOM FUNCTION


Push        key  on  the  live  channel  to  set  the 
sleep timer. 
Use  left/right  keys(

◀∙▶

)  and  push  the  Save 

button by using up/down keys (

▲∙▼

) and OK 

key. 


8.5. SLEEP MODE


You can watch two channels(or three channels 
from a same TP) at the same time. 
To use this function, push          key. 
Pushing this key again, two channels will be   
showed as the same size.   
You can record PIP channel. 
Select  the  PIP  screen  by  using  a  color  key 
from the channel information box. 
Push          key to record.   
 

33

34

Summary of Contents for VS PRO

Page 1: ......

Page 2: ...DIO LANGUAGE 8 5 SLEEP MODE 8 6 ZOOM FUNCTION 8 7 PIP Picture In Picture 8 8 HISTORY PREVIOUS CHANNEL 8 9 MOSAIC 8 10 CAPTURE 8 11 HOW TO USE USB External Storage 9 HOW TO RECORD PLAYBACK 9 1 TIME SHIFT 9 2 QUICK RECORD 9 3 RESERVATION RECORD 9 4 PLAYBACK 10 TROUBLE SHOOTING 11 TECHNICAL SPECIFICATIONS 12 REMOTE CONTROL PROGRAMING 13 WARRANTY CARD To enhance the product functions are subject to ch...

Page 3: ... SAFETY INSTRUCTION IMPORTANT SAFETY INSTRUCTION IMPORTANT SAFETY INSTRUCTION IMPORTANT SAFETY INSTRUCTION DECLEARATION OF CONFORMITY DECLEARATION OF CONFORMITY DECLEARATION OF CONFORMITY DECLEARATION OF CONFORMITY ...

Page 4: ...d to direct sunlight or near heater Never stack other electronic equipment on top of the receiver Place the receiver at least 30mm from the wall ATTACHMENTS Do not use any attachment that is not recommended by the manufacturer as it may cause a hazard or damage the equipment SERVICING Do not attempt to service this product yourself Any attempt to do so will void the warranty Refer all servicing to...

Page 5: ...ough this port and the input frequency range is 950 2150MHz Also the voltage switching 13V and 18V is passed through this port 2 LOOP OUT To enable the connection of an analog receiver the receiver is provided with this port Connect this port to LNB IN port of the other receiver via RF Cable 3 SERIAL PORT Connect your receiver to a computer with a serial cable This port can be used for upgrading s...

Page 6: ...r receiver should be placed under proper ventilation Do not place the unit in enclosed cabinets that will restrict the flow of air resulting overheating The location should be safeguarded from direct sunlight excess moisture rough handling or household pets Avoid stacking other electronic components on top of the receiver The location should be safely accessible by the cable 3 2 CONNECTING TO THE ...

Page 7: ...ng the left right keys and up down keys Green Go to the Next Step SYSTEM SET SYSTEM SET SYSTEM SET SYSTEM SET UP UP UP UP 11 12 4 1 3 Select Satellite Select the appropriate Satellites from the list by using the up down keys and ok key Green Go to the Next Step 4 1 4 Antenna Setting Set up the configurations on each satellites by using the left right and up down keys OK key will guide you to a lis...

Page 8: ...K after Then you will be able to continue watching the live program Please refer to 9 1 Time Shift You can watch Two or Three programs at the same time The possible combinations are Live Live Live Same screen Playback Live Live Same screen Please refer to 8 7 PIP Picture in Picture Recording Time Shift A Information Box Please try to familiarize yourself with the Information Box It provides helpfu...

Page 9: ...ey Changing Favorite channel lists to be edited Use the left right keys pointing the cursor on the favorite list Deleting an channel from a Favorite list Point the cursor on the favorite channel list by using the Red key Select desired channels and push the Green key to delete from a favorite list Other functions Sort Sort the list by Alphabetical order Rename Group Rename a Favorite channel list ...

Page 10: ... Antenna Setting Select Antenna Setting menu in Installation menu Adjust the parameter at each submenu by using the up down and the left right keys with checking the Quality and Signal strength When OK icon available push the OK key to open the option list Satellite LNB Frequency 22 KHz Tone DiSEqC 1 0 DiSEqC 1 1 Motor Type Select a Satellite to setup Select a LNB Frequency Turn on or off the 22KH...

Page 11: ...ALS only My Longitude My Latitude Goto the Position Move to East or West direction while pushing the left or right key Apply the calibrated value to all Satellites Set the limit position Store the current position of the motor for the selected satellite Remove the previous limit information Move to center Input a value of longitude by numeric keys and set West or East by the left right keys Input ...

Page 12: ...Language Setting menu in the Preferences menu This menu helps you to set up Menu Language Audio Language Closed Caption Preferences menu helps you to set up Language Time Timer List Parental Control A V Control and OSD Setting Push the MENU key to save and return to the previous menu 7 2 8 Factory default Select Factory default menu in Installation This is to initialize back to the factory default...

Page 13: ...e menu or channel which is locked on the event that maturity rating is above the age limit 7 3 5 A V Control Select A V Control menu in Preferences menu This menu helps you to control the characteristics of Audio and Video Select Auto PAL or NTSC type Select Auto 4 3 16 9 or Center mode On If a program supports Dolby Digital stream out Dolby Digital will be selected automatically Off User has to s...

Page 14: ...your external storage Please refer to the 8 11 HOW TO USE USB External storage Make folder Make a new folder Move to folder You can move a file to a desired folder 7 4 2 MP3 List Select MP3 List menu in Record menu or push key You can enjoy listening to music in this function Select MP3 files on the list by using the up down keys and play music by pressing OK key Or you can make a play list Red Mo...

Page 15: ...ation Select PVR Configuration menu in Record menu You can set the PVR Configuration by using this menu 7 4 6 Hard Disk Information Select Hard Disk Information menu to check installed hard disk information such as Hard disk model name total space used space and free space 7 4 7 Hard Disk Format If you want to format your Hard Disk push OK key The PIN code is required before formatting Formatting ...

Page 16: ...l name current version of S W loader micom and last updated date 7 5 2 Calendar This calendar can be used with the up down keys and left right keys Green Previous month Yellow Next month 7 6 ENTERTAINMENT To remove USB device from your receiver please select USB Device Safe Remove menu in Record menu before you remove it This menu helps you to remove USB device safely Note If you do not practice t...

Page 17: ...ns indicate status or availability as followings 1 Status of recording 2 Parent control age limit 3 Scrambled Channel 4 Locked Channel 4 Progress of Event 5 Signal and Quality strength 6 Current Time 7 Event information 8 Antenna information 9 Additional service status The icons show the currently running services To check each service information push the colored button Refer to the following des...

Page 18: ...f the program is scrambled or locked To watch a specific channel select it by using the up down keys Then push OK key If you push OK key again the list disappears To change the list between TV and Radio use the key Red Sort the channels by Alphabet Green Find a channel name manually Yellow Sort out Free or Scrambled channels only 8 3 CHANNEL LIST 8 4 AUDIO LANGUAGE 8 7 PIP Picture In Picture 8 6 Z...

Page 19: ... capture the screen Captured images will be saved into the Capture List menu in Record menu External HDD External Memory connected to USB Host port 1 External HDD can be used with two file systems named with Drive E E2FS system and F FAT system You can decide the size of each drive during formatting 2 E2FS system is used for PVR function such as recording and capturing of program FAT system is use...

Page 20: ...xt 1 Push the key Time shift will be started on the live channel freeze live channel 2 Push key for playback 3 For slow motion playback push key 4 For Rewind push key For forward push key 5 To return to the present time for live push key 9 2 2 Two Records While recording one channel the second channel can be recorded simultaneously Press key on another channel which you want to record You can chec...

Page 21: ...rded program to watch by using up down keys and push OK key Please refer to the 7 4 1 Recorded Program 3 When the Playback is starting Playback Box is shown as the left picture You can control Playback easily and check the Recorded file name Progress Time Book Mark and Repeat status etc 4 To stop the Playback push key 9 4 1 Two Playbacks For the second playback in PIP during one playback open the ...

Page 22: ...ort circuit Turn off one of the two STBs 9 4 5 Fast Rewind Fast rewind is available during playback Please also see 9 4 9 Drag Backward 1 In Playback push key 2 In order to increase rewind speed push key several times 3 For returning to the normal speed push key 5 steps of speed are available for Fast rewind 9 4 6 Slow Motion For slow motion playback 1 In playback push key 2 For returning to norma...

Page 23: ...put Voltage Type Power Consumption AC 95V 240V 50Hz 60Hz SMPS Max 25 W stand by 12 W Power Supply Tuner Channel Input Connector Output Connector Frequency Range Signal Level LNB power Polarization 22 KHz Tone DiSEqC Control F type IEC 169 24 Female F type IEC 169 24 Female 950MHz 2150MHz 65 25 dBM Vertical 13 5V Horizontal 18V Current Max 500mA Frequency 22 4KHz Amplitude 0 6 0 2V Version 1 0 1 1 ...

Page 24: ...d Output 1 Input 1 output TUNER 1 RF Input 1 Loop through 2 RCA CVBS AUDIO L R YPbPr S VHS S PDIF Optical Output RS232 9pin DSUB USB HOST A type available either front or rear Size Weight Operating Temperature Storage Temperature Physical Specification 300 W X 62 H X 220 D mm About 1 9kg 0 c 45 c 10 c 70 c 45 46 12 PROGRAMING THE REMOTE CONTROL PROGRAMING THE REMOTE CONTROL PROGRAMING THE REMOTE C...

Page 25: ...47 48 ...

Page 26: ...49 50 13 WARRANTY CARD WARRANTY CARD WARRANTY CARD WARRANTY CARD WARRANTY CARD ...

Reviews: