


21
4212 PC SOFTWARE PROGRAMMING GUIDE
4212 PC Software Programming Guide
EN-UK - V.1.0 - 17/09/15
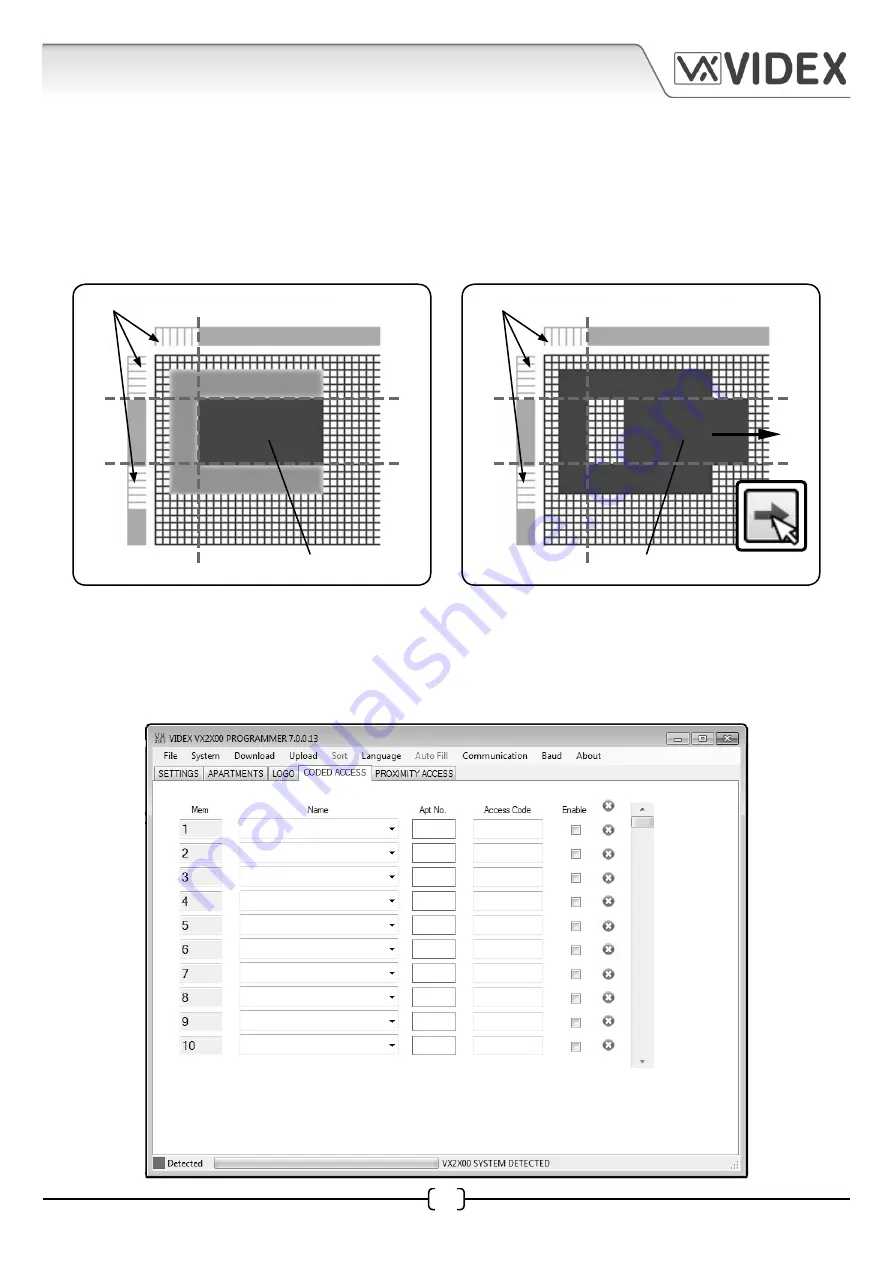
After a ‘pixel zone’ has been created along each adjustment bar
(areas highlighted in white)
any
image, part of an image or text that is within this region will be fixed in position. Any image, part
of an image or text that is not within this region
(areas ‘grayed out’)
can be moved using the four
justify image icons
(as described on page 19)
. An example of this is shown in Fig.10A, the dashed lines
indicate the ‘pixel zone’ boundry where the image is fixed. Pressing the right justify icon will move
part of the image that is not within these boundaries across to the right of the editing area, as shown
in Fig.10B.
adjustable image area
‘pixel zone’ where image is fixed
Fig.10A
adjustable image area
‘pixel zone’ where image is fixed
Fig.10B
CODED ACCESS WINDOW
The next tab on the main programmer screen is for the coded access window, as shown below. The
coded access tab will only be available if the security level on the settings window was set to fob or
code from the drop down menu
(refer to page 12)
.


