background image


- 7 -

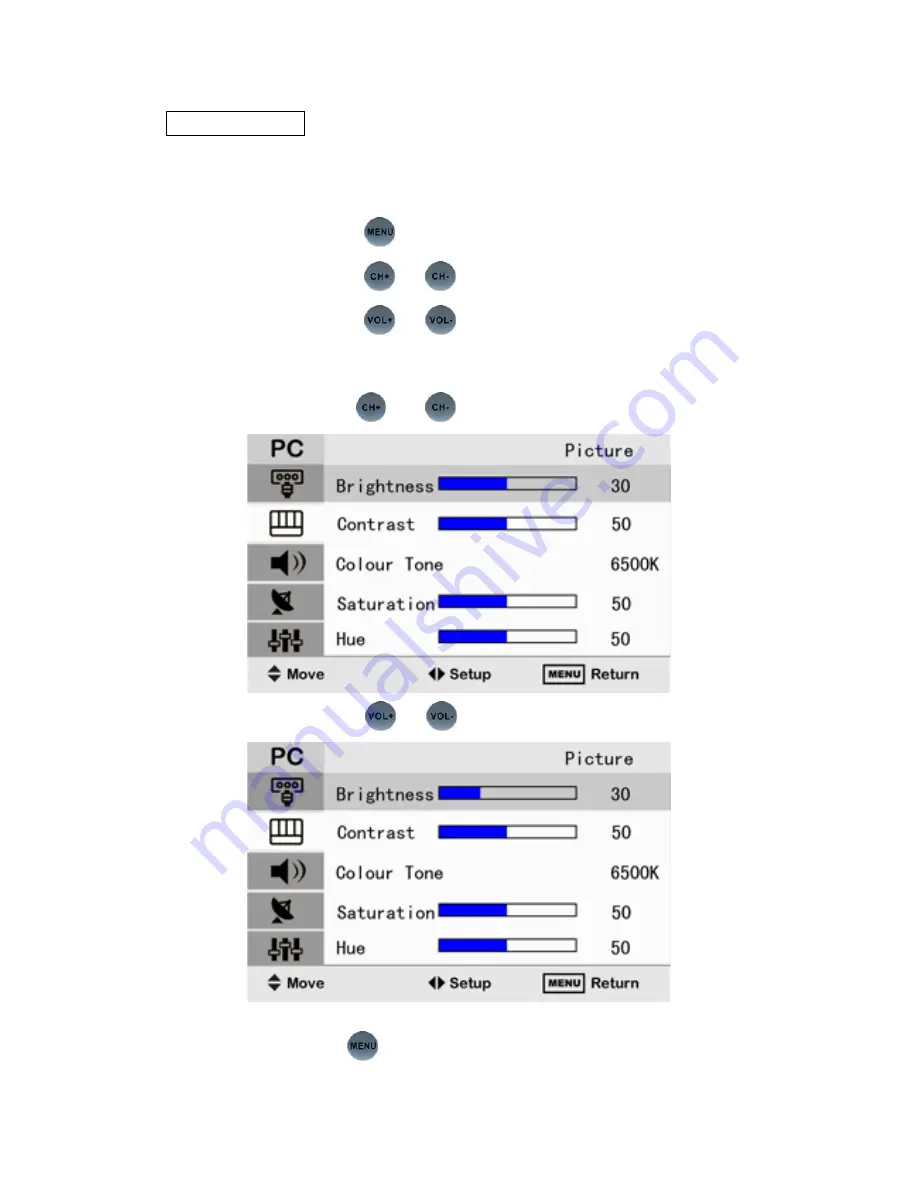
Setup Picture   


You can select the type of picture which best corresponds to your 
viewing requirements. 

――――――――――――――――――――――――――――――― 

Press the   

  button , display the OSD main menu. 

Press the   

 or 

  button , select the option. 

Press the   

 or 

  button , adjust the option. 


――――――――――――――――――――――――――――――――


For example , adjust the brightness


Press the 

 or  

  button ,select the brightness button


Press the   

 or 

  button , adjust the brightness. 


――――――――――――――――――――――――――――


                      Press the   

    button , exit the OSD menu. 

Summary of Contents for VSVM-103

Page 1: ...1 Safety Instructions...

Page 2: ...ntrol 7 SETING YOUR TV Viewing the Display mode 8 Setting the Picture 9 Storing Channels Automatically 10 Storing Channels Manually 11 Fine Tuning Channel Reception 12 Swapping and Deleting Stored Cha...

Page 3: ...3 Model No VSVM 103...

Page 4: ...dphone may be connected to the headphone output While the headphone is connected the sound from the built in speakers will be disabled Connecting Power Connect the Adapter to the Power input Adjust Vo...

Page 5: ...ns Used to display the next or previous stored channel Used to increase or decrease the volume Switch the input source Used to select a channel numbered ten or over Press this button and enter the two...

Page 6: ...Display the On Screen Display menu The signal information should be display on the screen You may see different information on different signal mode VGA mode TV mode Press the button to exit the OSD m...

Page 7: ...requirements Press the button display the OSD main menu Press the or button select the option Press the or button adjust the option For example adjust the brightness Press the or button select the bri...

Page 8: ...for the frequency ranges available to you and availability depends on your country Press the button display the OSD main menu Press the or button select the channel Press the button select the auto s...

Page 9: ...not to store each of the channels found Press the button display the OSD main menu Press the or button select the channel Press the button select the manual store Move the cursor the start press the...

Page 10: ...peration If however the signal is weak or distorted you may have to fine tune the channel manually Press the button display the OSD main menu Press the or button select the channel Press the button se...

Page 11: ...order to modify the numeric order in which the channels have been automatically stored or give easily remembered numbers to your favorite channel Press the button display the OSD main menu Press the...

Page 12: ...12 Adjust the sound setting You can press the and button to adjust the volume Use the Sound Source you can change the sound source You may need set the Sound System correct depends on your country...

Page 13: ...13 System setting You can choose the language that you need When no TV signal you can open the Blue Background You can choose 15 to 20 minutes Auto Power Down time...

Page 14: ...14 On PC mode you can use the Auto adjust to do adjusting Automatically Use the Reset You can replace all settings with the factory default values...

Page 15: ...hat the broadcast system selected is correct Sound and picture interference Try to identify the electrical appliance that is affecting the set and move it further away Plug your set into a different m...

Page 16: ...ponse time 16ms Horizontal frequency 30 61 KHz Vertical frequency 60 75 Hz Display color 262 144 colors Maximum mode 1024 x 768 75 Hz Sync video signal H V Separate TTL P or N 0 7Vp p 75 ohm Color sys...

Page 17: ...17 A V 80Hz 20kHz at 3dB...

Reviews: