


Videoswitch R-Series
N
VR Quick Guide
31
3.
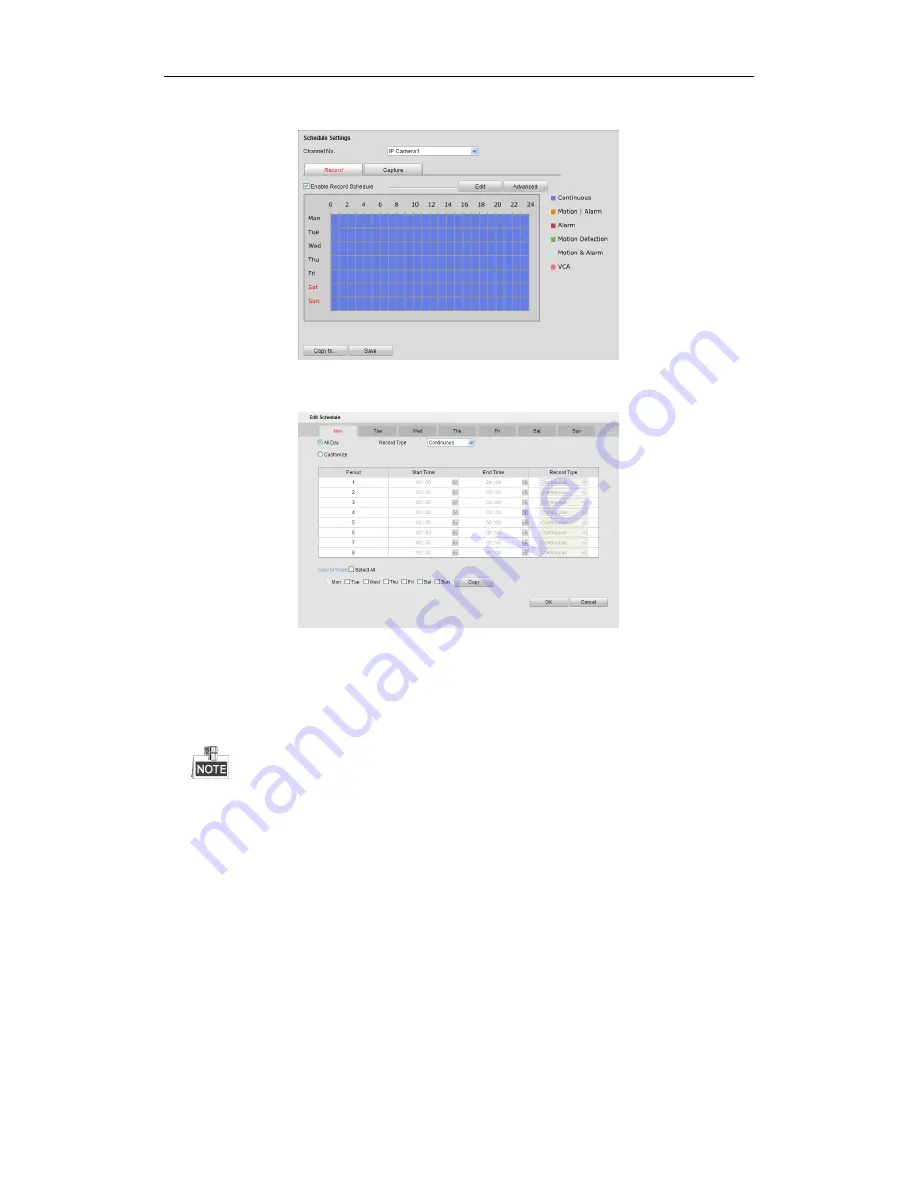
Check the checkbox of Enable Schedule to enable recording schedule.
4.
Choose the day in a week to configure scheduled recording.
5.
Click
Edit
to edit record schedule
.
1) Configure All Day or Customize Record:
If you want to configure the all-day recording, please check the
All Day
checkbox.
If you want to record in different time sections, check the
Customize
checkbox. Set the
Start Time
and
End Time.
Up to 8 segments can be configured and each segment cannot be overlapped.
2) Select a
Record Type
. The record type can be Continuous, Motion, Alarm, Motion & Alarm, Motion |
Alarm and VCA.
3) Check the checkbox of
Select All
and click
Copy
to copy settings of this day to the whole week. You
can also check any of the checkboxes before the date and click
Copy
.
4) Click
OK
to save the settings and exit the
Edit Schedule
interface.
6.
Click
Advanced
to configure advanced record parameters.
You can configure parameters of enable ANR (Automatic Network Replenishment), Pre-record time,
Post-record time, Stream Type, Record Audio and Expired Time.


