16
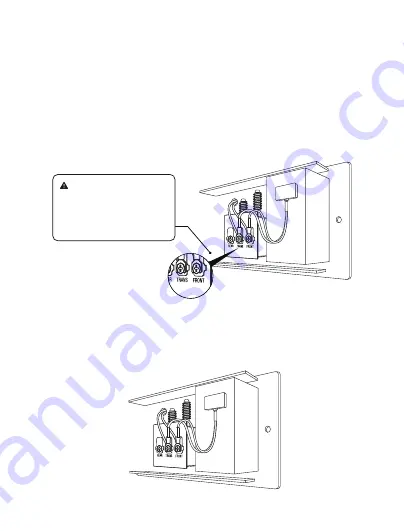
4. Position the Chime Kit within your internal doorbell, away from any
moving parts. Use the double-sided tape to fix the Chime Kit in place, if
desired.
3. Loosen the internal doorbell's front terminal (usually labeled as
"FRONT", "F", "1", or "C1") and transformer (usually labeled as
"TRANS", "T", "AC", or "0") terminal screws on your internal doorbell.
Connect one wire from the Chime Kit to the "Front" terminal, and the
other wire to the "Transformer" terminal, leaving the existing doorbell
wires in place. Then, re-tighten the screws. It doesn't matter which
Chime Kit wire goes to each terminal.
TIP
:
Wire of the chime kit
can connect to either "Trans" or
"Front" terminal as the electric
current is alternating current.
Summary of Contents for VD300
Page 1: ...Video Doorbell with hardwired installation kit VD300 User Manual...
Page 2: ......
Page 18: ...17 5 Replace the cover on your internal doorbell...
Page 31: ......
Page 32: ...1...


