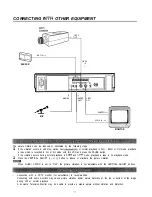

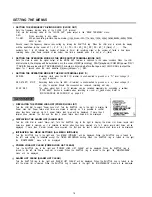


MANUAL RECORDING
1
El
2
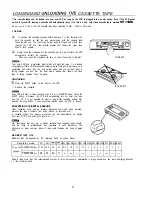
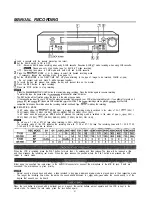
Load a cassette with the erasure prevention tab intact.
Set the S-VHS switch to ON or OFF.
O N
: Resumes S-VHS mode recording when using S-VHS cassette. Resumes S-VHS
mode recording when using VHS cassette.
Please use only High Grade tape for S-VHS ET mode recording.
OFF : Recording take place in VHS mode with both VHS and S-VHS cassette.
Press the
MODE (-) or (t) buttons to select the desired recording mode.
. If necessary, change the recording mode. (See page 14.)
Set the VIDEO MODE in the FIRST TIME SET UP menu according to the type of image to be recorded, COLOR or
l
Do not connect color and black white cameras together.
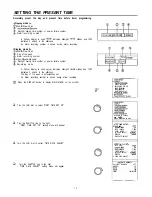
To record the day and present time, display the day and present time on the monitor.
Press the REC button to begin recording.
Press the STOP button to stop recording.
l
Press the
HOLD button to momentarily
recording. Press the button again to resume recording.
l
To protect the tape, the pause mode is
released after about 5 minutes.
l
The REC button will not function unless the tape is in the stop or pause mode.
l
If the cassette you insert in your VCR has the erasure prevention tab removed, your VCR will automatically eject if you attempt to record on it
l
(SP) and
(EP) tapes are VHS compatible
other VCRs. Time
recordings can be played
by other VHS
compatible lime Lapse Recorders when the recording interval and head type
matches the recording.
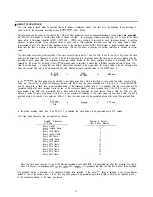
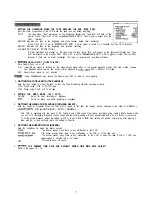
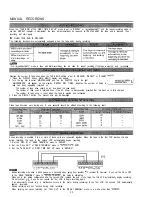
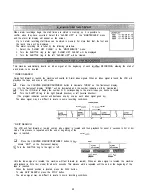
RECORDING MODE
In SP mode, when the
MODE button is pressed, the recording mode is switched in the order of 2H
48H
72H
) 120H ) 168H ) 240H ) 360H )
) 720H ) 960H ) OH ) 2H) . . . .
In EP mode, when the
MODE button is pressed, the recording mode is switched in the order of
)
) 48H
72H ) 96H ) 120H )
) 240H ) 360H ) 480H ) 720H ) 960H ) OH ) 6H) . . . .
l
Do not use a T-l 60 or ST-l 60 tape when recording in 48H 960H modes.
l
The recording mode of this VCR indicates the recording time with T-l 20 or ST-1 20 tape. The recording times with T-l 20, ST-1 20,
T-l 60 and ST-1 60 tape are as follows :
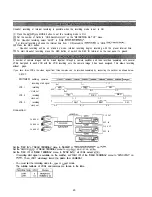
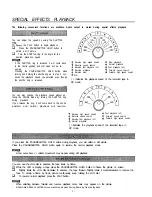
When the VCR is recording, press the PLAY button for more than
seconds and then release. The tape will be rewound a little
and then playback the recording just made. When the tape reaches the position where the PLAY button was pressed, the VCR
returns to record mode.
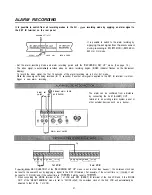
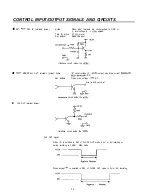
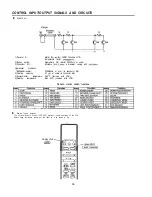
Either apply the specified line input signal to the AUDIO IN connector or connect the microphone to the MIC IN jack. If both are
connected, the microphone is given priority.
Normal sound is played back only when a tape recorded in
and
mode is played back in their respective mode.
l
The longer the recording time mode, the worse the sound quality becomes. In
and
mode, the sound quality is of the
degree that speech can be heard.
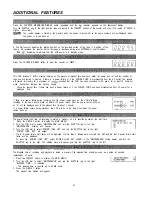
When the lock button Is pressed with a ballpoint pen or a pencil, the control buttons will not operate and the VCR is kept in the
current mode. To release the lock mode, press the lock button again.
2 1