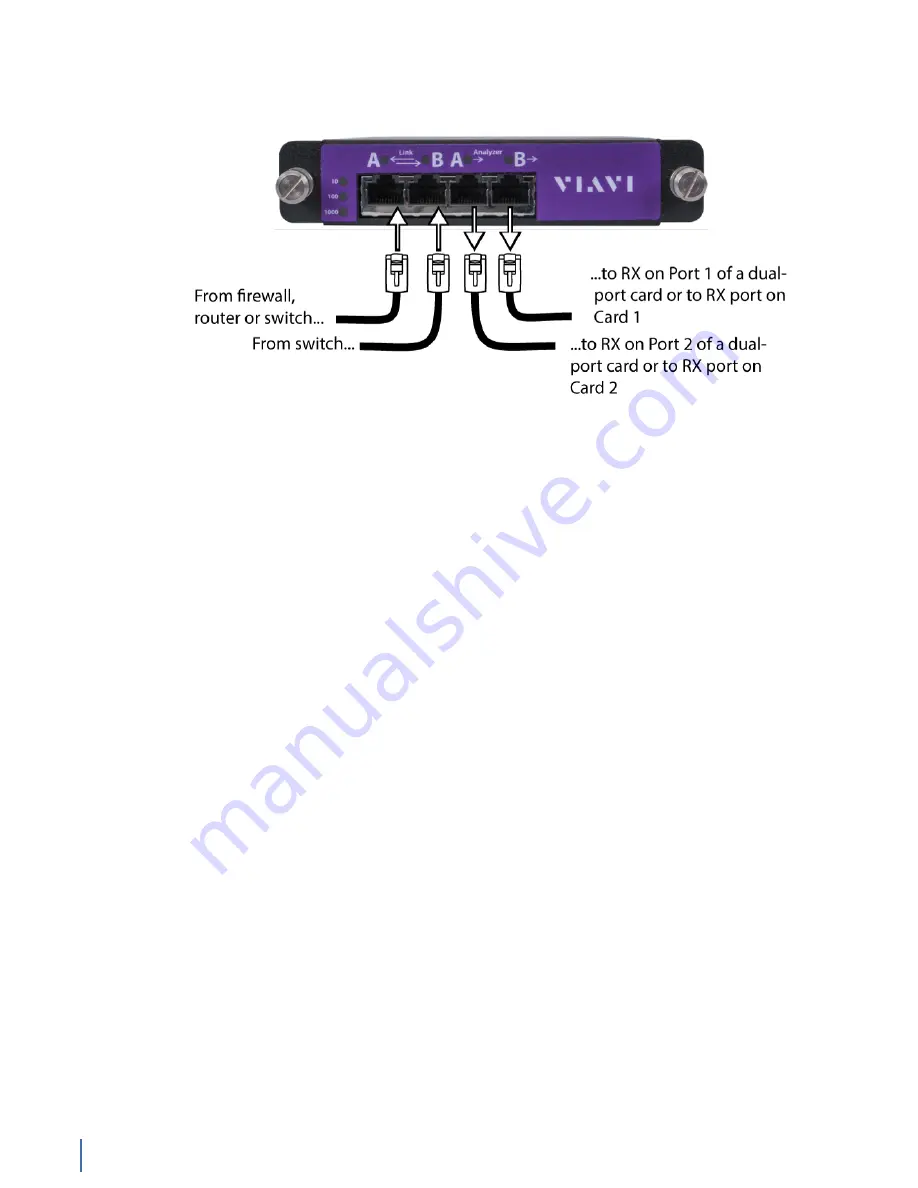
How do I connect my failover devices?
24 10/100 Copper nTAP (7 Feb 2018) — Archive/Non-authoritative version
Figure 5: Capture card teaming
This figure is for illustrative purposes and may not match your product.
1.
Configure the IntelPro/1000 Driver Software to Define Teamed Connections.
For Ubuntu Linux instructions for port bonding, see the
Ubuntu
documentation
.
2.
Connect the TAP to the analyzer using the appropriate cables.
The TAP is cabled between the devices being monitored normally (i.e., it
provides a pass-through circuit for the link under test). Instead of connecting
to a single dual-receive port (as is the preferred deployment), connect
the send lines to the transmit (TX) sides of the two ports you intend to
aggregate. You can team ports on separate cards as long as one of them is an
IntelPro card.
3.
Open Network Connections by right clicking My Network Places on the
Windows Start menu and choosing Properties.
4.
Right-click a Monitor Port from an IntelPro/1000 card (which one does not
matter) and choose Properties. Click the Teaming tab.
5.
Choose the “Team with other adapters” option and then click New Team... to
start the New Team Wizard. The first dialog lets you name the Team (you may
want to call it something like “Virtual Dual-receive”).
6.
Click
Next
and add another adapter/port that supports teaming (for example
the second port on a dual-port IntelPro card).
7.
Click
Next
and choose Static Link Aggregation. This option works best for
aggregating both sides of a full duplex link for analysis. Click
Next
, and then
Finish.
The My Network Places display should now list the new virtual adapter.
How do I connect my failover devices?
When the device connected to Link B fails, the TAP disables Link A so that the
device on Link A can initiate its failover procedure.
The TAP then restarts its search phase. Until the Link B device is working again,
the TAP repeats the following steps:
1.
Search.
2.
Determine if Link A is up. If not, keep searching.


