


15° 15°
2.2
Wall Mounting with a Slant Mounting Base
Before you start:
You need to purchase a slant mounting base separately if this
mounting method is selected.
Steps:
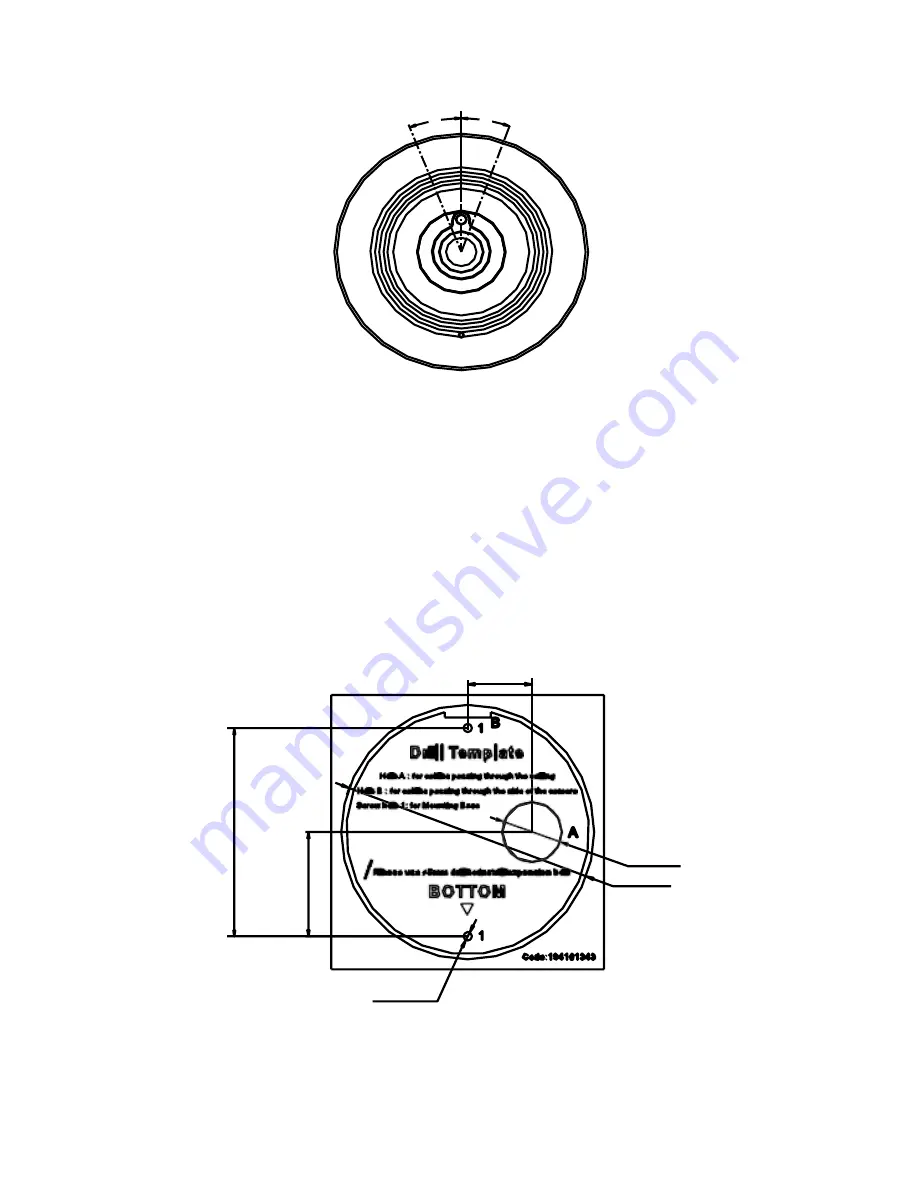
1.
Drill two screw holes and the cable hole according to the
supplied drill template.
2-26
φ
24
φ
102
2-
φ
3.4
2.
Fix the slant mounting base to the wall with the screws.
83
.5
41
.75


