background image

Getting Started

English

   - 19 -

Switching On/Off

To Switch the TV On

Connect the power cord to the 220-240V AC, 50 Hz. 
To switch on the TV from standby mode either:
Press the “ ” button, 

P+

 / 

P-

 or a numeric button on 

the remote control.
Press the side function switch until the TV comes on 

from standby.

To Switch the TV Off

Press the “ “ button on the remote control or press 

the side function switch until the TV switches into 

standby mode.

To power down the TV completely, unplug the 

power cord from the mains socket.

First Time Installation

WARNING:

 When you are required to enter a PIN 

number for any menu operation you should use the 

PIN that you have previously defined during the first 

time installation. If you have forgotten the PIN number 

you  have  set  during  the  first  time  installation,  you 

should use the master PIN code, 4725.
When turned on for the first time, the language 

selection screen is displayed. Select the desired 

language and press 

OK

.

The First Time Installation (FTI) screen will be displayed 

next. Set your preferences using the navigation buttons 

and  when  finished,  press 

OK

 to continue. To start 

automatic search please select 

Yes 

from following menu 

and press OK button. 
Automatic search will start and the television will 
search for TV channels.

After APS is finalized, the programme table will appear 

on the screen. In the programme table you will see 

the programme numbers and names assigned to the 

programmes.

Default PIN code can change depending on the 

selected country.

If you are asked to enter a PIN code for viewing a 

menu option, use one of the following codes: 

4725

0000

 or 

1234

.

Media Playback via USB Input

You can connect a 2.5” and 3.5” inch (hdd with external power 

supply) external hard disk drives or USB memory stick to your 

TV by using the USB inputs of the TV.

IMPORTANT!

 Back up your files before making 

any connections to the TV. Manufacturer will not be 

responsible for any file damage or data loss. Certain 

types of USB devices (e.g. MP3 Players) or USB hard 

disk drives/memory sticks may not be compatible 

with this TV. The TV supports FAT32 and NT””FS 

disk formatting.
While formatting a USB hard disk that has 1TB (Tera 

Byte) or more file capacity, you can experience 

problems with the formatting process. Do not 

repeatedly quickly plug and unplug the drive. This 

may cause physical damage to the USB player and 

USB device itself. Do not pull out USB module while 

playing a file.

Media Browser Menu

You can play photo, music, and movie files stored on a 

USB disk by connecting it to your TV. Connect a USB 

disk to one of the USB inputs located on the side of 

the TV. Pressing the 

MENU

 button while in the Media 

Browser mode will access the Picture, Sound and 

Settings menu options. Pressing the 

MENU

 button 

again will exit from this screen.


You can set your Media 

Browser preferences by using the Settings Menu.

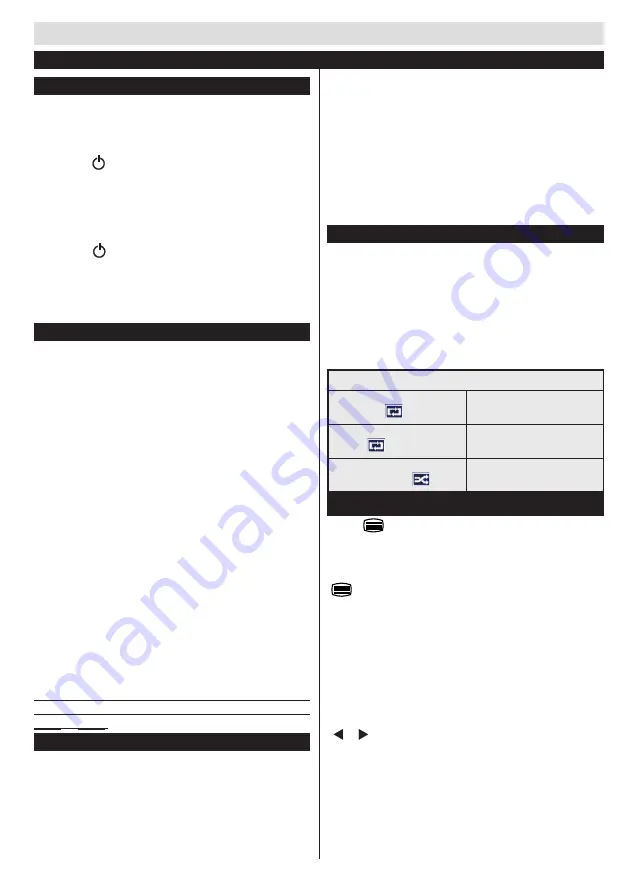
Loop/Shuffle Mode Operation

Start playback with Play button 
and activate 

TV plays next file and loop 

the list.

Start playback with OK and 
activate 

the same file will be played in a 

loop (repeat).

Start playback with OK/Play 
button and activate 

the file will be played in a shuffle.

Teletext

Press 

 button to enter. Press again to activate mix 

mode. Press once more to exit. Follow the instructions 

displayed on teletext screen.

Teletext function buttons are listed below:

 Teletext / Mix : 

Activates teletext mode when 

pressed once. Press again to place the teletext screen


over the programme (mix).Pressing again will quit the 

teletext mode.

“RETURN” Index:

 Selects the teletext index page.

İ(INFO)Reveal:

 Shows hidden information (e.g. 

solutions of games).

“OK” Hold:

 Holds a text page when convenient. Press 

again to resume.

“ ”/“ ” Subcode Pages :

 Selects subcode pages 

if available when the teletext is activated. 

P+ or P-  and numbers (0-9):

 Press to select a page.

Note:

 Most TV stations use code 100 for their index 

pages.

First Time Installation - USB Connections

Summary of Contents for Televizyon Performance 22VF3025

Page 1: ...TELEViZYON KULLANIM KILAVUZU OPERATING INSTRUCTIONS PERFORMANCE 22VF3025 22 LED TV...

Page 2: ...ni engellemeyiniz TV yi e imli veya dengesiz y zeylere koymay n z TV devrilebilir Bu cihaz l man iklimlerde kullan n z G kablosu kolayl kla eri ilebilir olmal d r G kablosu zerine TV mobilya vs yerle...

Page 3: ...enkli televizyon HDMI giri i HDMI yuvas olan bir cihaza ba lanmak i indir USB giri i OSD men s sistemi Harici ayg tlar i in scart soketi vard r DVD oynat c lar PVR video oyunlar vb Stereo ses sistemi...

Page 4: ...ar veya tescilli markalar d r Kullan c lar i in Eski Donan m ve Pillerin At lmas zerine Bilgi Bu sembollere sahip donan m s radan ev at klar yla ayn ekilde bertaraf edilmemelidir r n veya pili bertara...

Page 5: ...ual I II 19 H zl geri medya taray c modunda 20 H zl ileri medya taray c modunda 21 Altyaz a k kapal medya taray c modunda 22 Duraklat medya taray c modunda 23 Durdur medya taray c modunda 24 Teleteks...

Page 6: ...anmal s n z SCART soketi yoluyla harici bir cihaz ba lanm sa TV otomatik olarak AV moduna ge er Ortam Taray c modundayken k skart soketinden m mk n olmayacakt r Duvara montaj kiti opsiyonel kullan l r...

Page 7: ...yb ndan sorumlu tutulamaz Belirli USB cihaz t rlerinin bu TV ile uyumlu olmamas olas bir durumdur r MP3 alarlar TV FAT32 ve NTFS disk formatlar n destekler 1TB Terabayt ya da daha fazla dosya kapasite...

Page 8: ...siyonel HDMI kayna ndan izlerken bu zellik G r nt Ayarlar men s nde g sterilecektir G r nt deki siyahl iyile tirmek i in bu zelli i kullanabilirsiniz Film Modu Filmler normal televizyon programlar nda...

Page 9: ...Zamanlay c 10 dakikal k ad mlarla Kapal ile 2 saat 120 dakika aras nda programlanabilir Otomatik Kapanma etkinle tirilirse se ilen s re sonunda TV otomatik olarak bekleme konumuna ge er Men Zaman A m...

Page 10: ...z mi D k sinyal seviyesi g r nt n n bozulmas na neden olabilir L tfen anten eri imini kontrol edin E er man el ayarlama yap yorsan z kanal frekans n do ru girdi inizi kontrol edin ki cihaz televizyona...

Page 11: ...i desteklemiyor olabilir TV niz 1920x1080 e kadar desteklemektedir Dizin z n rl k Frekans 1 800x600 56 Hz 2 800x600 60 Hz 3 1024x768 60 Hz 4 1024x768 66 Hz 5 1280x768 60 Hz 6 1360x768 60 Hz 7 1280x960...

Page 12: ...s recinde de kar la labilinir Alt piksel hatalar 2 ana e ittir Tip 1 S rekli yanan alt piksel k rm z ye il veya mavi olabilir Tip 2 S rekli s n k alt piksel siyah bir ekilde g r n r ISO 13406 2 standa...

Page 13: ...an uydu al c s DVD player ya da kablolu kanal yay nlar nda beklenen performans al namayabilir ve bu yay nlarda resimde mozaiklenme veya resim netlik ve keskinli i az g r nt de ekranda baz efektler olu...

Page 14: ...Sat c ya kar 3 A r bir masraf gerektirmedi i takdirde b t n masraflar sat c ya ait olmak zere sat lan n cretsiz onar lmas n isteme 4 mk n varsa sat lan n ay ps z bir misli ile de i tirilmesini isteme...

Page 15: ...s Do not place the TV on sloping or unstable surfaces the TV may tip over Use this device in moderate climates The power cord plug should be easily accessible Do not place the TV furniture etc on the...

Page 16: ...s Remote controlled colour TV HDMI inputs are for connecting a device that has a HDMI socket USB input OSD menu system Scart socket for external devices such as DVD Players video games etc Stereo soun...

Page 17: ...trademarks or registered trademarks of HDMI Licensing LLC Information for Users on Disposal of Old Equipment and Batteries These symbols indicate that equipment with these symbols should not be dispos...

Page 18: ...n TXT mode 7 Navigation Buttons 8 Return Back Index page in TXT mode 9 No Function 10 Volume up down 11 Mute 12 Numeric Buttons 13 TV source Channel list 14 My button 15 No Function 16 No Function 17...

Page 19: ...he TV will automatically switch to AV mode While in Media Browser mode output will not be available via the scart socket When using the wall mounting kit optional we recommend that you plug all your c...

Page 20: ...any connections to the TV Manufacturer will not be responsible for any file damage or data loss Certain types of USB devices e g MP3 Players or USB hard disk drives memory sticks may not be compatible...

Page 21: ...ue Black optional While watching from HDMI source this feature will be visible in the Picture Settings menu You can use this feature to enhance blackness in the picture Film Mode Films are recorded at...

Page 22: ...grammed between Off and 2 hours 120 minutes in steps of 10 minutes If Sleep Timer is activated at the end of the selected time the TV goes automatically to standby mode Menu Timeout Changes timeout du...

Page 23: ...l level can cause picture distortion Please check antenna access Check if you have entered the correct channel frequency if you have done manual tuning The picture quality may degrade when two devices...

Page 24: ...ideo display modes Your TV may not support all resolutions Your TV supports up to 1920x1080 Index Resolution Frequency 1 800x600 56 Hz 2 800x600 60 Hz 3 1024x768 60 Hz 4 1024x768 66 Hz 5 1280x768 60 H...

Page 25: ...els may cause sub pixel errors by way of lighting continuously or remaining dim continuously Please consider the following explanation about a possible sub pixel error This problem can be encountered...

Page 26: ...pported by other sources in terms of high definition DVD players or cable television and in these broadcasts mosaic images may occur sharpness and resolution of the image may be low some effects may a...

Page 27: ...iOS ANDROID...

Page 28: ......

Page 29: ......

Page 30: ...m tr destek E posta vmh vestel com tr Cihaz n z n T C G mr k ve Ticaret Bakanl T keticinin Korunmas ve Piyasa G zetimi Genel M d rl nce tespit ve ilan edilen kullan m mr cihaz n fonksiyonlar n yerine...

Reviews: