VESDA Sensepoint XCL – Large Bore Installation Manual
VESDA by Xtralis
4.6
Replacing the Gas Sensor
Warning:
Use only genuine replacement sensors specifically for use with VESDA Sensepoint XCL.
Attempting to use non-genuine sensors could result in malfunction of the product.
1. Disable smoke detector to prevent the transmission of potential flow fault alarm.
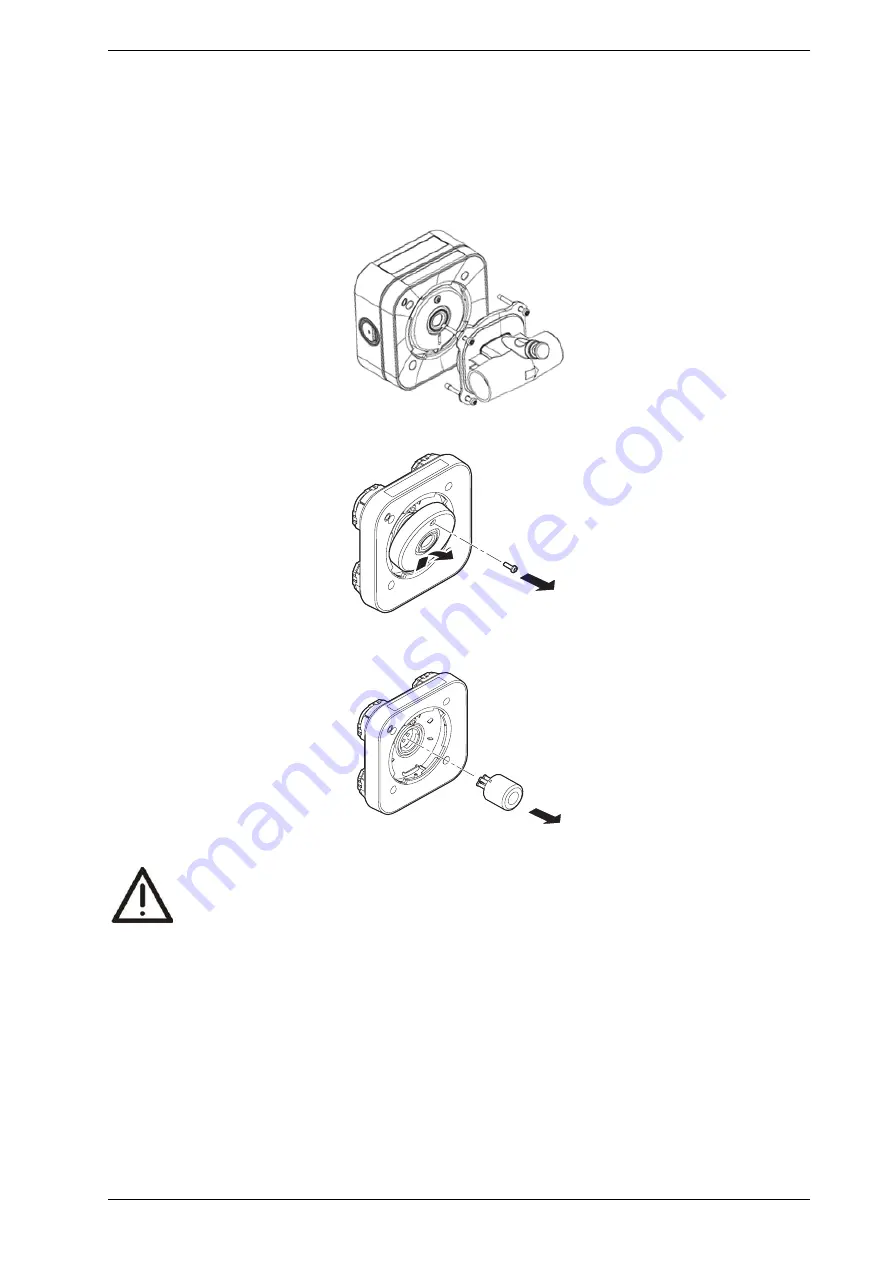
2. Disconnect both sampling pipes and remove the flow cap from the detector.
3. Remove the sensor cover (loosen the screw on top of the sensor cover).
4. In Sensepoint App, choose Change Sensor from Maintenance menu.
5. Pull out the gas sensor.
6. Insert a new sensor ensuring that the sensor pins are correctly aligned.
CAUTION:
Do not force the sensor into the socket, otherwise it may be damaged.
7. Reinsert sensor cover and flow cap and connect to the sampling pipe.
8. Enable the smoke detector.
9. Perform calibration (section “4.3 Calibration”)
To replace gas sensor using the detector buttons, remove detector module from back box. Before removing
the gas sensor press and hold the UP button for 10 seconds to switch to sensor replacement mode. In this
mode, the detector output is inhibited, and the sensor circuits are internally isolated.


