


Vermont Castings • Encore Model 2040-CAT-C Installation Manual_R3 • 2019 - ___ • 09/20
20
8390-204i
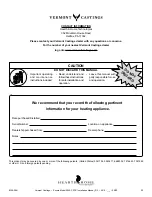
Figure 5.13
- Floor Installation
Fire Risk
Asphyxiation Risk
Do not draw outside combustion air from:
• Wall, floor or ceiling cavity
• Enclosed space such as an attic or garage
• Close proximity to exhaust vents or chimneys
Fumes or odor may result
WARNING
!
Asphyxiation Risk
Outside air inlet must be located to prevent
blockage from:
WARNING
!
• Leaves
• Snow or ice
• Other debris
Blockage may cause combustion air starvation
Smoke spillage may set off alarms or irritate sensitive
individuals.
Asphyxiation Risk
Length of outside air supply duct shall NOT
exceed the length of the vertical height of the
exhaust flue.
WARNING
!
•
Fire will not burn properly
•
Smoke spillage occurs when door is opened due to
air starvation
L. Smoke and CO Detectors & Safety Tips
Smoke and CO Detectors
The use of smoke and carbon monoxide (CO) detectors
throughout the home is strongly advised, even if not
required by building codes or insurance regulations.
It is a good idea to install a smoke detector in the living
areas and each bedroom. Follow the smoke/CO detector
manufactures placement and installation instructions and
maintain regularly.
You may not, however, wish to install a detector in the
immediate vicinity of the stove. Depending on the sensitivity
of the unit, the alarm can be set off while you are tending
the fire or emptying the ashes. If you install a detector in the
same room, locate it as far away from the stove as possible.
Safety Tips
Conveniently locate a “Class A” fire extinguisher to contend
with small fires. Be sure the fire extinguisher works and
is clearly visible. All occupants of the house should know
where it is, and how it operates. Have heavy stove gloves
available near the stove. Have special safety accessories
(e.g., Child Guard Screen) available for use if small children
will be in the home.
In the event of a stove pipe or chimney fire….
• Evacuate the house immediately
• Notify the fire department
• If the fire isn’t too threatening, closing down the stove
tight, (damper, primary air, all doors) will help to smother
the fire.
• Inspect your stove, vent pipe and chimney for any
damage caused by the fire and correct any damage
before using your stove again.
Fire Risk
• Do not leave the fire unattended when the
door is unlatched or when using the fire
screen.
• Unstable firewood could fall out of the firebox
creating a fire hazard to your home.
WARNING
!