Blade Sharpening
For ease of sharpening either the
1
/
2
"
straight or the
1
/
2
"
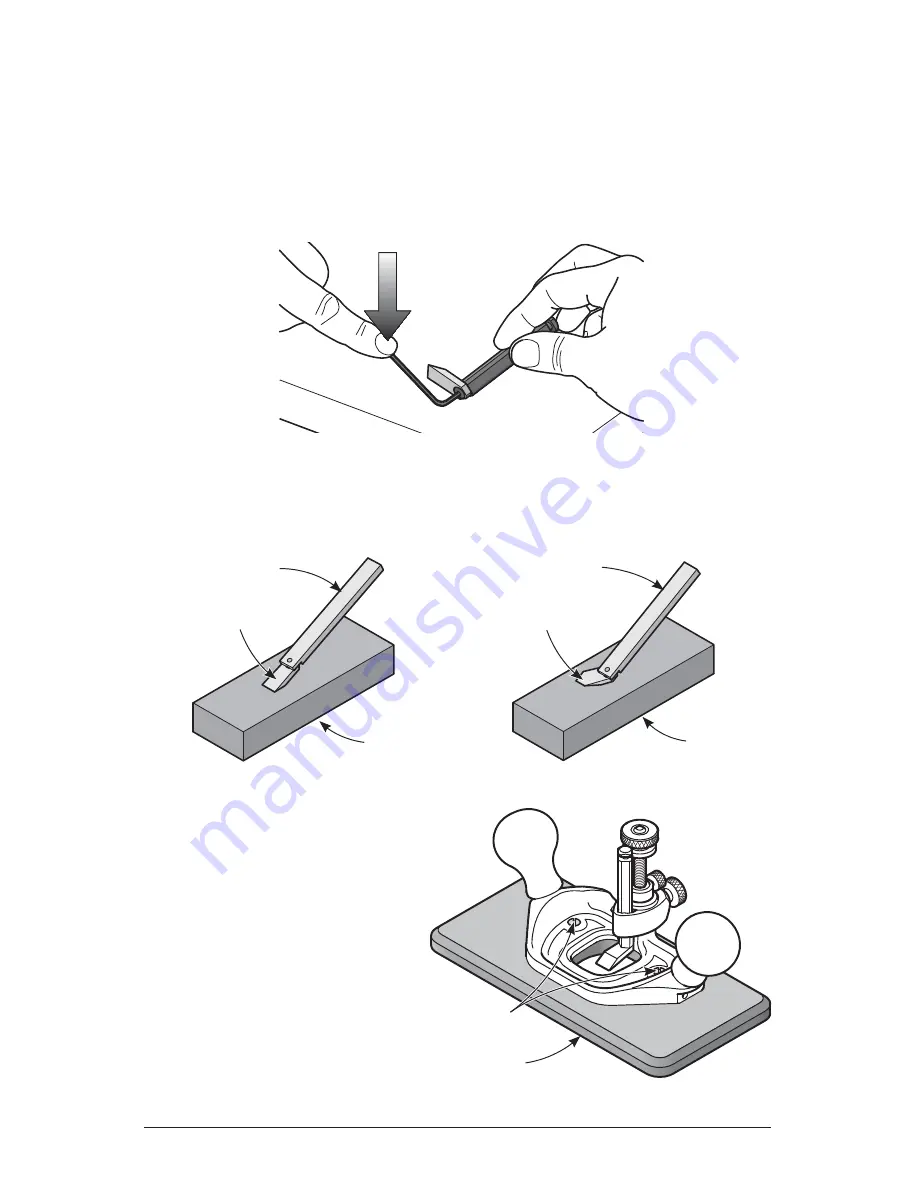
pointed blade, the blade
portion may be removed from the shaft. Whether removing or reattaching the
blade, be very careful of the sharp edge. Do not hold the blade shaft in your hand
while loosening or tightening the set screw. Clamp the shaft in a vise or hold it
down on a fl at surface, as shown in
Figure 5
. Remove the set screw that secures
the blade portion to the shaft with the supplied hex key.
Attach the blade to the holder with the small screw provided. The blade holder can
be mounted in a honing guide or used for sharpening by hand. Hone the bevel as
illustrated in
Figure 6
or
7
, and fl ip over to lap the back.
Auxiliary Base
The base of the router plane comes
with two countersunk holes so that
you can attach a larger shop-made
base with #10 screws. The maximum
depth of cut of the plane will be
reduced by the thickness of the base
being used.
The optional fence cannot be used
when an auxiliary base is mounted
on the router plane; however, a strip
of wood attached to the auxiliary
base can serve as a fence.
Figure 6: Honing the
1
/
2
"
straight blade.
Figure 7: Honing the
1
/
2
"
pointed blade.
Figure 5: Removing blade from shaft.
Figure 8: Auxiliary base.
Stone
1
/
2
"
Straight
Blade
Blade Holder
Stone
1
/
2
"
Pointed
Blade
Blade Holder
#10 Screws
Auxiliary Base
5
Summary of Contents for 05P38.01
Page 1: ...Router Plane 05P38 01 U S Pat No 7 950 157 ...
Page 7: ...7 ...


