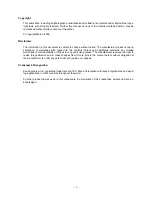
background image

1788-190913EN

7

Subject to misprints, errors and technical modifications.

INSTALLATION MANUAL


RITZSCREEN® V540 - V599 - V599R - V599L - V599 XL

in de dag

op de dag

fig. 1.5  Correct mounting of the Ritzscreen® V540/V599 L

fig. 1.4  Mounting the back guide of the Ritzscreen® V540/V599 L

fig. 1.6  Incorrect mounting of the Ritzscreen® V540/V599 L

1.4  Mounting the V540/V599 L guide
The Ritzscreen® V540 and V599 L is supplied with guides with predrilled mounting holes in the back profile. This occurs in 
a fixed pattern. At screens with a total height up to 1800 mm, the guides are provided with two holes: 1 hole 100 mm from 
the top and 1 hole 100 mm from the bottom. At screens with a total height of more than 1800 mm, the guides are provided 

with 

three holes: 1 hole 100 mm from the top, 1 hole 100 mm from the bottom and 1 hole in the middle. 

Attention! By incorrect mounting or when using the wrong screws, the insert provided with neoprene can not freely move 
in the guide. When using the screen, the insert or guide is pulled crooked in the profile. This can cause damage to the 
system. The figure below shows what goes wrong when (a) the screw is not placed far enough in the guide and (b) a screw 

with a round head is used. 

3. 

Screw the guides tight. Tighten the top screws loosely, not completely fixed. This way the guides can be brought 


    forward when placing the screen cover.

2. 

Drill the holes. Mind the size of the screws and plugs that you are going to use. Only use screws with a flat head

 that can  

     be  mounted  countersunk

 when mounting. The surface area needs to be entirely plane.


1. 

Place the back profile of the guides against the façade 


    or the window frame as described in paragraph 1.1.  

    Make sure that the guides are perpendicular and equal 


    to the wall. The marking of the drill holes on the wall or 


    the window frame can be made on the base of the holes  

    in the guides. 

Outside Mount

Inside Mount

Summary of Contents for Ritzscreen V540

Page 1: ...INSTALLATION MANUAL RITZSCREEN V540 V599 V599R V599 L V599 XL...

Page 2: ...Side guides a back profile b insert provided with neoprene Ritz guide c front profile 3 Mounting set 4 Control a electrical switch and plug b remote control remote control and plug Necessary tools Dr...

Page 3: ...guide G section guide G right Maximum ordering size V540 3000 mm Attention The Ritzscreen V540 is delivered with guides provided with predrilled mounting holes in the back profile Only use flat counte...

Page 4: ...K bottom bar O and guide G section bottom bar O section bottom bar O section guide G right section guide G right maximum ordering height V599 XL 6000 mm Measurements in mm Ritzscreen V599 L 125 130 42...

Page 5: ...t of the package Put the content of the package on a soft surface Be careful when drilling falling drill cuttings can cause damages Check if the window frame or fa ade is flat and smooth General warni...

Page 6: ...e 1 Place the left back profile vertically at the correct height against the fa ade or the window frame View figure 1 1 2 Mark the mounting holes on the guide The choice for inside mounting or outside...

Page 7: ...a 10 mm drill so that the screwdriver fits through fig 1 2 Drilling mounting holes fig 1 3 Mounting the back guide 1 3 Mounting the guide 1 Place the back profile of the guides back against the fa ad...

Page 8: ...incorrect mounting or when using the wrong screws the insert provided with neoprene can not freely move in the guide When using the screen the insert or guide is pulled crooked in the profile This can...

Page 9: ...r 1 5 Hole for control 1 Accurate mark the inside transit hole for the control cord This hole needs to be at exactly the same height as the point where the control cord comes out of the screen 2 Drill...

Page 10: ...ute is advised 1 7 Sliding the zipper into the guide 1 Place the insert Ritz guide b with the V profile up a little oblique in the back profile a 2 Slide the edge of the zipper from the top in the V p...

Page 11: ...sition of the switch inside the house and mark two holes on the wall 2 Drill the holes with a 6 mm drill 3 Open the switch using a flat screwdriver 4 Place the plugs and mount the switch with two coun...

Page 12: ...brown yellow green blue black brown brown yellow green blue brown yellow green blue black brown brown yellow green blue brown yellow green blue black brown brown Motor left seen from the outside Motor...

Reviews: