background image

E - 1

PLACEMENT INFORMATION

•  Do not use this unit in places which are extremely 

hot, cold, dusty or humid.

•  Do not restrict the air flow of this unit by placing it 

somewhere with poor air flow, by covering it with 

a cloth, by placing it on bedding or carpeting.

SAFETY INFORMATION

•  When connecting or disconnecting the AC power 

cord, grip the plug and not the cord itself. Pulling 

the cord may damage it and create a hazard.

•  When you are not going to use the unit for a long 

period of time, disconnect the AC power cord.

CONDENSATION INFORMATION

• 

When left in a heated room where it is warm and 

damp, water droplets or condensation may form 

inside the equipment. When there is condensation 

inside the unit, the unit may not function normally. 

Let the unit stand for 1-2 hours before turning the 

power on or gradually heat the room and let the 

unit dry before use.

RATING PLATE LOCATION

The rating plate is located on the rear of unit.

FCC STATEMENTS

This device complies with Part 15 of the FCC Rules. 

Operation is subject to the following two conditions: (1) 

This device may not cause harmful interference, and 

(2) this device must accept any interference received, 

including  interference  that  may  cause  undesired 

operation.
This unit has been tested and found to comply with the 

limits for a Class B digital device, pursuant to Part 15 

of the FCC Rules. These limits are designed to provide 

reasonable protection against harmful interference in a 

residential installation. This unit generates, uses and 

can radiate radio frequency energy and, if not installed 

and used in accordance with the instructions, may cause 

harmful interference to radio communication. However, 

there is not guarantee that interference will not occur in 

a particular installation. If this unit does cause harmful 

interference to radio or television reception, which can 

be determined by turning the unit off and on, the user is 

encouraged to try to correct the interference by one or 

more of the following measures:
-  Reorient or relocate the receiving antenna.

-  Increase  the  separation  between  the  unit  and 

receiver.

-  Connect the unit into an outlet on a circuit different 

from that to which the receiver is connected.

-  Consult  the  dealer  or  an  experienced  radio/TV 

technician for help.

-   Shielded  cables  must  be  used  with  this  unit  to 

ensure compliance with the Class B FCC limit.

-   This  television  receiver  provides  display  of 

television  closed  captioning  in  accordance  with 

Section 15.119 of the FCC rules.

SAFETY PRECAUTIONS

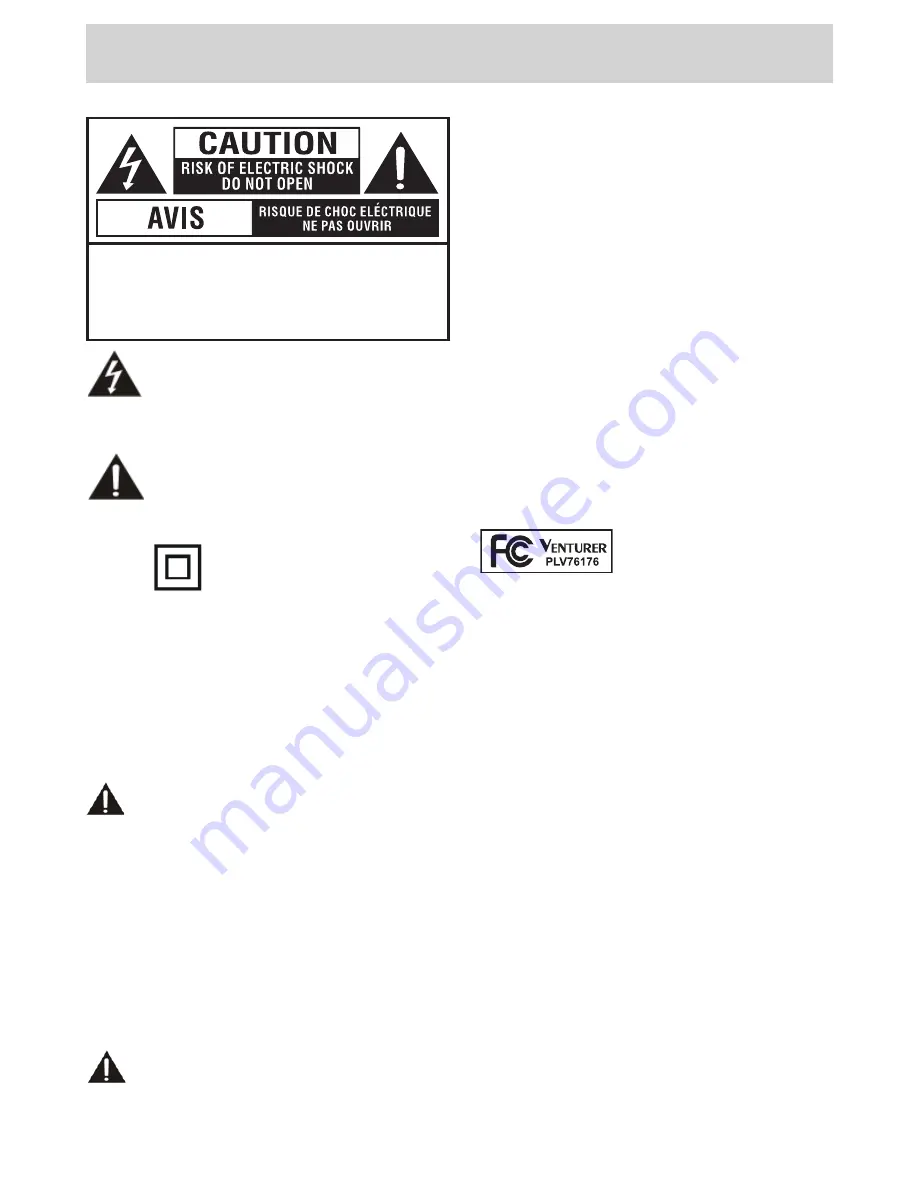
The lightning flash with arrowhead symbol, 

within an equilateral triangle, is intended to 

alert the user to the presence of uninsulated 

“dangerous  voltage”  within  the  product’s 

enclosure  that  may  be  of  sufficient  magnitude  to 

constitute a risk of electric shock to persons.

The exclamation point within an equilateral 

triangle  is  intended  to  alert  the  user  to 

the  presence  of  important  operating  and 

maintenance (servicing) instructions in the 

literature accompanying the appliance. 

CAUTION  :  TO  REDUCE  THE  RISK  OF 

ELECTRIC SHOCK, DO NOT REMOVE COVER 

(OR BACK). NO USERSERVICEABLE PARTS 

INSIDE.  REFER  SERVICING  TO  QUALIFIED 

SERVICE PERSONNEL.

CAUTION

•  DANGER  OF  EXPLOSION  IF  BATTERY  IS 

INCORRECTLY  REPLACED.  REPLACE  ONLY 

WITH THE SAME OR EQUIVALENT TYPE.

•  TO PREVENT ELECTRIC SHOCK, MATCH WIDE 

BLADE  OF  PLUG  TO  WIDE  SLOT  OF  WALL 

OUTLET, THEN FULLY INSERT.

•   USE  OF  CONTROLS  OR ADJUSTMENTS  OR 

PERFORMANCE  OF  PROCEDURES  OTHER 

THAN  THOSE  SPECIFIED  MAY  RESULT  IN 

HAZARDOUS RADIATION EXPOSURE.

The  symbol  for  Class  II 

(Double Insulation)

WARNING :

•  To reduce the risk of fire or shock hazard, do not 

expose this unit to rain or moisture.

•  The  mains  plug  of  apparatus  should  not  be 

obstructed OR should be easily accessed during 

intended use.

•  The  unit  shall  not  be  exposed  to  dripping  or 

splashing  and  that  no  objects  filled  with  liquids, 

such as vases, shall be placed on unit.

•  In  order  to  disconnected  the  unit  from  the 

mains  completely,  the AC  power  cord  should 

be  disconnected  from  the  mains  socket  outlet 

completely.

•  Battery  shall  not  be  exposed  to  excessive  heat 

such as sunshine, fire or the like.

WARNING:


•  Changes or modifications to this unit not expressly 

approved  by  party  responsible  for  compliance 

could void the user authority to operate unit.

Equipment  tested  for 

compliance as a complete 

unit

PLV76176S7_IB_UL_090723.indd   1

7/24/2009   11:52:40

Summary of Contents for PLV76176

Page 1: ...E 20 17 LCD TV INSTRUCTION MANUAL Need More Help DO NOT RETURN THIS PRODUCT TO THE STORE Please visit online help at http www venturer com PLV76176 ...

Page 2: ...he separation between the unit and receiver Connect the unit into an outlet on a circuit different from that to which the receiver is connected Consult the dealer or an experienced radio TV technician for help Shielded cables must be used with this unit to ensure compliance with the Class B FCC limit This television receiver provides display of television closed captioning in accordance with Secti...

Page 3: ...into your outlet consult an electrician for replacement of the obsolete outlet 10 Protect the power cord from being walked on or pinched particularly at plugs convenience receptacles and the point where they exit from the apparatus 11 Only use detachments accessories specified by the manufacturer 12 Use only with the cart stand tripod bracket or table specified by the manufacturer or sold with the...

Page 4: ...O however you might find you get improved results using STD IRC or HRC these are different standards used by various Cable Systems Then use the button to move the highlight bar on Start to Scan and press ENTER button to start The unit will take a few minutes to finish auto scan and all scanned channels will be stored automatically 7 7 8 2 3 8 2 3 8 Turning On the Unit for the first time The first ...

Page 5: ...NNECTIONS 8 9 Connecting a TV Antenna 8 Connecting to other Equipment with Video Output VCR Camcorder Video Game System Cable Satellite system etc 8 Connecting the Power Cord 9 Connecting a PC 9 USING HEADPHONES 10 INSTALLATION 11 TV SETUP 12 16 Picture Menu 12 Audio Menu 12 Time Menu 13 Setup Menu 13 14 Parental Menu 14 15 TV Menu 16 TROUBLESHOOTING GUIDE 17 ...

Page 6: ...REPLACEMENT When the batteries become weak the operating distance of the remote control is greatly reduced and you will need to replace the batteries CAUTION Danger of explosion if battery is incorrectly replaced Replace only with the same or equivalent type NOTES If the remote control is not going to be used for a long time remove the batteries to avoid damage caused by battery leakage corrosion ...

Page 7: ...OL VOL Button Press to increase decrease the volume 6 LAST CH Press to switch repeatedly between the last two channels displayed 7 STANDBY ON Button Press to turn ON the unit or put it in STANDBY OFF mode 8 FUNCTION Button Press to switch between TV AV PC 9 LCD MODE Button PresstoSelectfrompresetscreendisplaysettings to match the type of show you are watching 10 CH CH Buttons Press to select the c...

Page 8: ...m selections on the TV menu screen and to change TV channels 6 VOL VOL controls Adjusts the volume level and highlights selections Left Right on the TV menu screen 7 Color LCD screen 8 Built in speakers 9 Remote sensor Point the remote control here Standby indicator 10 Removable stand 11 Power cord 12 MONITOR VGA jack 13 Headphones jack 14 TV ANTENNA terminal Connects a TV antenna or CATV cable 7 ...

Page 9: ...s typically critical for best results you may find that placement of the antenna near a window or in an elevated location improves performance To TV Antenna terminal To Home Antenna terminal Cable without a CATV converter or cable box Combination VHF UHF antenna ATSC NTSC signal Separate VHF or UHF antenna ATSC NTSC signal CONNECTING TO A VCR CAMCORDER VIDEO GAME SYSTEM CABLE SATELLITE SYSTEM Conn...

Page 10: ...ctly To prevent electrical shock match wide blade of plug to wide slot of wall outlet then fully insert When you are not going to use the unit for a long period of time disconnect the power cord connect A PC Connect the 15 pin D SUB PC VGA connector from your computer to the 15 pin D SUB PC VGA input on this unit using a monitor cable and audio cable not included as shown Make sure you connect the...

Page 11: ...efore connecting headphones earphones to the unit then adjust the volume to your desired level When headphones earphones are connected no sound will come from the front speakers NOTE Excessive sound pressure from earphones headphones can cause hearing loss ...

Page 12: ... back side facing up Please make sure to place a soft cushioned material such as a pillow or thick piece of foam beneath the screen 3 To install the base stand place the base stand on the mounting slot push the stand till it locks 4 To remove the base stand keep pressing the locking area of the base stand and pull downwards to release the base stand MOUNTING ON THE WALL This unit is VESA compliant...

Page 13: ...DIO MENU 1 Press the MENU button 2 Use the or button to select Audio then press the button to enter the Audio settings 3 Use the or button to select the options Sound Mode Bass Treble Balance Audio Language and MTS Adjust them using the or button 4 Repeat step 3 to adjust other options 5 To exit the MAIN MENU and return to the normal screen press the MENU button repeatedly Note Experiment with dif...

Page 14: ... the button to enter the SETUP settings 3 Use the or button to select the options OSD Language PC Setup Closed Caption or Restore Setting Adjust them using the or button Screen will change to your desired setting or press the button to go into the detailed settings 4 Press the MENU button to return to the previous menu 5 Repeat steps 3 and 4 to adjust other options 6 To exit the MAIN MENU and retu...

Page 15: ... the caption style items and set your desired detailed settings Note This function only works onATSC programs broadcast with captions PARENTAL MENU Password 1 Press the MENU button 2 Use the or button to select PARENTAL then press the button to enter the PARENTAL settings 3 Enter a 4 digit password Once entered the screen will enter the Parental menu The preset password is 0000 If you forget the p...

Page 16: ... one 17 or under admitted in movie theaters X Adults Only E Exempt C Children C8 Recommended for children age 8 and older G GENERAL AUDIENCES Suitable for all ages PG PARENTALGUIDANCE SUGGESTED Some material may not be suitable for children 14 Viewers 14 years and older 18 Adult Programming E Exempt G GENERAL AUDIENCES Suitable for all ages 8 ans Not recommended for young children 13 ans Not suita...

Page 17: ...MAIN MENU and return to the normal screen press the MENU button repeatedly Channel Skip 1 Use the or button to select a channel Press the button to select the last channel of the page press again to go to the next page Press the button to select the first channel of the page press again to return to the previous page 2 Press the ENTER button to shift between On Off Select On to skip the selected c...

Page 18: ...he PICTURE SETTING within the TV SETUP MENU Check to make sure the program you are watching is broadcast in Color and not Black White Black and white picture Make sure the unit is plugged in and turned on Make sure that TV mode is selected Try a new channel to check for possible station trouble Make sure the antenna is connected properly Increase the volume Make sure the antenna or audio video sou...

Page 19: ...ly to defects in material or workmanship and do not extend to any product or parts which have been lost or discarded or damage to product or parts caused by misuse accident improper operation or maintenance or use in violation of instructions provided with the product or to product which has been altered or modified without authorization of Venturer or to products or parts thereof which have had t...

Page 20: ...E 19 UNIT INCH Printed in China 811 761791W010 16 3 4 3 5 8 14 5 9 3 4 6 7 8 7 10 ...

Reviews: