background image

SAFETY

Safety - 10

General Safety Procedures

for Ventrac Power Units, Attachments, & Accessories

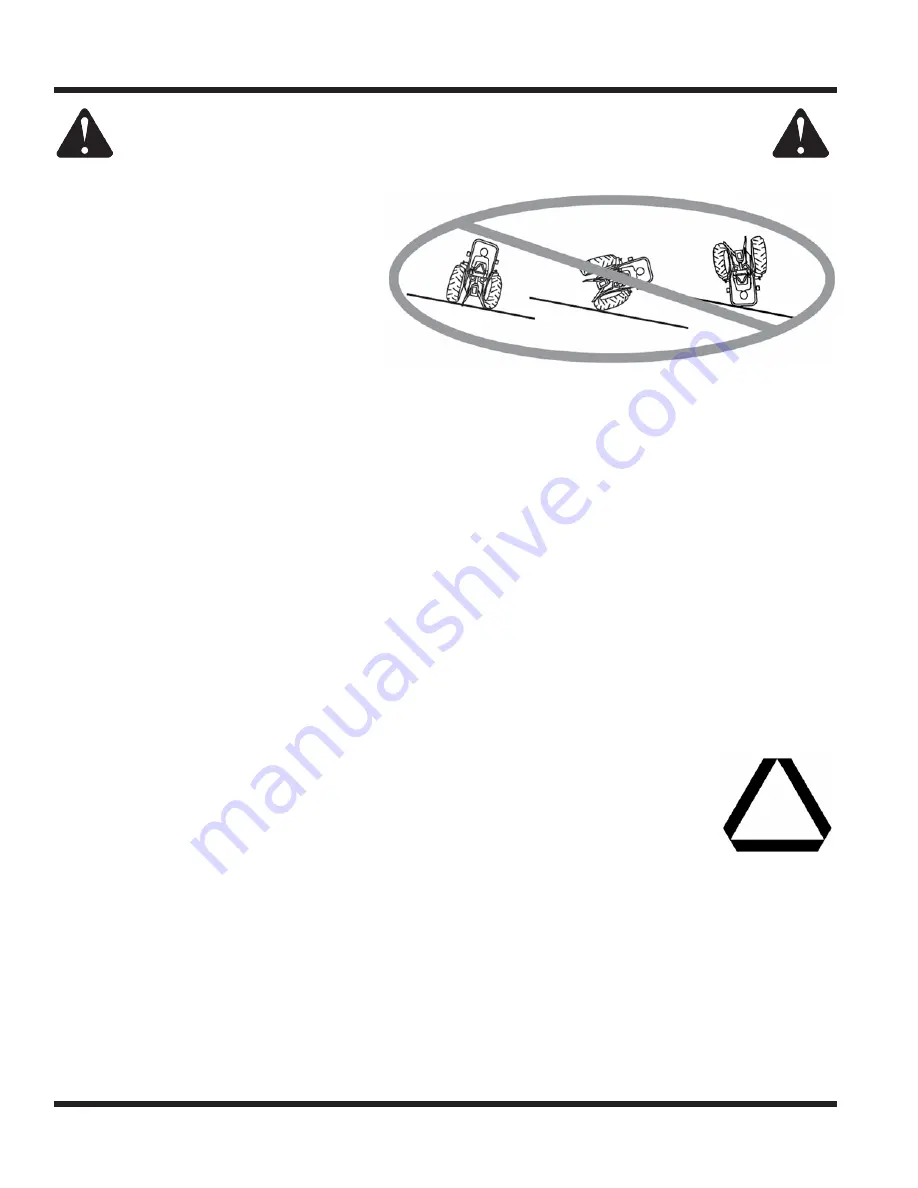
Operating On Slopes

•  Slopes can cause loss-of-control and  

tip-over accidents, which can result in 

severe injury or death. Be familiar with the 

emergency parking brake, along with the 

power unit controls and their functions.

•  If power unit is equipped with a fold down 

roll bar, it must be locked in the upright 

position when operating on any slope.

•  Use low range (if equipped) when operating 

on slopes greater than 15 degrees.

•  Do not stop or start suddenly when operating on slopes.

•  Never shift between high and low range while on a slope. Always move the power unit to level ground 

and engage the parking brake before shifting range or placing the power unit in neutral.

•  Variables such as wet surface and loose ground will reduce the degree of safety. Do not drive where 

machine could lose traction or tip over.

•  Keep alert for hidden hazards in the terrain.

• 

Stay away from drop-offs, ditches, and embankments.

•  Sharp turns should be avoided when operating on slopes.

•  Pulling loads on hills decreases safety. It is the responsibility of the owner/operator to determine loads 

that can safely be controlled on slopes.

•  Transport machine with attachment lowered or close to the ground to improve stability.

•  While operating on slopes, drive in an up and down direction when possible. If turning is necessary 

while driving across slopes, reduce speed and turn slowly in the downhill direction.

• 

Assure a sufficient supply of fuel for continuous operation. A minimum of one-half tank of fuel is recommended.

Roadway Safety

•  Operate with safety lights when operating on or near roadways.

•  Obey all state and local laws concerning operation on roadways.

• 

Slow down and be careful of traffic when operating near or crossing roadways. Stop before crossing 

roads or sidewalks. Use care when approaching areas or objects that may obscure vision.

•  If there is doubt of safety conditions, discontinue machine operation until a time when 

operation can be performed safely.

•  When operating near or on roadways, have a Slow Moving Vehicle Emblem clearly 

displayed.

Truck Or Trailer Transport

•  Use care when loading or unloading machine into a truck or trailer.

•  Use full width ramps for loading machine into a truck or trailer.

• 

The parking brake is not sufficient to lock the machine during transport. Always secure the power unit 

and/or attachment to the transporting vehicle securely using straps, chains, cable, or ropes. Both front 

and rear straps should be directed down and outward from the machine.

• 

Shut off fuel supply to power unit during transport on truck or trailer.

• 

If equipped, turn the battery disconnect switch to the Off position to shut off electrical power.

Summary of Contents for LC150

Page 1: ...Operator s Manual Parts Drawings Stump Grinder Model LC150 Revised 09 16 15 09 10033 Rev 03 Original Operator s Manual ...

Page 2: ..._______________________ Dealer ____________________________________________________________________________ Dealer Address _____________________________________________________________________ _____________________________________________________________________ Dealer Phone Number _______________________________________________________________ Dealer Fax Number ___________________________________...

Page 3: ...e 11 Fuel Safety 11 Hydraulic Safety 12 GENERAL OPERATION PAGE 14 Daily Inspection 14 Attaching 14 Detaching 14 Operating Procedure 15 SERVICE PAGE 16 Cleaning and General Maintenance 16 Belt Inspection 16 Rotor Drive Belt Replacement 16 Cutter Teeth Replacement 16 Lubrication Locations 17 Gearbox Oil 17 Storage 17 Maintenance Schedule 18 Maintenance Checklist 18 SPECIFICATIONS PAGE 19 Dimensions ...

Page 4: ...riate section You must read and understand the operator s manual for each piece of Ventrac equipment you own Read ing the operator s manual will help you become familiar with each specific piece of equipment Under standing the operator s manual will help you as well as others avoid personal injury and or damage to the equipment Keep this manual with the machine at all times The manual should remai...

Page 5: ...ughout this manual Right Hand and Left Hand is determined as if sitting on the power unit seat facing forward SIGNAL WORD DEFINITIONS Indicates a potentially hazardous situation which if not avoided could result in death or serious injury Indicates an imminently hazardous situation which if not avoided will result in death or serious injury This signal word is limited to the most extreme cases Ind...

Page 6: ...ecals legible Remove all grease dirt and debris from safety decals and instructional labels If any decals are faded illegible or missing contact your dealer promptly for replacements When new components are installed be sure that current safety decals are affixed to the replacement components A Under Shield B B E E C F D G ...

Page 7: ...anger Shield Missing 00 0062 1 B Warning Keep Hands Feet Clear 00 0123 2 C Warning Moving Parts 00 0216 1 D Warning Read Owner s Manual 00 0217 1 E Warning Pinch Point 00 0218 2 F Warning Do Not Reach 00 0219 1 G Warning General Safety 00 0220 1 A B C D E F G ...

Page 8: ...g parts Be sure guards and shields are in proper working condition and are secured in place Make all necessary adjustments before operating machine Some pictures in this manual may show shields or covers opened or removed in order to clearly illustrate any instructions Under no circumstance should the machine be operated without these devices in place Alterations or modifications to this machine c...

Page 9: ...ion Do not run the engine in a building without adequate ventilation Do not touch the engine or the muffler while the engine is running or immediately after stopping the engine These areas may be hot enough to cause a burn Do not change the engine governor settings or over speed the engine Operating engine at excessive speed may increase the hazard of personal injury To reduce the hazard of fire k...

Page 10: ...und to improve stability While operating on slopes drive in an up and down direction when possible If turning is necessary while driving across slopes reduce speed and turn slowly in the downhill direction Assure a sufficient supply of fuel for continuous operation A minimum of one half tank of fuel is recommended Roadway Safety Operate with safety lights when operating on or near roadways Obey al...

Page 11: ...mponents while the engine is running or imme diately after stopping the engine These areas may be hot enough to cause a burn Allow the engine to cool before storing and do not store near an open flame Do not change the engine governor settings or over speed the engine Operating engine at excessive speed may increase the hazard of personal injury Springs may contain stored energy Use caution when d...

Page 12: ... tubes are in good condition Repair any leaks and replace any damaged or deteriorated hoses or tubes before starting the machine Hydraulic leaks can occur under high pressure Hydraulic leaks require special care and attention Use a piece of cardboard and a magnifying glass to locate sus pected hydraulic leaks Keep body and hands away from pinhole leaks or nozzles that eject high pressure hydraulic...

Page 13: ...diately if the cutter head strikes a rock or other solid object Damage to the cutting teeth or the cutter head may occur Do not operate with any of the cutting teeth missing This causes the cutter head to become unbalanced and may cause damage to the stump grinder Attachment hydraulic system may contain stored energy Before performing maintenance or repairs on the hydraulic system the attachment s...

Page 14: ... hitch locking lever 3 Engage the parking brake and shut off the engine 4 Place the attachment belt onto the PTO drive pulley on the power unit 5 Pull the belt tension spring back under the cross tube and hook inside the tab on the left hitch arm 6 Ensure the drive belt is properly located in the pulley grooves before attempting to operate 7 Wipe hose ends clean and connect to the power unit s hyd...

Page 15: ...der a little more and repeat the process If the grinder is lowered to much at one time it will not allow the power unit to be steered Lift the grinder slightly to continue side to side grinding After removing several inches on larger stumps it is necessary to drive forward and repeat the process Also on larger stumps it is advisable to approach from several different angles if possible Follow this...

Page 16: ...ts A that hold the cutter tooth in the cutter head The bolts do not need to be removed only loosened 2 B A Use a locking pliers to pull the cutter tooth out of the cutter head If the old cutter tooth will be discarded it is permissible to tap the cutter teeth out with a steel hammer If the cutter teeth will be reused use only a rubber mallet or soft faced hammer to help remove teeth to avoid damag...

Page 17: ...grinder to remove dirt wood shavings and other debris 2 Inspect for loose or missing hardware damaged components or signs of wear Repair or replace any damaged or worn components 3 Inspect safety decals Replace any decals that are faded illegible or missing 4 Inspect hydraulic hoses and fittings to ensure tight leak free connections Repair or replace any damaged or worn components 5 Inspect belts ...

Page 18: ...ation Section Inspection Check Gearbox Oil Level Change Gearbox Oil Replace w 80 90 Weight Synthetic Gear Oil Maintenance Checklist Maintenance Checklist o f L o c a t i o n s o f P u m p s D a i l y A t 5 0 H o u r s A t 1 0 0 H o u r s A t 1 5 0 H o u r s A t 2 0 0 H o u r s A t 2 5 0 H o u r s A t 3 0 0 H o u r s A t 3 5 0 H o u r s A t 4 0 0 H o u r s A t 4 5 0 H o u r s A t 5 0 0 H o u r s A ...

Page 19: ...er 14 3 8 inches 36 5 cm Grinding Depth below ground 6 inches 15 25 cm Cutter Teeth Carbide Tipped 4 Left 4 Right 4 Straight Teeth Features Excellent operator visibility Replaceable carbide hardened cutting teeth Hydraulically controlled multi function arm which performs three functions 1 A storage stand for which holds the stump grinder for reattachment 2 A depth gauge to preset the desired depth...

Page 20: ...Illustrated Parts 20 Use only original Ventrac replacement parts ILLUSTRATED DRAWING Main Frame Blade Stand Frame Hydraulics PARTS ...

Page 21: ...SS 2 12 62 1017 FRAME MAIN 1 13 99 A04 LOCKNUT STOVER 1 4 20 USS 1 14 20 0185 HOSE 1 4X48 00 SAE 100R17 AR 2 15 25 6400 06 06 FITTING M CONN 3 8 X 3 8 1 16 25 6802 06 06 FITTING 45 ME 3 8 X 3 8 1 17 23 0130 CYLINDER 1 1 2 X 5 1 18 29 GF0001 GREASE FTG 1 4 SAE ST 2 19 90 1016 5 8 11 X 2 BOLT 4 20 94 10 WASHER FLAT 5 8 USS 2 21 64 1132 BUSHING 5 8X1X1 2 2 22 62 1018 FRAME PUSH BLADE STAND 1 23 99 A1...

Page 22: ...PARTS Illustrated Parts 22 Use only original Ventrac replacement parts ILLUSTRATED DRAWING Belt Drive Power Unit to Gearbox ...

Page 23: ... LATCH 1 17 99 A1032N LOCKNUT NYLON 10 32 STAINLESS 1 18 99 SF04 NUT SRF 1 4 20 USS 2 19 99 K0062 MACHINE SCREW 10 32 X 1 2 1 20 99 SF08 NUT SRF 1 2 13 USS 2 21 85 B0027 BUSHING 1 2 ID X 5 8 OD X 5 8 2 22 40 0322 ARM DRIVE BELT IDLER 1 23 99 SF06 NUT SRF 3 8 16 USS 1 24 83 0013 PULLEY IDLER FLAT 3 8 X 3 1 2 1 25 90 0616 3 8 16 X 2 BOLT 1 26 41 0066 SPRING SINGLE TORSION LH 1 27 94 08 WASHER FLAT 1...

Page 24: ...PARTS Illustrated Parts 24 Use only original Ventrac replacement parts ILLUSTRATED DRAWING Belt Drive Gearbox to Cutter Rotor ...

Page 25: ...13 USS 2 14 85 SC05 SET COLLAR 5 16 1 15 90 0528 BOLT 5 16 18 USS X 3 1 2 1 16 83 2TB80 PULLEY 2TB 8 1 17 83 Q123 BUSHING 1 7 16 Q1 1 18 90 0610 BOLT 3 8 16 USS X 1 1 4 3 19 81 B049 BELT B49 SERIAL 1001 1129 2 19 81 B050 BELT B50 SERIAL 1130 2 20 90 0830 BOLT 1 2 13 USS X 3 3 4 1 21 85 B0027 BUSHING 1 2 ID X 5 8 OD X 5 8 2 22 40 0323 ARM DOUBLE BELT IDLER 1 23 83 0042 PULLEY DBL IDLER FLAT4 X 3 8 ...

Page 26: ...PARTS Illustrated Parts 26 Use only original Ventrac replacement parts ILLUSTRATED DRAWING Rotor Shield Belt Cover Safety Decals ...

Page 27: ... 8 99 A04 1 4 20 LOCK NUT 2 9 99 SF06 3 8 16 FLANGE NUT 3 10 00 0216 DECAL WARNING MOVING PARTS 1 11 00 0219 DECAL WARNING DO NOT REACH 1 12 99 SF04 1 4 20 FLANGE NUT 4 13 95 04 1 4SAE FLAT WASHER 4 14 00 0189 DECAL VENTRAC ORBITAL 1 15 62 1019 COVER BELT 1 16 00 0218 DECAL WARNING PINCH POINT 2 17 00 0062 DECAL DANGER SHIELD MISSING 1 18 00 0123 DECAL KEEP HANDS FEET AWAY 2 19 00 0217 DECAL WARNI...

Page 28: ...s or implied including but not limited to a warranty of merchantability or fitness for a particular purpose are made by V P I in connection with the manufacture or sale of its products The engine warranty is covered by its respective engine manufacturer Please refer to the engine manufacturer s war ranty statement that is included in the owner s manual The Ventrac turf equipment including any defe...

Page 29: ...is warranty vii any claims for lost revenue lost profit or additional cost or expense incurred as a result of a claim of breach of war ranty or viii attorney s fees The remedies of buyer set forth herein are exclusive and are in lieu of all other remedies The liability of V P I whether in contract tort under any warranty or otherwise shall not extend beyond its obligation as set forth herein V P I...

Reviews: