


7 VELUX
®
VELUX
®
8
ENGLISH
ENGLISH
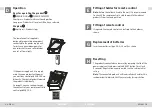
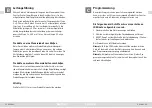
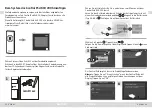
Initial set-up
Before starting the initial set-up, the product to be supplied
with power must be fitted to the window and connected to the
power supply unit.
The next three steps must be completed within
10 minutes.
1. Connect power supply unit to mains supply.
2. Remove strip from remote control supplied.
3. Press RESET button (for 1 second) on the back of the remote
control with a pointed object.
The product can now be operated.
Note:
If the 10 minutes are exceeded, disconnect from mains
supply and start all over again.
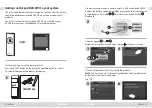
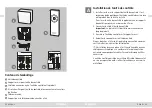
Note:
If you have more than one power supply unit, you must
finish the initial set-up for one power supply unit at a time.
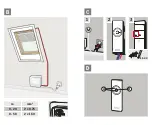
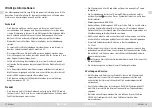
Wiring
Lead the connecting cable from the power supply unit to the
window. Wiring in roof windows is described in the instructions
for wiring supplied.
The 8 m long cable has a cable cross-section of 2 x 0.75 mm
2
.
If necessary, it can be extended by up to 12 m using the same
cable type (max total length: 20 m). If the cable must be longer
than 20 m, the cable supplied must be replaced by a cable with
a cable cross-section of 2 x 1.50 mm
2
(max total length: 50 m).
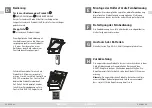
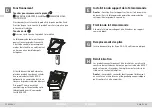
Connecting products to a power supply unit
When connecting more than one product, lead the cable to
a junction box from where the cables are distributed to the
individual products. The junction box should be placed as close
as possible to the products to be supplied with power.
Connecting products to additional power supply
units
When installing more than one power supply unit, use a
separate 2-core cable for each power supply unit. Do not use
multicore cables as the signals between the power supply units
and connected products may be disturbed.
Important
The polarity (+/-) must be kept all the way through to the
product.
B
C
Summary of Contents for Integra Kux 110
Page 1: ...VAS 453788 2015 04 VELUX INTEGRA KUX 110...
Page 3: ...B m mm2 0 20 2 x 0 75 0 50 2 x 1 50 A B 1 sec C D 1 2 3...
Page 4: ...E F 1 3 2 1 2 4 3 RESET 24V min 5 sec G H 1 1 2 2...
Page 61: ...115 116 117 118 119 120 121 122 122 122 122 KLR 200 123 124 125 113 VELUX VELUX 114...
Page 62: ...8 50 C VELUX io homecontrol 1 868 MHz 300 30 1 VELUX VELUX www velux com 115 VELUX VELUX 116...
Page 63: ...A 117 VELUX VELUX 118 24 V 1 3 2 4 6 5 1 2 3 4 5 6 1 11 2 3 4...
Page 64: ...119 VELUX VELUX 120 10 1 2 3 RESET 1 10 8 2 x 0 75 2 12 20 20 2 x 1 50 2 50 2 B C...
Page 65: ...121 VELUX VELUX 122 A B KLR 200 123 KLR 200 AAA 1 5 RESET 5 D E F G H...
Page 138: ...269 270 271 272 273 274 275 276 276 276 276 KLR 200 277 278 279 267 VELUX VELUX 268...
Page 139: ...8 50 C VELUX io homecontrol 1 868 300 30 1 o VELUX VELUX www velux com 269 VELUX VELUX 270...
Page 140: ...A 271 VELUX VELUX 272 24 V 1 3 2 4 6 5 1 2 3 4 5 6 1 11 2 3 4...
Page 141: ...273 VELUX VELUX 274 10 1 2 3 o 1 RESET 10 8 2 x 0 75 2 12 20 20 2 x 1 50 2 50 B C...
Page 142: ...275 VELUX VELUX 276 A B KLR 200 277 KLR 200 p 1 5 RESET 5 D E F G H...