


- 10 -
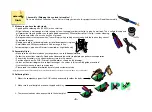
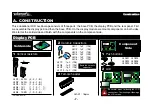
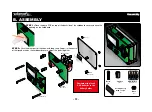
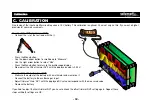
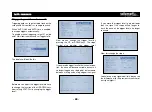
Construction
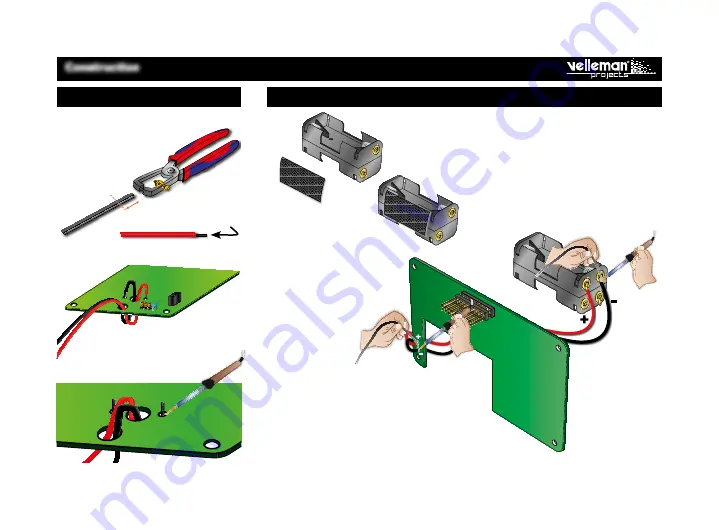
STEP 2:
Thin the wires.
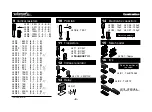
Step 4:
Solder the cables on the PCB.
STEP 1:
Strip both cables and twist the wire
ends of each cable.
STEP 3:
Mount both cables as shown in the
drawing.
+
-
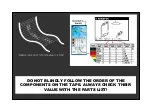
17
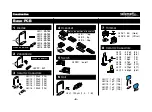
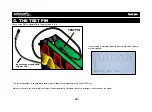
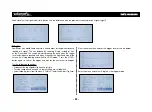
Mounting the test leads
Tip:
Start with one cable and then do
the other.
18
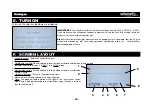
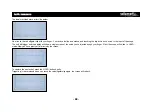
Mounting the battery holder
STEP 1:
Stick one part of the included hook-and-loop strap (hooks)
on one of the long sides of the battery holder.
STEP 2:
Connect the battery holder to the base
PCB using the included red and black mounting
wires. Mind the polarity!
•
Red = +
•
Black = -
Summary of Contents for EDU08
Page 2: ...Velleman N V Legen Heirweg 33 9890 Gavere Belgi...
Page 27: ...27 PCB BASE PCB...
Page 28: ...28 PCB DISPLAY PCB...
Page 29: ...29 PCB DISPLAY PCB...
Page 30: ...30 Diagram...


