15
(1) Make sure the tablet icon is in the task bar. If not, it means you have not installed the
driver, please install the driver and then reboot system to test again.
(2) If you can see the driver icon in the task bar, please open it and go to the “Pressure”
interface to test the pen pressure. If the pen pressure level changes when you click with
the pen, that means you have installed the driver correctly.
(3) Make sure the application that you are using supports pen pressure. Not all of the
applications support pen pressure function.
(4) Have you ever installed other tablet driver in your computer? If yes, please uninstall all
drivers and reboot. When the computer restart, install the VEIKK driver again.
(5) Click the tablet with the pen, the system preferences dialog box will pop up automatically
again.
(6) Click” Open System Preference” ---”Click the lock to make changes”---
tick “Tablet Driver Center”--Lock it to save.
(7) Open VEIKK driver from System Preference, click the tablet with the pen, if you can see
the pen pressure changes, it means you have installed the driver successfully.
(1) Make sure USB are connected correctly.
(2) Change a USB Port or a computer to have a try.
(3) After all cables are connected correctly, check whether the pen can control the cursor even
without tablet driver. If yes, disable your antivirus and keep all drawing softwares closed,
then go to our website to download the latest driver and install it
5. My tablets can not use the pen pressure.
6. The pen can not control the cursor.
Windows:
Run ‘Control panel --- Run ‘program’--- choose‘VKTabletDriver’--- follow the unload tips until
unloading is finished.
Mac:
(1) Open‘Finder’---‘Application’---‘Pen tablet Setting’---‘Uninstall Pen Tablet Driver’
If the first method do not uninstall the driver completely, please
(2) Open‘Finder’---‘Application’---‘Pen tablet Setting’ please delete the file directly.
7. How to uninstall driver?
Summary of Contents for VK640
Page 1: ...User Manual VK640 Graphic Pen Tablet BATTERY FREE PEN TABLET www veikk com...
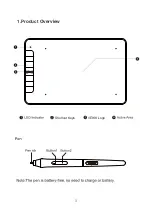
Page 6: ...1 Product Overview 1 Shortcut Keys VEIKK Logo...
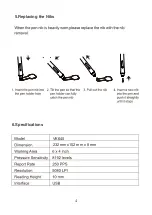
Page 9: ...4 5 Replacing the Nibs 6 Specifications VK640 232 mm x152 mm x 8 mm...
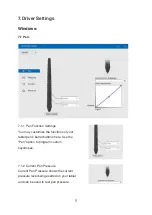
Page 14: ...9 7 2 2 Working Area All Area the entire active area of the tablet This is the default setting...
Page 22: ......

