


Chapter 2 - Configuring the IP Address
2 - 6
MPA Installation Guide
Document No. CO 402227
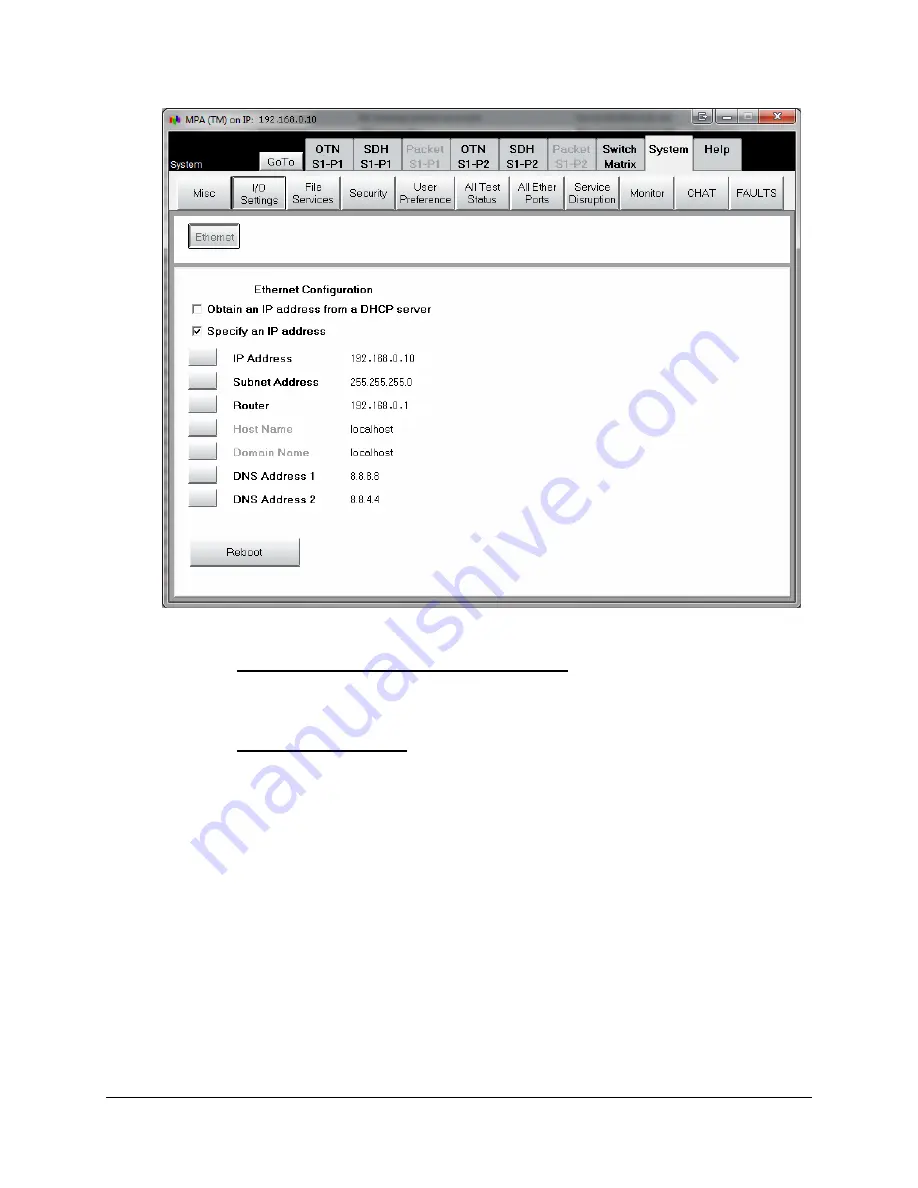
Figure 2-3:
System tab’s I/O Settings screen
4.
Select the
Obtain an IP Address from a DHCP server
option
for
a
DHCP IP Address
.
Note
: Verify that an Ethernet cable linked to a DCHP server or router is connected the
SCM’s RJ-45 LAN management port before setting the IP Address to DHCP.
5.
Select
the
Specify an IP address
option for a
Static IP Address
.
a.
Enter the new
IP Address
,
Subnet Address
, and
Router/Gateway Address
.
b.
By default,
DNS Address 1
(Primary DNS) is configured for
8.8.8.8
, and
DNS
Address 2
(Secondary DNS) is configured for
8.8.4.4
. These are public DNS
addresses established by Google, and only need to be modified if being replacing
with a network-specific addresses.
6.
Reboot the unit using the
Reboot
button for the changes to take affect.
7.
The current Remote GUI client application should close after pressing Reboot.
a.
If the Remote GUI client does not close automatically, then manually close the
Remote GUI client.
8.
Wait for 4 to 5 minutes for the MPA system to completely reboot, and verify that the new
IP Address is displayed on the OLED screen, and that you can remotely connect to the
new IP Address.


