background image

110

Basic operation

Softkeys

Press one of the softkeys to activate

the favourite or function screen button

displayed immediately above the

respective softkey.

Note

In subsequent chapters the

operating steps for selecting and

activating a screen button or menu

item will be described as "...select

the...screen button..." or "...select

the...menu item...".

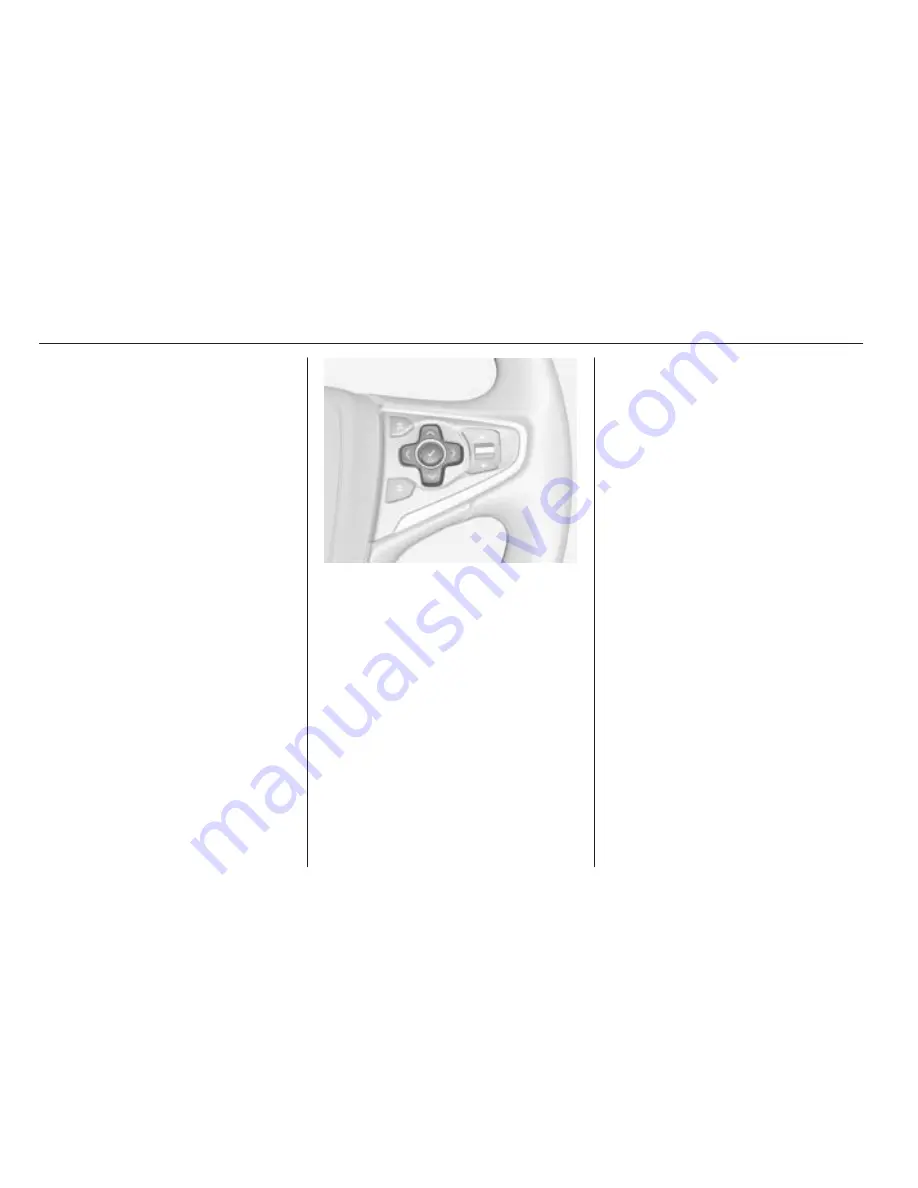
Steering wheel controls

For an overview of all relevant

steering wheel controls, refer to

"Control elements overview" 

3

 104.

Five-way controller

The five-way controller is used to

operate the menus in the Driver

Information Centre.

The five-way controller consists of

four directional buttons and a

confirmation button (

9

).

i

 (back) button

In the submenus on the Driver

Information Centre, the 

i

 button

serves as back button.
Press the 

i

 button to return to the next

higher menu level.
Selecting an application

To display the menu for application

selection, press the 

i

 button.

Repeatedly press the 

P

 or 

Q

buttons to scroll to a menu item.

Press the 

9

 button to confirm your

selection.
The respective application is

activated.
Selecting an application-specific

function

To display the main menu of the

application currently active, press the

j

 button.

Repeatedly press the 

P

 or 

Q

buttons to select a menu item.
Press the 

9

 button to confirm your

selection.
A submenu with further options is

displayed or the selected function is

activated.

Note

If you are requested to confirm a

function or message in the Driver

Information Centre by pressing SEL

(Select), press the 

9

 button.

Tone settings

In the tone settings menu, the tone

characteristics can be set. If adjusted

in one menu, they are globally set

Summary of Contents for Insignia 2014 R300 Color

Page 1: ...0 1 Infotainment Manual Model Year 2014 5 Edition January 2014 KTA 2677 11 VX en VAUXHALL Insignia Infotainment Manual Model Year 2014 5 Edition January 2014 KTA 2677 11 VX en...

Page 2: ...Introduction 102 Basic operation 109 Radio 115 CD Player 121 External devices 124 Phone 128 Index 138 R300 Color R400 Color...

Page 3: ...nment system is equipped with a Phone portal that allows comfortable and safe use of your mobile phone in the vehicle Optionally the Infotainment system can be operated using the control panel or the...

Page 4: ...e into Radio reception Radio reception may be disrupted by static noise distortion or loss of reception due to changes in distance from the transmitter multi path reception due to reflection shadowing...

Page 5: ...104 Introduction Control elements overview Control panel...

Page 6: ...ton Press display Home screen 109 8 BACK button Menu one level back 109 Input delete last character or entire entry 109 9 v button Radio short press skip to next station press and hold seek up 115 Ext...

Page 7: ...109 Press buttons operate menus on the Driver Information Centre see images below i button display menu for application selection return to next higher menu level j button display application specific...

Page 8: ...ce becomes active Press and hold the X knob again to turn the system off Automatic switch off If the Infotainment system is switched on using the X button while the ignition is switched off it switche...

Page 9: ...cting and operating external devices 3 124 Phone Press the button to display the Home screen Select the PHONE screen button to establish a Bluetooth connection between the Infotainment system and a mo...

Page 10: ...ed item is highlighted Press To activate a selected screen button or menu item To confirm a changed settings value To switch to a different settings option To display the application specific submenu...

Page 11: ...on Centre the i button serves as back button Press the i button to return to the next higher menu level Selecting an application To display the menu for application selection press the i button Repeat...

Page 12: ...Balance Turn the MENU knob to adjust the setting as desired Press the MENU knob to confirm the setting Selecting a tone style Scroll through the list and press the MENU knob to activate EQ Equaliser...

Page 13: ...elect the AUTO SET screen button at the bottom of the screen Activate either On RDS or Off Manual If Off Manual is selected adjust hours and minutes Repeatedly select the 12 24 HR screen button at the...

Page 14: ...ll Authorised Repairer Display Press the button and then select the SETTINGS icon Scroll through the list and select the Display menu item Select the Turn Display Off menu item to turn off the display...

Page 15: ...gs e g tone settings A warning message is displayed Select the Restore screen button The settings are reset Software Information Press the button and select the SETTINGS icon Scroll through the list a...

Page 16: ...nds Station search Automatic station search Press the t or v buttons to play the previous or next station Manual station search Press and hold the t or v buttons Release the respective button when the...

Page 17: ...m is only available for the FM and the DAB wavebands Press the MENU knob to display the respective waveband menu and select the Categories list item A list of programme type categories currently avail...

Page 18: ...e Select the desired favourite screen button The respective radio station is played Note The active favourite is highlighted Using the right hand steering wheel control Repeatedly press the k or l but...

Page 19: ...nfotainment system tunes in to RDS stations only The Infotainment system always tunes into the best receivable broadcasting frequency of the set station by means of AF alternative frequency Depending...

Page 20: ...ncy ensemble Besides high quality digital audio services DAB is also able to transmit programme associated data and a multitude of other data services including travel and traffic information As long...

Page 21: ...if the DAB waveband is activated DAB to DAB Linking If this function is activated the device switches over to the same service programme on another DAB ensemble frequency if available when the DAB sig...

Page 22: ...MP3 and WMA files written in any format other than listed above may not play correctly and their file names and folder names may not be displayed correctly Audio CDs with copy protection which are not...

Page 23: ...age Starting CD playback Push an audio or MP3 CD with the labelled side upwards into the CD slot until it is pulled in Repeatedly press the MEDIA button to activate the CD function Removing a CD Press...

Page 24: ...ay the CD menu and then select the Browse CD Media list item The track list is displayed Note The track currently playing is highlighted Scroll through the list and select the desired list item Note F...

Page 25: ...io signal of the auxiliary device is transmitted via the speakers of the Infotainment system The volume and the tone settings can be adjusted via the Infotainment system All other control functions ne...

Page 26: ...sconnect the USB device or iPod select another function and then remove the USB storage device Caution Avoid disconnecting the device during playback This may damage the device or the Infotainment sys...

Page 27: ...em Connecting a device Find a detailed description on the Bluetooth connection 3 129 Bluetooth audio function The Infotainment system can play music files contained in Bluetooth devices like iPod or S...

Page 28: ...song playback e g album artist genre To deactivate the shuffle function select the 9 screen button again Note If the shuffle function is activated 9 is highlighted in red Browse function Note The brow...

Page 29: ...and network provider You will find further information on this in the operating instructions for your mobile phone or you can enquire about them with your network provider Important information for o...

Page 30: ...then select the SETTINGS icon Select Bluetooth to display the respective submenu Pairing a device Important information Up to five devices can be paired to the system Only one paired device can be co...

Page 31: ...g via the Phone application 1 Press the button and then select the PHONE icon The phone main menu is displayed 2 Select the Manage Phones list item to display the device list 3 Select the PAIR screen...

Page 32: ...eld of the device list Deleting a device 1 Press the button and then select the SETTINGS icon Select Bluetooth to display the respective submenu 2 Select Device Management to display the device list 3...

Page 33: ...as a connection via Bluetooth has been set up between your mobile phone and the Infotainment system you can operate many functions of your mobile phone via the Infotainment system Note Not every mobi...

Page 34: ...list and select the desired contact entry The contact details view is displayed Select one of the phone numbers stored under that contact The number is dialled Calls lists Press the button and then se...

Page 35: ...ct the END screen button to end the call Deactivating the microphone Select the MUTE screen button to temporarily deactivate the microphone The screen button changes to UNMUTE To reactivate the microp...

Page 36: ...ation instructions and the operating guidelines of the mobile phone and handsfree manufacturer must be observed when installing and operating a mobile telephone Failure to do so could invalidate the v...

Page 37: ...pment and mobile telephones which fail to meet above mentioned mobile telephone standards is only permitted using an antenna located outside of the vehicle Caution Mobile telephones and radio equipmen...

Page 38: ...Phone 137...

Page 39: ...r 109 Instrument panel 109 Bass 110 Bluetooth connection 129 Bluetooth music 124 C Category list 115 CD player 121 Clock display 112 Control elements Infotainment system 104 Steering wheel 104 Control...

Page 40: ...information 128 Handsfree mode 132 Phone book 132 Recent calls 132 Ringtone 132 Phone book 132 Phone call Initiating 132 Rejecting 132 Taking 132 Playing audio 126 R Radio Category list 115 DAB 119 DA...

Page 41: ...s 110 TP 118 Traffic Programme 118 Treble 110 U Usage 107 115 122 AUX 126 Bluetooth music 126 CD 122 Infotainment system 107 Menu 109 Phone 132 SD card 126 USB 126 USB 124 V Valet mode Locking 112 Unl...

Reviews: