


Biometric Scanner Overview:
(Biometric Model Only)
The safe is capable of storing fingerprint data for up to 20 unique authorized users. A user consists
of 4 scans of the same finger during registration. Once a user’s fingerprint data is stored in the safe
and encrypted, it cannot be copied or stolen. The 1st and 2nd fingerprints will be recognized as
administrative fingerprints and are required to authorize enrolling additional users (3-20).
Usage Tip!
The scanner is waterproof just
like the LifePod
®
. However, if the scanner is
wet it needs to be dried off before a finger is
scanned.
Helpful Programming Tips!
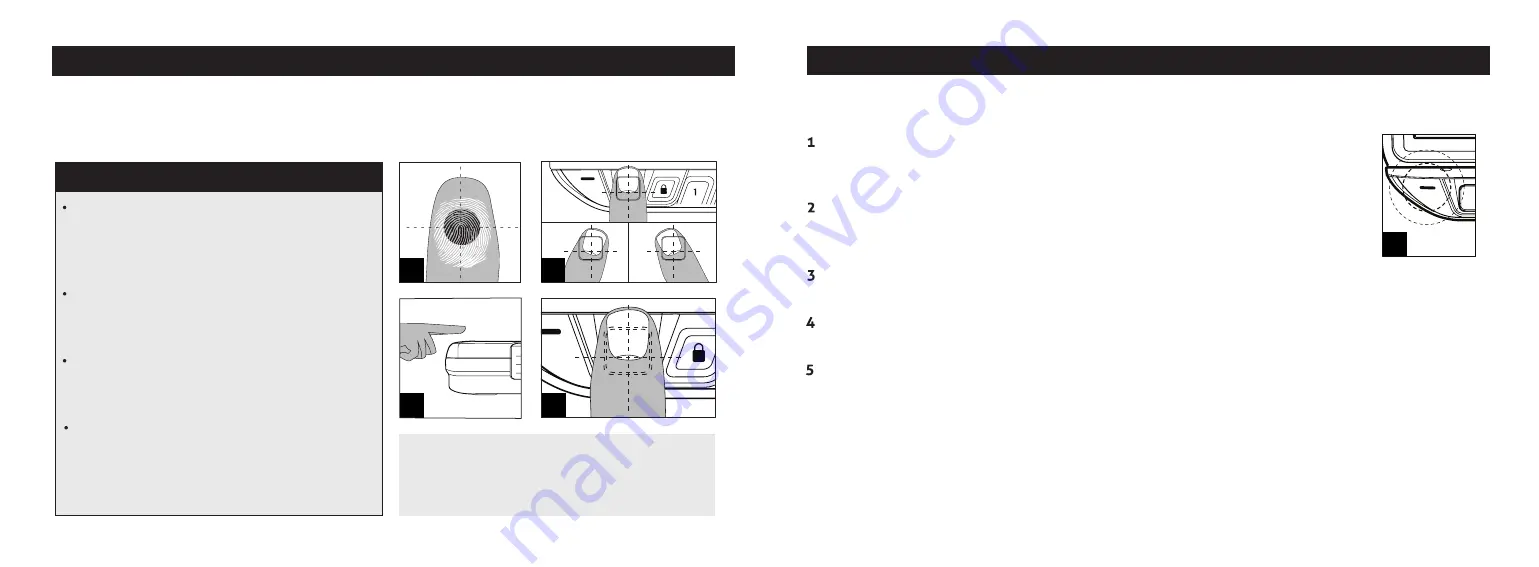
Place the core of the fingerprint flat
(Fig D +
E + F + G) over the center of the scanner (this
allows the scanner to read where most of the
fingerprint detail is located) see (Fig D).
Rotate your finger slightly between
registration scans to store print variations for
increased accuracy (Fig E).
Excessive moisture, lotions, or dirt will affect
your fingerprint and may cause inaccurate
sensor reading.
Troubleshooting!
If you are having difficulty
with your print, program the same fingerprint
4 or 5 times. You have 20 slots available
for programming and you can also try your
thumb as it has more surface area to read.
F
G
D
Biometric Scanner Programming:
Admin Print 1 and 2
The 1st and 2nd fingerprints will be recognized as administrative fingerprints and are required to
authorize enrolling additional users (3-20). To program additional users refer to the next page.
H
11 Vaultek
®
12 Vaultek
®
E
Registration Scan 2: With the 2 key now blinking, place same finger on the scanner at a slightly
different angle and remove it when the status LED turns GREEN and you hear a confirmation beep.
Registration Scan 3: With the 3 key now blinking, place same finger on the scanner at a slightly
different angle and remove it when the status LED turns GREEN and you hear a confirmation beep.
Registration Scan 4: With the 4 key now blinking, place same finger on the scanner at a slightly
different angle and remove it when the status LED turns GREEN and you hear a confirmation beep.
This completes enrollment for the first admin print.
Tip!
Repeat steps 1-5 to enroll the 2nd admin print. To program prints (3-20) refer to page 13.
Tip!
Simply scan an authorized fingerprint to unlock LifePod
®
. No need to wake up LifePod
®
.
Troubleshooting!
Reference the troubleshooting tip on page 11.
First open the unit and tap the lock pad to wake the unit up (Fig A page 10.
When the keypad lights up, your LifePod
®
is awake and ready for programming.
Programming each fingerprint takes 4 registration scans.
Registration Scan 1: While LifePod
®
is awake, quickly tap the program button (Fig B
on page 10) to get the 1 key blinking. Place your finger on the scanner and remove
it when the status LED (Fig H) turns GREEN and you hear a confirmation beep.


