background image

Aluminum Mobile Rack 


          3-7

10. Replace the computer’s cover and reconnect the power and other external

cabling.

7. Position the docking case so its mounting holes align with the drive bay’s

mounting holes. Secure with the supplied mounting screws (two/four on

each side.)

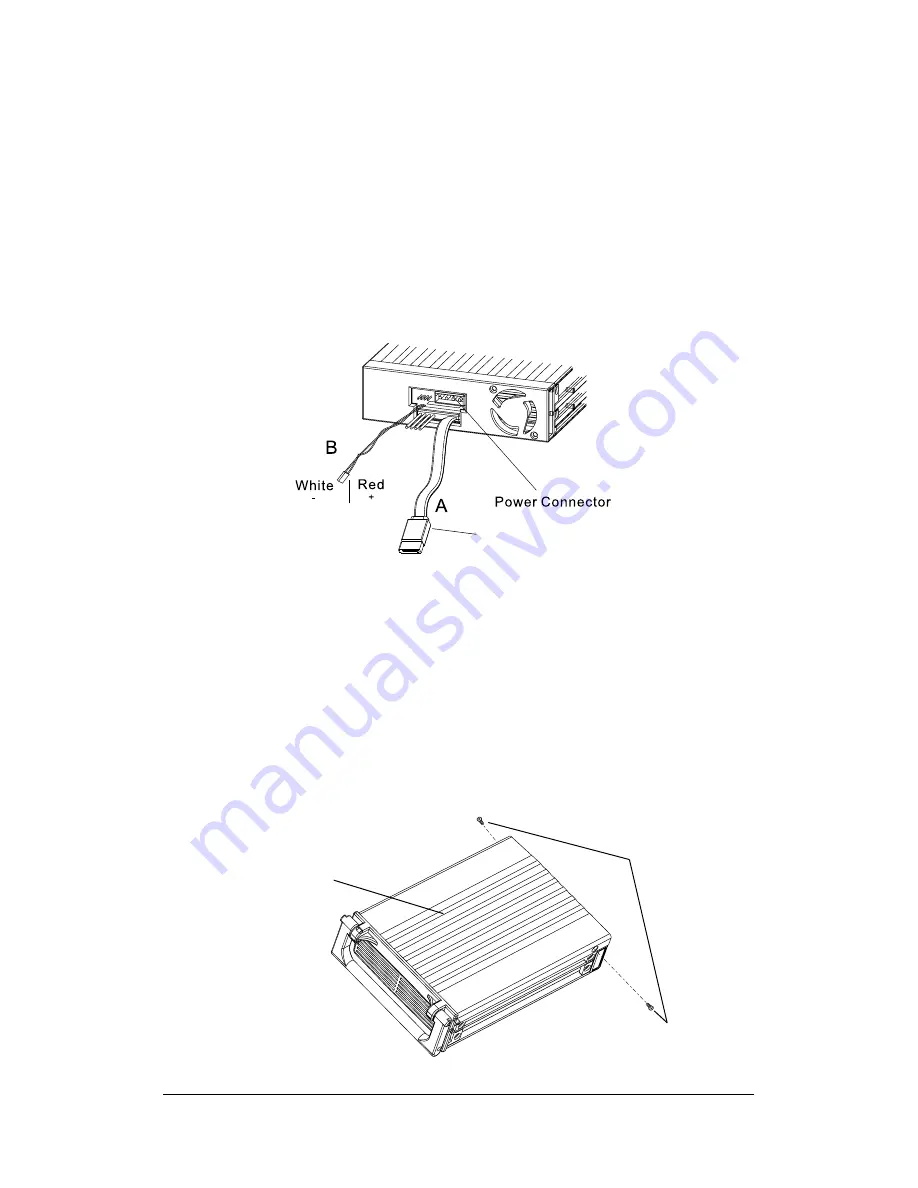
8. Attach the red SATA cable from the back of the unit to an available SATA port 

on the system board or anySATA controller card.  Connect the red and white

HDD Access/Activity signal cable to the HDD signal pins on your system board.

9. Connect an available 4-pin power cable from the system’s power supply to

the 4-pin connector on the back of the docking case. The power connector is

‘D’ shaped to ensure proper orientation when making the connection.

Docking Module Data Cable and Power Connectors

Mounting a Drive in the Drive Case

Proceed with the following steps to install a 3.5-inch drive device in the Mobile Rack

drive case. 
1.Remove the Mobile Rack drive case cover by removing the two mounting screws,

then sliding the cover towards the back of the unit.

Remove the Drive Case Cover

Slide Cover Off

Mounting

Screws (x2)

HDD Access

Serial ATA (SATA) cable

Summary of Contents for MRK-300ST-BK

Page 1: ...Aluminum Mobile Rack 3 1 Model MRK 300ST BK Serial ATA to Serial ATA...

Page 2: ...s 3 3 Unpacking Your Mobile Rack 3 4 IDE Basics 3 4 3 2 Hardware Installation 3 5 Mobile Rack Components 3 5 Installing the Mobile Rack Docking Case 3 6 Mounting a Drive in the Drive Case 3 7 3 3 Usin...

Page 3: ...the EZ Swap 2 SATA is also hot swappable Easy convenient and reliable the EZ Swap 2 SATA is the ideal SATA mobile rack EZ Swap 2 SATA Features Aluminum case design aides in heat dissipation Built in f...

Page 4: ...d drives optical drives CD DVD Rom drives and other computer devices Because it uses serial technology information is transferred in a single stream rather than along parallel paths SATA thereby elimi...

Page 5: ...r installing the Mobile Rack are given since the design of computer cases varies Refer to your computer s manual whenever in doubt Mobile Rack Components The Mobile Rack is comprised of two components...

Page 6: ...ectricity build up in your body by touching a grounded metal surface such as the computer case if plugged in During installation procedures avoid any contact with internal parts 2 Unplug the power cor...

Page 7: ...DD signal pins on your system board 9 Connect an available 4 pin power cable from the system s power supply to the 4 pin connector on the back of the docking case The power connector is D shaped to en...

Page 8: ...back on and secure with the two mounting screws 2 Carefully position the drive inside the drive case 3 Secure the drive in place using the supplied mounting screws Use the mounting holes on the sides...

Page 9: ...light delay The installed Mobile Rack device is ready to use To remove the Mobile Rack drive case 1 Insert the key and turn it left to unlock Note that the power LED on the Mobile Rack should now be O...

Page 10: ...s still being written to the hard drive NEVER REMOVE THE EZ SWAP 2 CARTRIDGE WHILE DATA IS BEING WRITTEN TO THE HARD DRIVE Doing may cause the hard drive to become corrupt Make sure all applications b...

Reviews: