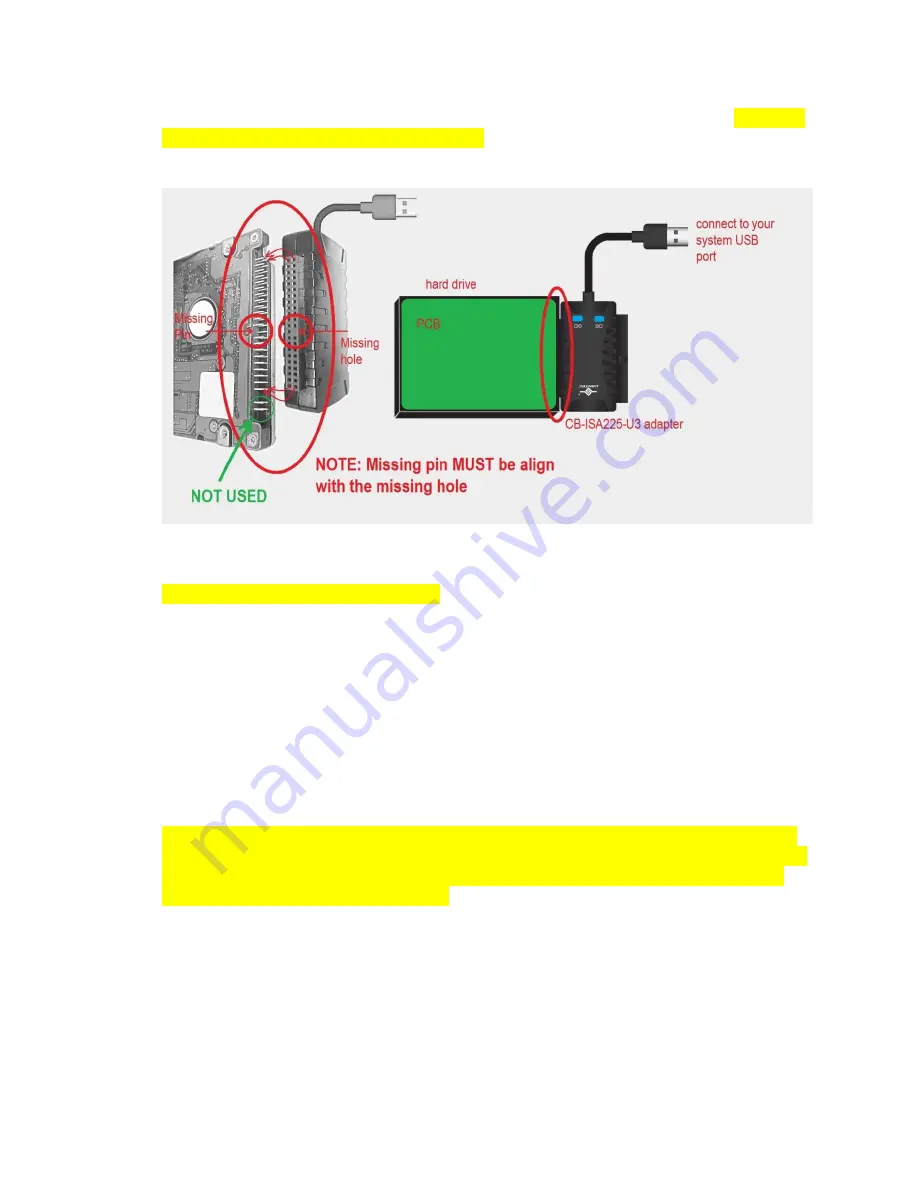
to avoid wrong connection. On the drive side, there are 44 pins with one missing pin. Make sure
the plugged hole is aligned with the missing pin. If you are still not sure, please write or call us
for assistance.
4.
Follow the picture and make sure the hard drive is secure and properly connected to the device.
Do not connect the USB to the computer
.
5.
Since 2.5” IDE drive is using power from the USB port, you do not need to connect the power
adapter, but please use the USB port that can provide the most power to the drive.
A USB 3.0 port should have sufficient power for your drive, but if you are using a USB 2.0 port, a
good way is to connect to a powered USB HUB if you have one. If not connect to the USB on the
back of a desktop or tower system (avoid the front USB port).
6.
Now connect the USB to the computer, once connected to the USB port the drive should spin up
and the Blue LED (2) on the adapter will be ON.
7.
Wait while the computer detects the device and automatically install USB drivers. (Sometime
older drives may take as long as 45 seconds to a whole minute to be detected)
8.
Once the drivers are installed, the computer should see the hard drive in My Computers. (for
Mac, see a USB icon of the drive on the desktop)
9.
If drive did not show on explorer or My Computer, look into the Disk Management to see if the
physical drive is there. (For Mac, if the drive does not show on the desktop with a USB icon, look
into the Disk Utility to see if it is there). If the physical disk shows in disk management or disk
utility, this adapter kit is working correctly, it may be your drive’s file system that was corrupted
as a result you cannot read the drive in Windows Explorer.


