


I N S T A L L A T I O N
©Vantage, 8/11/2016 / IS-00700-B
Equinox 73-II LCD In-Wall Touchscreen – MODEL: EQ73TB-TI-II
page 2 of 4
System Requirements
Equinox 73-II is compatible with InFusion Design Center
version 3.5 software or higher. For new projects it is
recommended that firmware and software be kept to the most
current release.
Installation
Installation of Vantage products should be performed or
supervised by a
Certified Vantage Installer.
Installation kits for
Equinox 73-II touchscreens are compatible with global
electrical and installation standards. For new construction or
retrofit installations. Please see the additional installation
sheets* referenced below for Equinox 73-II installation
preparation.
See Standard, Easy Retrofit, and TPT650 retrofit, respectively.
Click on the install method wanted:
Equinox 73 LCD Standard_EQ73ST-INSTALL_install_IS-0545.pdf
Equinox 73 LCD Easy-Retrofit_EQ73ER-INSTALL_install_IS-0697.pdf
Equinox 73 LCD Retrofit_EQ73RT-INSTALL_install_IS-0571.pdf
1.
Connect Equinox 73-II to Ethernet PoE and/or other wiring
connection options used in the installation.
2.
Insert the Equinox 73-II into the mounting ring from the
mounting option selected.
a.
Make sure the Equinox 73-II’s four
Spring Clips
lock to
mounting option selected,
Standard, Easy-Retrofit,
or
Retrofit
install options.
Configuration
1.
Highlight the station in Design Center and click Configure
Stations.
2.
Station displays, configure mode / touch to configure.
3.
When configured station goes back to ready until
programmed.
-OR-
4.
The station may also be configured by typing the serial
number in the project file, using this method the station
will automatically be configured when the system is
programmed.
Device & Info Settings
Device Settings are accessed through the
Profile
pages.
NOTE:
Changes on the device page are specific to the device and are not part of any profile setting
.
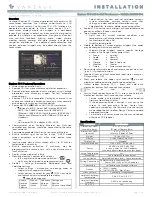
1.
Press the profile button, (
my home,
upper right, in this example)
2.
Press the
settings
button
3.
The first time
settings
is pressed the screen will go to the dashboard edit
screen.
4.
Pressing the upper left area on the dashboard page,
opens
the
settings
thumbnail selections at left.
5.
Select the
device
option from the four choices.
NOTE: The other pages are covered in the
Equinox Widgets_install.pdf
installation sheet and in
Design Center Help.
The first time the controller is programmed, the Equinox 73-II device should use
the brightness settings specified in the
Equinox Widget Styles
object in Design
Center. Subsequent controller program downloads depend on whether or not
the
Keep DC Profile Changes
and/or
Keep Controller Profile Changes
check
boxes are checked in Design Center.
When
Keep Controller Profile Changes
is checked, it will retain the brightness
settings on the device.
When
Keep DC Profile Changes
is checked, it will use the brightness settings
specified in the
Equinox Widget Styles
object in Design Center.
When both
Keep DC Profile Changes
and
Keep Controller Profile Changes
check boxes are checked the two styles will be merged unless a conflict
occurs. Conflicts may then be corrected before programming continues.
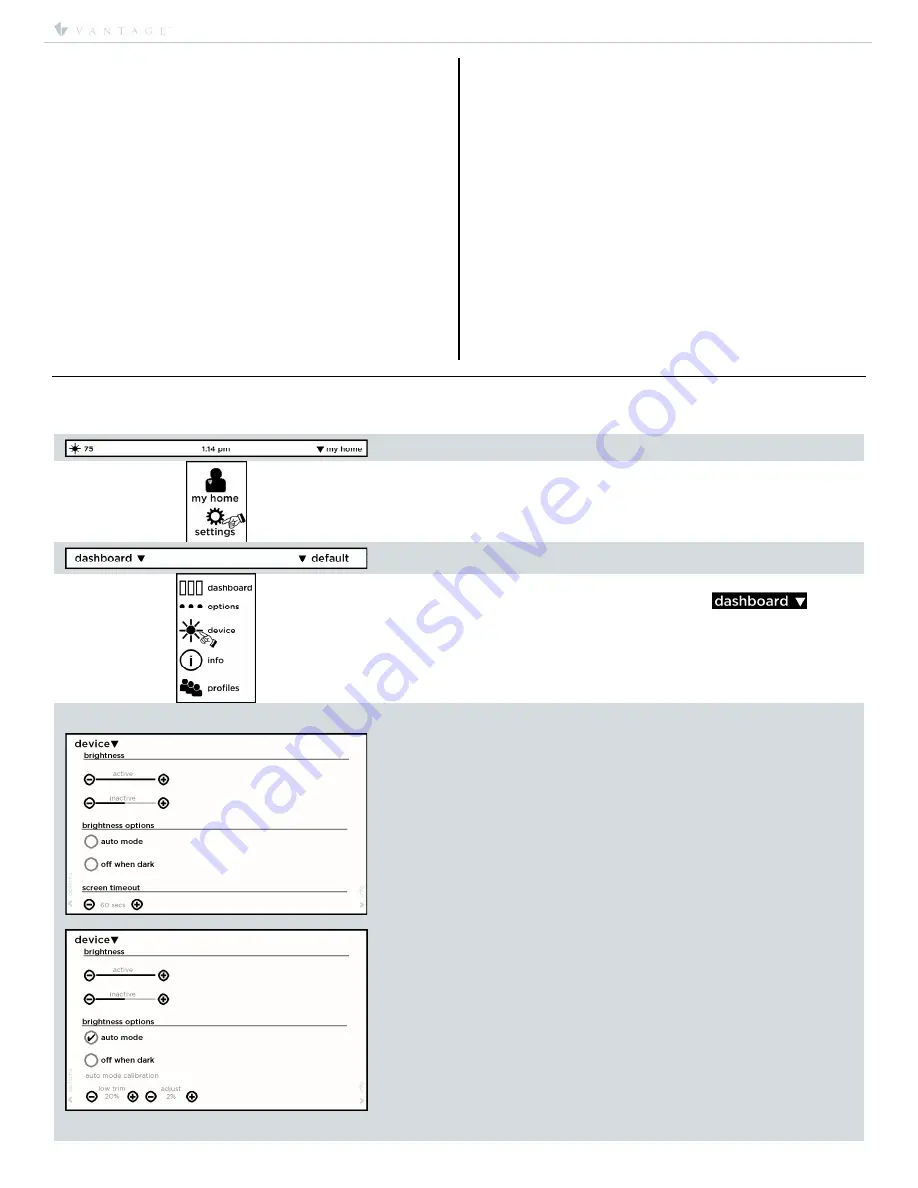
6.
The
device
screens are accessed by swiping up or down to see all of the
screen choices. The first
device
screen allows settings for:
brightness
– brightness level for
active
and
inactive
modes
brightness Options
auto mode*
– uses ambient light to adjust screen brightness
off when dark
– when ambient light is very low the screen illumination turns
off
screen timeout
– adjusts from 1 to 10 minutes (via seconds)
*auto
mode:
auto mode calibration
– these options only appear when the
auto mode
box is
checked.
low trim
– (range 1%-25%) If screen is too dim when used in a dark room,
increase the
low trim
setting and conversely when screen is too bright.
Adjust
– (range, -5 to +5) If screen is too dim when used in a moderately lit
room, increase the
adjust
setting and conversely when screen is too bright.
NOTE: Adjustments take a few seconds for the screen brightness to change. This
delay action is deliberate to avoid sudden changes in screen brightness.


