background image

18

One-Year 

Warranty

There are no express warranties except as listed above. This 

warranty gives you specific legal rights and you may have 

other rights which vary from state to state.

Please do not return this product to the retailer. Contact us 

directly for warranty service.

This Vanity Planet product is warranted to be free of 
manufacturer’s defects in materials or workmanship for one 
year from the date of purchase. Damage or wear resulting from 
an accident, misuse, abuse, commercial use, or unauthorized 
adjustment and/or repair are not covered under this warranty.

Should this product require warranty service (or replacement at 
our discretion), please contact client services. Proof of purchase 
is required. Products returned without prior authorization from 
Vanity Planet will not be accepted and the sender will not 
receive a refund or replacement.

Visit vanityplanet.com/warranty 
to register your product and 
activate your warranty.

va n i ty p la ne t . com 
in f o @ v a n i t yp la ne t . co m 
1.8 8 8 . 870 . 2 1 3 2

Summary of Contents for Essia

Page 1: ...Essia ULTRASONIC LIFTING EXFOLIATING WAND USER GUIDE ...

Page 2: ...Includes Your Essia Instructions Upkeep Safety FAQ Specs Warranty Contents 1 2 3 12 14 16 17 18 ...

Page 3: ...1 Essia Ultrasonic Lifting and Exfoliating Wand Charging Base AC Adapter User Guide ...

Page 4: ...2 Your Essia Power Mode Button Cap Exfoliate Mode Moisturize Mode Lift Mode Charging Light Side Panel s ...

Page 5: ...g Essia wash your face making sure to remove makeup and surface layer debris Then apply your favorite moisturizer serum or water To turn Essia on press and hold the Power Button Then continue to press the button until you ve selected the mode you would like to use PREP MODE SELECTION ...

Page 6: ...of the wand head against your moisturized or damp skin at a 30 degree angle and begin slowly moving the wand forward You ll notice the ultrasonic waves and wand head loosening blackheads and clearing away dead skin and dirt Exfoliate Mode ...

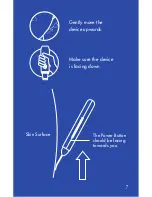
Page 7: ...The Power Button should be facing away from you Skin Surface ...

Page 8: ...n press the front of the wand head to your skin at a 30 degree angle slowly moving the wand backwards Make sure to hold both side panels when using this mode it completes the anion circuit and allows the microcurrent to better penetrate your skin stimulating your cells and enhancing the absorption of your skincare product Moisturize Mode ...

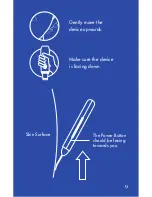
Page 9: ...7 Gently move the device upwards Make sure the device is facing down The Power Button should be facing towards you Skin Surface ...

Page 10: ...he wand head to your skin at a 30 degree angle slowly moving the wand upwards Make sure to hold both side panels to complete the EMS circuit allowing the microcurrent to penetrate your skin stimulating your muscles and helping to reduce the appearance of fine lines and wrinkles Lift Mode ...

Page 11: ...9 Gently move the device upwards Make sure the device is facing down The Power Button should be facing towards you Skin Surface ...

Page 12: ...liate Mode to Moisturize Mode to Lift Mode for a thorough regimen or pick and choose modes based on your needs it s completely up to you We recommend following the sequence below Using Essia Forehead Cheeks Chin areas around mouth Nose areas around nose ...

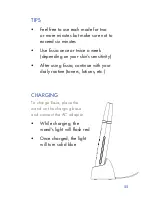
Page 13: ... Use Essia once or twice a week depending on your skin s sensitivity After using Essia continue with your daily routine toners lotions etc To charge Essia place the wand on the charging base and connect the AC adapter While charging the wand s light will flash red Once charged the light will turn solid blue ...

Page 14: ...ard to remove try using a damp cloth STORAGE Make sure to replace the cap when you re done using the wand Store the wand and accessories in a cool dry place Make sure to turn off the wand before storing it Try not to excessively squeeze or put pressure on the wand Make sure to disconnect the adapter before storing the wand ...

Page 15: ...13 Say hello to true beauty ...

Page 16: ...eze tie clamp or heat the power cord Don t try to charge the wand if the power cord or power connector is broken or if wires are exposed Avoid exposing the wand power cord or charging base to water and don t use the wand if your hands are wet Don t use the device if you have implanted medical devices i e pacemakers etc If you have sensitive skin are taking a dermatologist related medication or are...

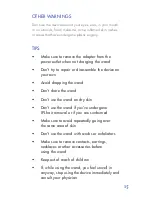
Page 17: ...on your own Avoid dropping the wand Don t share the wand Don t use the wand on dry skin Don t use the wand if you ve undergone IPL hair removal or if you are sunburned Make sure to avoid repeatedly going over the same area of skin Don t use the wand with scrubs or exfoliators Make sure to remove contacts earrings necklaces or other accessories before using the wand Keep out of reach of children If...

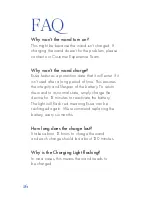
Page 18: ... time This ensures the integrity and lifespan of the battery To return the wand to its normal state simply charge the device for 15 minutes to reactivate the battery The light will flash red meaning Essia can be recharged again We recommend replacing the battery every six months How long does the charge last It takes about 12 hours to charge the wand and each charge should last about 120 minutes W...

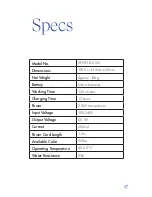
Page 19: ...Weight Approx 106g Battery Lithium batteries Working Time 120 minutes Charging Time 12 hours Power 2 3W at maximum Input Voltage 100 240V Output Voltage DC 9V Current 500mA Power Cord Length 1 2m Available Color White Operating Temperature 40 50 C Water Resistance IPX5 ...

Page 20: ... from the date of purchase Damage or wear resulting from an accident misuse abuse commercial use or unauthorized adjustment and or repair are not covered under this warranty Should this product require warranty service or replacement at our discretion please contact client services Proof of purchase is required Products returned without prior authorization from Vanity Planet will not be accepted a...

Reviews: