background image

www.vanco1.com

800.626.6445

7

OPERATION AND CONTROL

The product has 4 HDMI inputs, and 4 HDMI/UTP outputs that are fully HDMI and HDCP compliant. 4 HDMI/
UTP outputs can select any one of 4 HDMI different inputs, or same HDMI inputs. The user can control 4x4 
matrix by front panel buttons, IR remote, RS232 or local 100M LAN Ethernet port.in clear view to receive an 
infrared signal from the remote handset used to control the display outputs.

Front Panel Control  

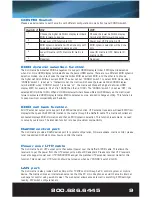
“OUTPUT A-D” buttons can select one of 4 HDMI inputs to HDMI/UTP outputs A to D. 

Local IR Remote Control

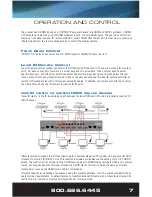
Local IR remote control window can control the HDMI routing of the matrix. There are 4 groups for 4 output 
ports. For each output port, there are 4 number keys and two arrow keys. Press number keys to select 
specific input port, and left arrow button can select the previous input and right arrow can select the next 
input. Except of front panel local IR receiver window, the user can also use this local IR remote controller at 
remote UTP extender side with 4 IR receiver extension cables. In addition, the remote controller can control 
the matrix through any one IR receiver in matrix’s IR IN ports.

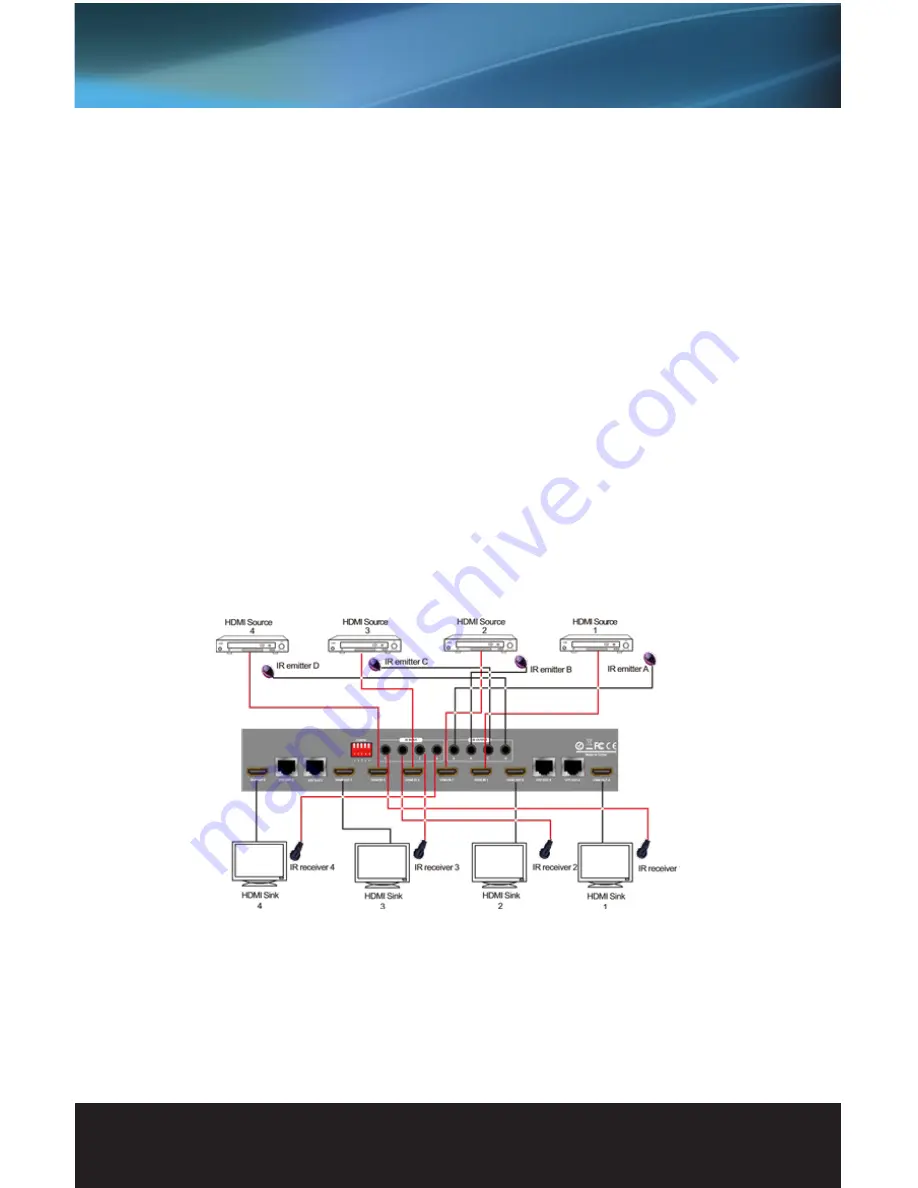
4x4 IR matrix to control HDMI source devices

“Local IR matrix” is the IR transmission path between the local IR IN and OUT which is located in matrix’s IR 
IN/OUT socket. 

“Remote IR matrix” means the IR transmission path is between Remote UTP receiver unit and Local IR which 
is located in matrix’s IR IN/OUT ports. This function is enabled or disabled via the setting of pin 4 in CONFIG 
switch. The matrix can not only switch the HDMI source signal to HDMI display terminals which are in remote 
rooms, but also can pass the IR signal through the 4x4 IR matrix. IR matrix shares the same control and 
transmission route as the HDMI matrix and is bi-directional. 
IR matrix features and settings are accessed using the provided software. It can be customized according to 
customer real requirements, to default remote to local bidirectional IR matrix mode, local single direction IR 
matrix mode, or remote to local hybrid single direction IR matrix mode.

Summary of Contents for EVMX44QI

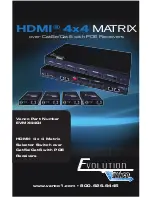
Page 1: ...Vanco Part Number EVMX44QI HDMI 4 x 4 Matrix Selector Switch over Cat5e Cat6 with POE Receivers www vanco1 com 800 626 6445 HDMI 4x4 MA TRIX over Cat5e Cat6 with POE Receivers ...

Page 2: ...cularly at the plugs 9 Use unit only with accessories specified by the manufacturer 10 Refer all servicing to qualified personnel CAUTION HDMI is a very complex technology requiring continuous authentication of the signal and the same video resolution and audio settings on all electronic equipment in the system When there are multiple sources and displays the video resolution and audio setting on ...

Page 3: ...buted simultaneously to up to 4 displays 4 additional HDMI outputs for flexibility or mirroring capability allows for connection of up to 8 displays or the ability to create a larger distribution system by cascading or daisy chaining Cat5e Cat6 extender outputs support POE No power supply is needed on the receiver end Transmission Range Extends 1080p 60 Hz up to 164ft 50m over Cat5e Cat6 Automatic...

Page 4: ...lts p p TTL HDMI Input output audio formats PCM Dolby AC3 DTS 7 1 DSD Maximum 8 channels HDMI input output cable distance 15m 26 AWG and can be extended with amplifier in most cases Extender output resolution and distance 1080P 170ft 50meters CAT5e 230ft 70meters CAT6 720P 1080i 230ft 70meters CAT5e 300ft 90meters CAT6 Indicators Power Green Extender output connected status Yellow Matrix Status Ye...

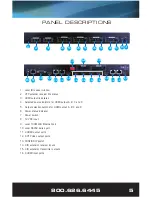
Page 5: ...I output A B C and D 6 Power status indicator 7 Power switch 8 12V DC input 9 Local 100M LAN Ethernet port 10 Local RS232 series port 11 4 HDMI output ports 12 4 UTP video output ports 13 CONFIG DIP switch 14 4 IR extension receiver inputs 15 4 IR extension transmitter outputs 16 4 HDMI input ports PANEL DESCRIPTIONS 7 1 2 3 4 5 10 4 5 4 5 4 5 6 8 9 11 11 11 11 12 12 12 12 13 14 15 16 16 16 16 ...

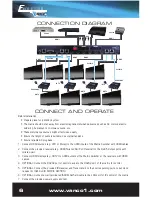
Page 6: ...C plug base 1 Connect HDMI sources e g STB or Bluray to the HDMI inputs of the Matrix Switcher with HDMI cables 2 Connect the provided receivers e g HDMI Twisted Pair PoC Receiver to the RJ 45 Output ports with twisted pair 3 Connect HDMI displays e g HDTV to HDMI outputs of the Matrix Switcher or the receivers with HDMI cables 4 OPTIONAL Connect the RS232 port of control device to the RS232 port ...

Page 7: ... local IR remote controller at remote UTP extender side with 4 IR receiver extension cables In addition the remote controller can control the matrix through any one IR receiver in matrix s IR IN ports 4x4 IR matrix to control HDMI source devices Local IR matrix is the IR transmission path between the local IR IN and OUT which is located in matrix s IR IN OUT socket Remote IR matrix means the IR tr...

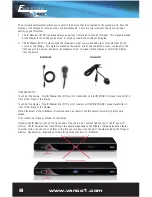
Page 8: ...aced at the display to control the display from the source IR BLASTER TX To control the source Plug IR Blaster into IR TX port of transmitter unit EVEX2006 TX place transmitter in front of the IR eye of the source To control the display Plug IR Blaster into IR TX port of receiver unit EVEX2006 RX place transmitter in front of the IR eye of the display Note Placement of the IR Blaster is important ...

Page 9: ...DID information and then do EDID dynamic selection This function is automatic no need to setup by customers The intension function is to keep maximum compatibility Rs232 control port The 4x4 matrix provide a RS232 series port for system configuration firmware update matrix control please refer to assorted GUI help to know how to control the matrix Power over UTP cable The 4x4 matrix has 4 UTP outp...

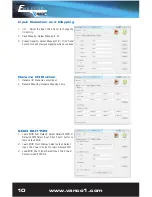
Page 10: ...us mapping which are saved Rename I O Button 1 Rename I O Rename output input 2 Rename Mapping Rename Mapping name EDID BUTTON 1 Learn EDID from Default Select Default EDID 1 9 Default EDID Select Input Click Learn button to learn default EDID 2 Learn EDID From Display Select output Select input Click Learn button to learn display EDID 3 Load EDID File To Input Select Input Click Load button to lo...

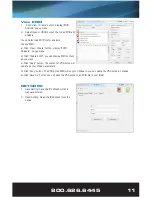
Page 11: ...p menu b Click Create EDID you can choose EDID content as you want c Click Apply button The content of 256 bytes will update as your chose parameters d Click Copy button The 256 bytes EDID will copy to Clipboard you can paste the 256 bytes in notepad e Click Save As button you can save the 256 bytes to an EDID file in your folder NETWORK 1 Save Setting Save the IP address which is manually entered...

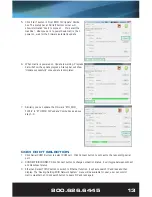
Page 12: ... to open serial port 2 Click System label enter Firmware update interface Click LoadFile button in Host MCU FW Update Combo box 3 Find the file path at popup dialog menu Choose the bin file HOST_MCU_FW bin Click Open Button 4 Then popup a new dialog Display corresponding hexadecimal content of bin file You can close this window ...

Page 13: ... Similarly you can update the firmware ETH_MCU_ FW bin in ETH MCU FW update Combo box as above step1 6 COM PORT SELECTION 1 Click Serial COM1 Buttom to select COM port Click Connect button to connect to the responding serial port 2 CONNECT DISCONNECT Click Connect button to change connection status it will toggle between connect and disconnect status 3 Ethernet Select TCP IP button to switch to Et...

Page 14: ... of the major source and display manufacturers employ a proprietary control channel to communicate between devices from the same manufacturer Sometimes this can interfere with the HDMI control circuit or the authentication of the signal Call the manufacturer if you experience this issue Sometimes a player an audio video receiver or a cable satellite box may not have the latest software update usua...

Page 15: ...ical Support by dialing 1 800 626 6445 You can also email technical support issues to techsupport vanco1 com When calling please have the Model Number Serial Number affixed to the bottom of the unit and Invoice available for reference during the call Please read this Instruction Manual prior to calling or installing this unit since it will familiarize you with the capabilities of this product and ...

Page 16: ...Vanco International 506 Kingsland Drive Batavia Illinois 60510 call 800 626 6445 fax 630 879 9189 visit www vanco1 com ...

Reviews: