background image

___________________________________

__________________________________

3. Ventilation

Make sure the amplifier has good airflow around it. If you are going to install the
equipment in a cabinet or shelf, make sure there is at least a ten centimeter gap
between the ventilation slots and the ends of the amplifier. The rear panel of a closed
piece of furniture such as a wardrobe should have ventilation holes to prevent heat
build-up. Do not place the appliance on a soft surface such as rugs or foamy sheets.

2.3. Warranty

VALVER guarantees the safety, reliability and performance of this unit only if
modifications and repairs are carried out by authorized personnel and only if the
amplifier is used in accordance with the instructions contained in this manual,
otherwise the warranty will be void if identified. unauthorized interventions.
Throughout the warranty period, upon communication via e-mail and / or registered
letter with return receipt, you can return the material and if it is found to be defective
or non-compliant, it will be repaired or replaced with an equivalent or higher one if it
is no longer in production. . The customer is responsible for the shipping costs to
bring the defective goods to our office, while the costs for returning the replaced /
repaired product will be borne by us. If the material is not working due to "neglect",
incorrect use or incorrect installation by the customer, it will be returned as is and
the customer will also have to pay the return costs.
The warranty we provide on

valves

extends the European warranty on bulk

electronic components which would simply guarantee the item free from defects
upon receipt and assembly. This 30 days warranty extension does not apply if the
damage to the component is caused by negligence or incorrect installation.

9

Summary of Contents for DR160

Page 1: ...DR160 SINGLE ENDED 845 INTEGRATED amplifier User Manual 2022 ...

Page 2: ...___________________________________ __________________________________ 2 ...

Page 3: ...ighest level The DR160 has been designed to offer audiophiles a noteworthy sound quality with dynamics and tonality geared towards the faithful reproduction of your favorite tunes creating a natural sound stage and the atmosphere of a live musical representation with the aim of transmit in addition to the message of the song the emotions that music can give Please take a few minutes to read this m...

Page 4: ...tioning 2 3 Warranty 3 Installation 3 1 Connect the amplifier 3 2 Operation 4 Front panel operations 5 Connections 5 1 Rear panel 6 Valves 6 1 Remove the grille 6 2 Adjusting the BIAS 6 3 Valves efficiency 6 4 Valve Replacement 7 REMOTE CONTROL 8 Problem solving 9 Technical data and dimensions 10 CONTACTS 11 Declaration of conformity 5 7 7 8 9 10 10 10 11 12 12 13 13 13 13 14 15 15 16 17 18 4 ...

Page 5: ...l feature that distinguishes the DR160 is the Single Ended circuit configuration with very low output transformers in terms of power but oversized and designed to best express the refinement dynamics and true identity of the sound valve Safety Each VALVER amplifier is equipped with numerous prevention and protection systems for the internal electronics and peripheral components of your audio chain...

Page 6: ...Start ignition system is a protection circuit that excludes any possibility of error during ignition prevents voltage fluctuations and ensures a gradual supply of voltage to the valve Audiophile enthusiasts usually get advice such as never operate without speakers connected Follow the ignition sequence in order Turn the amplifier off and on as little as possible etc These tips are certainly import...

Page 7: ...ug and power cord Do not open the amplifier There are dangerous high voltages and hot tubes inside the unit To avoid burns or the risk of electric shock do not allow anyone except qualified persons to open the amplifier or remove the grille and tubes Service and Maintenance For safety reasons make sure that maintenance repairs and other modifications to VALVER equipment are only carried out by a q...

Page 8: ...onment only Do not use it outdoors or in humid environments Never place plants or containers containing liquids near your VALVER appliance Be careful that no objects fall or liquids are spilled inside If so remove the plug immediately and take the amplifier to a qualified technician Condensation can form if the amplifier is moved from a cold to a warm environment If you do this wait until the ampl...

Page 9: ...d if identified unauthorized interventions Throughout the warranty period upon communication via e mail and or registered letter with return receipt you can return the material and if it is found to be defective or non compliant it will be repaired or replaced with an equivalent or higher one if it is no longer in production The customer is responsible for the shipping costs to bring the defective...

Page 10: ...at the amplifier is turned off before plugging the power cord into the wall outlet 6 At this point turn on the amplifier using the Power button on off and then the source button or the red button from the remote control to start see chapter 4 Operations After switching on the amplifier will be ready for use in approximately 30 seconds 7 Check that the volume is not set to maximum before turning on...

Page 11: ...d input Press and hold to turn the amplifier on and off ATTENTION Input 1 Phono MM Inputs 2 3 and 4 Line SET BIAS Potentiometer for BIAS adjustment LEFT To set the BIAS with the correct value MAXIMUM 90mA VOLUME Volume potentiometer RIGHT To set the BIAS with the correct value MAXIMUM 90mA SET BIAS Potentiometer for BIAS adjustment 11 ...

Page 12: ..._______ 5 CONNECTIONS 5 1 Rear panel IMPEDANCE Select the impedance according to the speakers CONNECTORS Connect the speakers observing polarity ON OFF Main switch MAINS Connect the supplied power cord F1 F2 F3 Protection fuses INPUTS RCA inputs for the sources 12 ...

Page 13: ... 6 2 Adjusting the BIAS To get maximum performance from your tube amplifier it is imperative that the BIAS is properly tuned This model is equipped with acalibration fixed BIASsystem which can be adjusted from the outside by means of a SET potentiometer It is advisable to operate below 80mA to preserve the valves for longer and in no case exceed the maximum value of 90mA 6 3 Valves Efficiency The ...

Page 14: ...Use only the same or equivalent valves with the models indicated on page 14 In the table below the identification of the valves used Ref T1 T2 T3 T4 T5 T6 T7 T8 Model 845 845 PCL82 PCL82 EF183 EF183 6N2P EV 6N2P EV function Power Valve Power Valve Pre line Pre line Pre Phono Pre Phono Pre Phono Pre Phono 14 ...

Page 15: ...eption It is not recommended to connect the amplifier with faulty cables or without grounding Lack of grounding in the home system adversely affects the sound or signal quality Switching interference The proximity of some old appliances and halogen lamps can cause crackling through the speakers when they are turned on and off Solution The only solution is to use a single power outlet for the entir...

Page 16: ...Power 2 x 30 W Frequency Response 10 Hz 25 KHz 1w Harmonic Distortion 0 1 1w S N Ratio 96 dB Output Impedance Input Impedance 4 8 ohm 100 Kohm Input sensitivity 0 33V 4 7mV Phono line General Power consumption 140 360 W Standard Accessories Power cable Remote control Dimensions Alt Lar Lun Weight 270x430x410 mm 28 kg 16 ...

Page 17: ...66 Caselle di Sommacampagna Verona Italy Opinion and personal experience with the product Thank you for choosing VALVER and for reading this User Manual It is our concern to ensure the best quality of our products for this reason we ask your opinion regarding the shopping experience listening and any assistance by writing a sincere review on our website www gabrisamp it A Gabriel Moldovan 17 ...

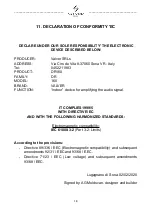
Page 18: ...ODEL 160 BRAND VALVER FUNCTION Indoor device for amplifying the audio signal IT COMPLIES1999 5 WITH DIRECTIVE EC AND WITH THE FOLLOWING HARMONIZED STANDARDS Electromagnetic compatibility IEC 61000 3 2 Part 3 2 Limits According to the provisions Directive 89 336 EEC Electromagnetic compatibility and subsequent amendments 92 31 EEC and 93 68 EEC Directive 71 23 EEC Low voltage and subsequent amendme...

Reviews: