Installation Planning
Existing Fireplace Preparation
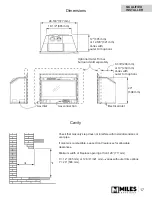
A few points must be considered before inserting the
739I into an existing
fi
replace cavity. Generally, no
modi
fi
cations are allowed to the existing
fi
replace that
will compromise the integrity of the existing
fi
replace.
Components that are bolted or screwed on such as
dampers or baf
fl
es may be removed to accommodate
the installation of the 739I engine.
Cutting away
any sheet metal parts of the existing fi replace
to accommodate the installation of the 739I is
prohibited
. Check with local authorities if in doubt.
Clean Fireplace and Chimney
Have the chimney swept and the
fi
replace cavity
including ash dumps and clean-outs cleaned before
installing the 739I heater and vent liners. Any creosote
or soot residue remaining in the
fi
replace cavity
chimney or clean-out may cause odors or stains once
the 739I insert is installed. Consult with chimney sweep
for information on how best to clean.
Installer—READ THIS FIRST
1. YOU NEED TO KNOW FROM THE
HOMEOWNER what accessories (surround,
door, etc.) will be installed with this fi replace;
2. Unpack the appliance.
3. Check that you have everything.
4. Clean cavity, chimney, ash dump, and clean-out.
5. Install venting pipes.
6. Attach conversion plate to existing
fi
replace.
7. Install and test blower if used.
8. Fit appliance into cavity.
9. Connect and test gas supply.
10. Install ceramic liners, fuel bed and rocks.
11. Re
fi
t window.
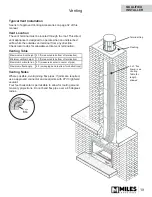
Existing Dampers
Factory-built, zero-clearance
fi
replaces will require the
damper to be removed in order to install the vent liners.
These dampers are usually bolted into place. Dampers
in masonry
fi
replaces must be
fi
xed open and may
remain in place.
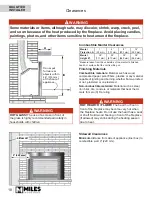
Ash Retaining Curbs
Some
fi
replaces (particularly factory-built) have a
raised curb at the front edge to retain ashes. Check the
dimensions carefully to ensure the 739I engine will
fi
t
behind any raised curb (some curbs may be removed
separately from the refractory base).
12. Put batteries in receiver and remote control
handset.
13. Set-up remote control.
14. Connect electrical wiring blower if used.
15. Verify operation and adjust aeration settings.
16. Install the remote control handset wall holder.
17. Instruct the homeowner on the operation and
maintenance of the fi replace.
18. Install the surround trim and front.
19. Install the fret if required.
Only qualifi ed licensed or trained personnel
should install this appliance.
20
QUALIFIED
INSTALLER


