


Blind Operation
MULTI CHANNEL REMOTE CONTROL
For installations of multiple blinds, you may have ordered or wish to order the multi-channel
remote control which can operate up to 15 blinds individually or simultaneously.
OPERATION
– Your blind will arrive with the top and bottom stop limits factory set.
Close the blind: press and hold the down button on the remote control for 1 second
then release the blind will begin to close, the blind will stop automatically
at the bottom of the window.
Open the blind: press and hold the up button on the remote control for 1 second
then release the blind will begin to open, the blind will stop automatically at the
top of the window.
The blind can be stopped at any point during an open or close cycle by pressing
the stop button for 1 second then releasing.
Blind speed settings: Your blind has 3 operating speed functions
(1) Slow
(2) Medium
(3) Fast
Your blind is already pre-set to the medium speed (2).
To increase the speed press &
HOLD
both the
STOP
and
UP
buttons simultaneously until
the blind jogs 3 times, your blind will now operate faster.
To decrease the speed press &
HOLD
both the
STOP
and
DOWN
buttons simultaneously
until the blind jogs 1 time your blind will now operate slower.
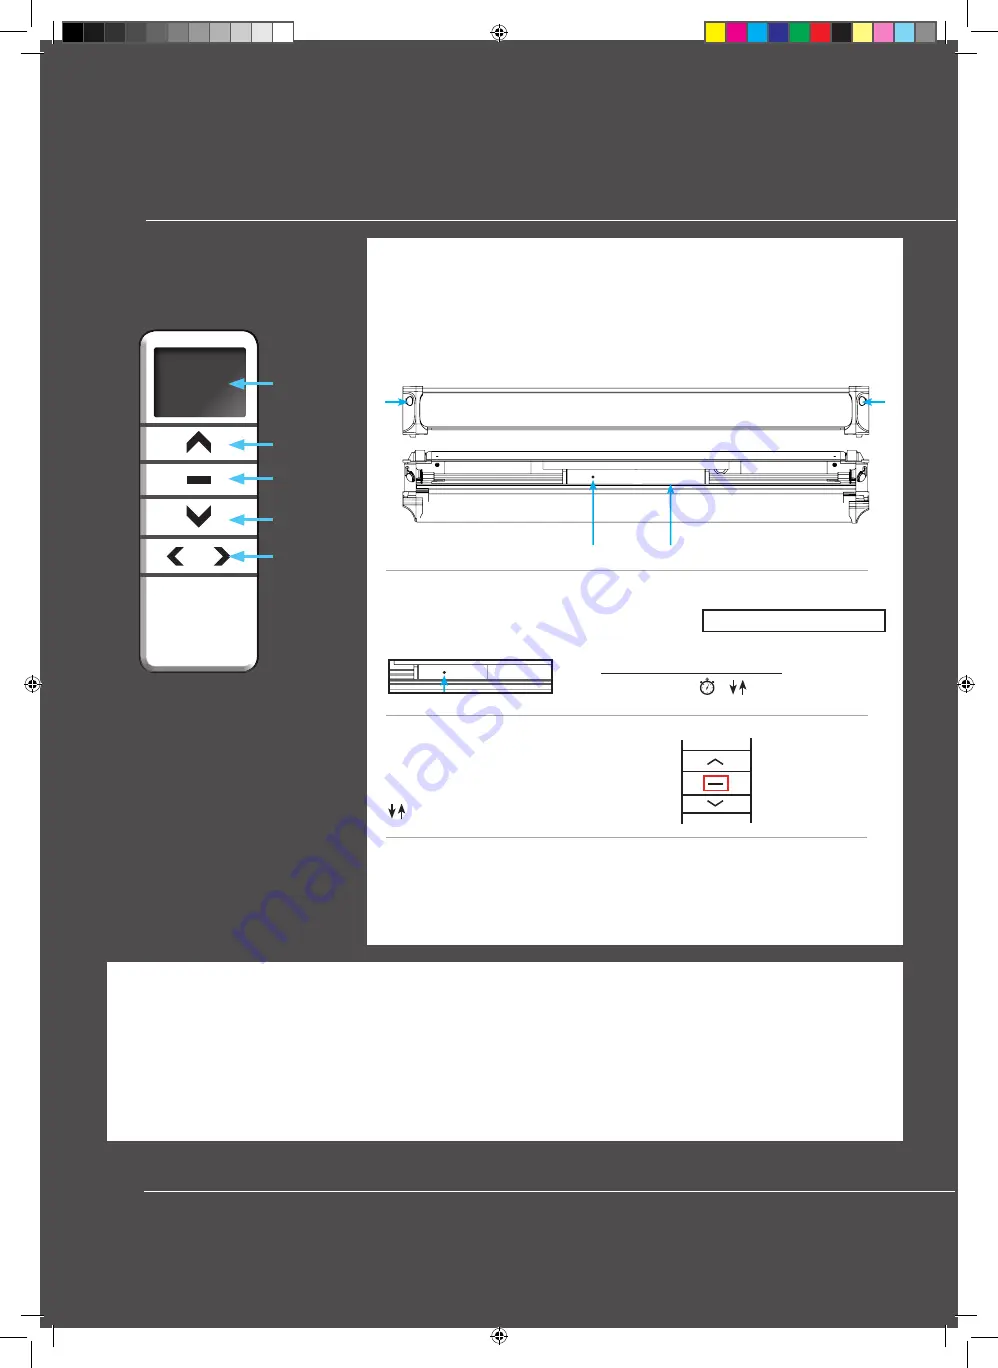
SINGLE CHANNEL REMOTE CONTROL
UP
STOP
DOWN
Pairing the multi-channel remote control to your blinds -
For each blind you wish to control with the multi-channel remote control
please follow the steps below:
(1) Move the blind you wish to pair to the mid-point on your window.
(2) Remove the back battery covers from the multi-channel remote control
and single channel remote control of the blind you want to pair.
(3) Select channel 1 on the multi-channel remote control using the channel selection
buttons, on the single channel remote control press the P2 button, the blind will jog once,
press the P2 button again the blind will jog again.
(4) On the multi-channel remote control press P2 button, the blind will jog, your mul-
ti-channel remote control is now paired and will operate the blind.
* If the remote control does not pair leave for 1 minute and follow steps 3 & 4 again.
Repeat the steps above to add multiple blinds ensuring to select the next channel
on the multi-channel remote control eg: 1st blind channel 1, 2nd blind channel 2.
To operate all blinds simultaneously select channel 0 on the multichannel
remote control.
CHANNEL
DISPLAY
SCREEN
UP
STOP
DOWN
CHANNEL
SELECTION
(use to select
the required
channel
required)
Tel: 0800 107 5535
CR2450
P2
P2
M
CR2450
P2
P2
M
DC1600
DC1602
P2 BUTTON
Blind Operation
MULTI CHANNEL REMOTE CONTROL
For installations of multiple blinds, you may have ordered or wish to order the multi-channel
remote control which can operate up to 15 blinds individually or simultaneously.
OPERATION – Your blind will arrive with the top and bottom stop limits factory set.
Close the blind: press and hold the down button on the remote control for
1 second then release the blind will begin to close, the blind will stop automatically
at the bottom of the window.
Open the blind: press and hold the up button on the remote control for 1 second
then release the blind will begin to open, the blind will stop automatically at the
top of the window.
The blind can be stopped at any point during an open or close cycle by pressing
the stop button for 1 second then releasing.
Blind speed settings: Your blind has 3 operating speed functions
(1) Slow
(2) Medium
(3) Fast
Your blind is already pre-set to the medium speed (2).
To increase the
speed press &
HOLD
both the
STOP
and
UP
buttons
simultaneously until the blind jogs 3 times, your blind will now operate faster.
To decrease the speed press &
HOLD
both the
STOP
and
DOWN
buttons
simultaneously until the blind jogs 1 time your blind will now operate slower.
SINGLE CHANNEL REMOTE CONTROL
UP
STOP
DOWN
Pairing the multi-channel remote control to your blinds -
For each blind you wish to control with the multi-channel remote control
please follow the steps below:
(1) Move the blind you wish to pair to the mid-point on your window.
(2) Remove the back battery covers from the multi-channel remote control
and single channel remote control of the blind you want to pair.
(3) Select channel 1 on the multi-channel remote control using the channel selection buttons, on the
single channel remote control press the P2 button, the blind will jog once, press the P2 button again the
blind will jog again.
(4) On the multi-channel remote control press P2 button, the blind will jog, your multi-channel remote
control is now paired and will operate the blind.
* If the remote control does not pair leave for 1 minute and follow steps 3 & 4 again.
Repeat the steps above to add multiple blinds ensuring to select the next channel
on the multi-channel remote control eg: 1st blind channel 1, 2nd blind channel 2.
To operate all blinds simultaneously select channel 0 on the multichannel
remote control.
CHANNEL
DISPLAY
SCREEN
UP
STOP
DOWN
CHANNEL
SELECTION
(use to select
the required
channel
required)
CR2450
P2
P2
M
CR2450
P2
P2
M
DC1600
DC1602
P2 BUTTON
Blind Operation
OPERATION
Close the blind:
press and hold the down button on the remote control for 1 second then release the blind will begin to close,
the blind will stop automatically at the bottom of the window.
Open the blind:
press and hold the up button on the remote control for 1 second then release the blind will begin to open, the
blind will stop automatically at the top of the window.
The blind can be stopped at any point during an open or close cycle by pressing the stop button for 1 second then releasing.
To operate multiple blinds simultaneously select
channel 0
on the remote control.
CHANNEL
DISPLAY
SCREEN
UP
STOP
DOWN
CHANNEL
SELECTION
(use to select
the required
channel
required)
DC1602
P2 BUTTON
PAIRING THE REMOTE
When using a multichannel remote the channel number the user
wishes to use must be selected first on the remote before pairing.
Open the blind cassette by pressing the 2 buttons on either end of the
cassette to release and rotate forward.
IMPORTANT after pairing your
remote control please ensure blind cassette is fully closed.
P1 button
Motor
Using the pointer tool provided hold the P1 button for
approx 2 seconds until the motor responds with 1 jog.
Please ensure to close blind cassette before operating.
The remote should now be paired and operate the blind.
To add additional blinds select another channel on the remote and repeat
process above.
Step 1.
Press and hold stop on the remote control for
approx 2 seconds or until motor responds with 2 jogs.
jog x 2
Step 2.
Step 3.
Approx 2 seconds
Motor Response
jog x 1
jog = small movement of motor
Unbranded Solar Skylight Instructions Roto Fakro.indd 8
13/03/2019 15:00:39


