6
7
FR
FR
Utilisation de l’appareil
Utilisation de l’appareil
B
B
6
7
EN
EN
Using the appliance
Using the appliance
B
B
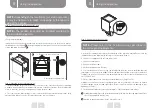
WARNING
:
•
Only use salt that is specially made for dishwashers!
Any other type of salt that is not specifically for use in a
dishwasher, especially table salt, will damage the water
softener. In the event of damage caused by the use of
unsuitable salt, the manufacturer declines any warranty
and any liability for the damage caused.
•
Wait until you are ready to start a wash cycle before
filling the salt container.
This will prevent any grains of salt or salt water that may
have been spilled and left at the bottom of the machine for
any length of time from causing corrosion.
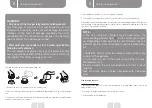
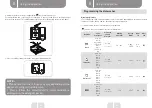
• Follow the steps below to add regenerating salt:
SAL
T
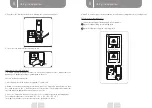
1. Remove the lower rack and unscrew the container cap.
2. Place the end of the funnel into the hole and pour in approximately 1.5 kg of regenerating
salt.
3. Fill the salt container with water up to the maximum limit. It is normal for a small amount
of water to spill out of the container.
4. After filling the container, screw the cap back on tightly.
5. The salt indicator light will turn off once the container has been filled with salt.
6. Immediately after having filled the salt container, start a washing program. If not, the filter
system, pump or other important parts of the machine could be damaged by the salt water.
This is not covered by the warranty.
NOTE
:
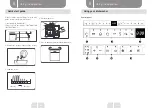
• The salt container should only be filled when the
corresponding indicator light on the control panel lights
up. Depending on how quickly the salt dissolves, the salt
indicator light may remain on even though the container is
full.
• CAUTION : Risk of corrosion and perforation of the cavity
or parts of the appliance
: If you spill any salt in the cavity when filling the tank,
immediately rinse
the place where the salt was deposited or start a wash
program.
Take extra care when running a program with a delayed
start.
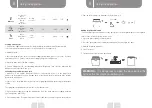
Tips for using the rack
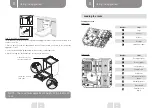
Adjusting the upper rack
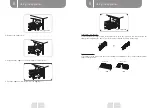
• The height of the upper rack can easily be adjusted to accommodate larger items in the
upper or lower rack.
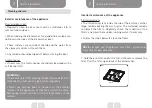
• To change the height of the upper rack, follow these steps:
1. Pull the upper rack towards you.
Summary of Contents for 972331
Page 2: ...1 2 3 4 5 A B 6 7 8 ...


