


4 On-roof fitting and installation
24
Installation manual auroTHERM exclusive 0020077994_02
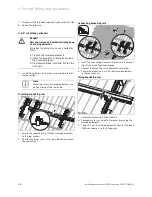
Conditions
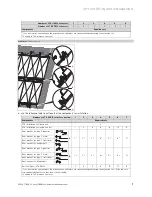
: Fastening type: To roof batten
1
3
2
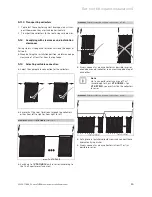
▶
Define the clearances of the roof brackets. (
→
Page 20)
▶
Slide one to two pantiles upwards at the corresponding
position above the roof batten
(1)
.
▶
Undo the top bolt until the height of the roof bracket
can be adjusted
(2)
.
Working materials
SW 13 spanner
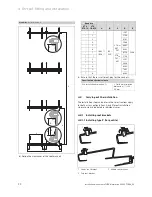
▶
Hang the roof bracket on the roof batten
(3)
. Ensure
that the top, middle and lower roof brackets are posi-
tioned correctly.
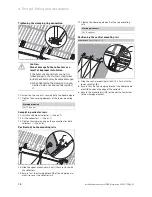
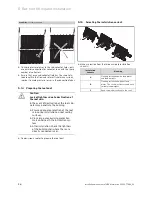
4
▶
Adjust the roof bracket to the height of the pantiles, so
that the top part lies on the roofing and the bottom part
is pushed tight against the roof batten from the bottom
(4)
.
▶
Ensure that the roof bracket fits securely around the
roof batten and pantile when it engages.
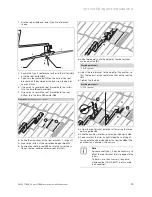
5
6
A
▶
Tighten the top bolt
(5)
.
Working materials
SW 13 spanner
▶
Slide the pantiles into their original position again
(6)
.
▶
To ensure that the tiles lie tightly together, notch gut-
tering onto the underside of the pantiles
(A)
using a
hammer, if necessary.
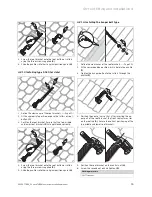
4.2.1.2 Installing type S (for slate)
2
1
1.
Define the clearances of the roof brackets. (
→
Page 20)
2. At the appropriate position, expose the rafters or roof
batten
(1)
.
3. Position the roof bracket. Ensure the correct position of
the top, middle and lower roof brackets
(2)
.