background image

1

Overview

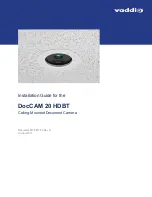
This guide describes installation and related information for the DocCAM 20 HDBTceiling-mounted
document camera:

n

Camera only, North America – 999-9968-000

n

Camera only, Europe/UK – 999-9968-001

n

Camera with OneLINK HDMI, North America – 999-9968-200

n

Camera with OneLINK HDMI, Europe/UK – 999-9968-201

n

Camera with OneLINK Bridge, North America – 999-9968-300

n

Camera with OneLINK Bridge, Europe/UK – 999-9968-301

What's in this Guide

This guide covers:

n

Unpacking the camera

n

Tips for a successful installation

n

Information on mounting and connecting the camera

n

Camera power-on

Complete product information is available in the

Integrator's Complete Guide to the DocCAM 20 HDBT

Ceiling-Mounted Document Camera

.

Download manuals, dimensional drawings, and other information from

www.vaddio.com/support

.

Features

n

Exmor® 1/2.8 type, high-speed, low-noise image sensor for 2.38 megapixels total, full HD (native
1080p/60)

n

20x optical zoom with horizontal field of view from 59.5° (wide end) to 3.3° (tele end)

n

Low-power laser pointer for centering

n

Superior low-light performance (0.4 Lux)

n

Web interface for remote administration and operation, integration-ready Telnet and serial RS-232
control, presenter-friendly IR remote control

n

Use with a OneLINK device for power, video, and control:

o

OneLINK HDMI – uncompressed HDMI video, bidirectional RS-232 connectivity for camera control
via third-party equipment, passes IP stream from the camera

o

OneLINK Bridge – OneLINK HDMI capabiliities plus uncompressed USB 3.0 streaming, HD-SDI
output, and audio routed up to the camera and injected into the IP stream

Summary of Contents for DocCAM 20 HDBT

Page 1: ...Installation Guide for the DocCAM 20 HDBT Ceiling Mounted Document Camera Document 411 0017 31 Rev A October 2017...

Page 2: ...6 Things You Will Need 7 Selecting the Installation Area 7 Preparing the Installation Area 7 Preparing a Tile Ceiling 7 Preparing a Solid Ceiling 7 Basic Connection Diagram 8 Options for Power and Ot...

Page 3: ...ed Document Camera Download manuals dimensional drawings and other information from www vaddio com support Features n Exmor 1 2 8 type high speed low noise image sensor for 2 38 megapixels total full...

Page 4: ...VDC power supply and AC cord set for North America n Trim ring with mounting screws n Tile support brace n IR remote DocCAM 20 HDBT with OneLINK HDMI Europe UK 999 9968 201 n DocCAM 20 HDBT camera an...

Page 5: ...nix type connectors qty 4 n USB 3 0 cable type A to type B 6 ft 1 8 m n Trim ring with mounting screws n Tile support brace n IR remote Note The mounting hardware that ships with the camera is designe...

Page 6: ...NK device for power and all connectivity When installed the connector side points in the direction that the top of the document or other camera subject will face n Fasteners for conduit box For instal...

Page 7: ...s of Interest During Operation n Camera lens 20x optical zoom lens for crisp detail n Laser pointer Shows where the camera image is centered Use the remote to turn on the laser pointer n IR window Sen...

Page 8: ...ped damaged or exposed to liquids If any of these things happen return it to Vaddio for safety and functional testing Cabling Notes Use Cat 5e or better cable and standard RJ 45 connectors 568B termin...

Page 9: ...ed n Minimum 5 6 inches of clear space above the camera opening to maneuver the camera into place Preparing the Installation Area The DocCAM 20 HDBT can be installed in a dropped acoustic tile ceiling...

Page 10: ...for Power and Other Connections Connect the camera to a OneLINK HDMI or a OneLINK Bridge AV Interface a single Cat 5e or better cable provides power to the camera along with HDBaseT network and video...

Page 11: ...ng in the opening 4 Rotate the camera so that the cable connector is facing the same direction as the top of the document or other photographic subject 5 Secure the trim ring to the camera bezel ring...

Page 12: ...atus Light The light in the camera s face indicates its current state Caution This product contains a 5 mw 650 nm red laser which produces visible laser radiation Avoid direct eye exposure Do not look...

Page 13: ...ful interference to radio communications Operation of this equipment in a residential area is likely to cause harmful interference in which case the user will be required to correct the interference a...

Page 14: ...Corrigendum 2006 Electrical Fast Transients EN 61000 4 5 2006 Surge Immunity EN 61000 4 6 2009 Conducted Immunity EN 61000 4 8 2010 Power Frequency Magnetic Field EN 61000 4 11 2004 Voltage Dips Inter...

Page 15: ...and or replacement Vaddio Technical Support can be contacted by email at support vaddio com or by phone at one of the phone numbers listed on support vaddio com Return Material Authorization RMA numb...

Page 16: ...ator light 4 10 installation requirements 7 installation typical 8 9 L location of connector 4 5 O OneLINK 8 P packing lists 2 PoE power 8 power on power off 10 power options 8 product capabilities 1...

Page 17: ...Bonus blank page...

Page 18: ...io RoboSHOT and OneLINK are trademarks or registered trademarks of Milestone AV Technologies HDBaseT and the HDBaseT Alliance logo are trademarks of the HDBaseT Alliance Exmor is a trademark of Sony C...

Reviews: