page 102 of 152
+
Allow sufficient cooling of the pump before
starting maintenance.
+
Vent the pump and isolate it from the
vacuum system before you start mainte-
nance. Drain condensate, if applicable.
Ensure that maintenance is done only by suitably
trained and supervised technicians.
The valves and diaphragms are wear parts. If the rated
ultimate vacuum is no longer achieved or in case of in-
creased noise level, the pump interior, the diaphragms
and the valves must be cleaned and the diaphragms and
valves must be checked for cracks or other damage.
All bearings are encapsulated and are filled with long-life
lubricant. Under normal operating conditions, the drive
system is maintenance free.
In demanding circumstances, it may be efficient to check
and clean the pump heads on a regular basis. In normal
use, the lifetime of the diaphragms and valves is typically
15,000 operating hours.
- Prevent internal condensation, transfer of liquids or
dust. The diaphragms and valves will be damaged if
liquid is pumped in significant amount.
- Carry out maintenance frequently if the pump is ex-
posed to corrosive media or in case of deposits.
- Regular maintenance will improve the lifetime of the
pump and also protect both users and the environment.
NOTICE
atm
°C / °F
Set of seals
(diaphragms, valves and O-rings).........................................
2x 696867
for
ME 16C NT VARIO / PC 3016 NT VARIO
Set of seals
(diaphragms, valves and O-rings) ............................................
696839
for
MD 12C NT VARIO, MV 10C NT VARIO / PC 3012 NT VARIO / PC 3010 NT VARIO
Diaphragm key
(w/f 66) ...............................................................................
636554
+
Service only one side of the pump at a time to avoid the mixing of
parts.
+
In case, support the pump appropriately.
Summary of Contents for MV 10C NT VARIO o.C.
Page 34: ...page 34 of 152 1 8 2 9 18 PC 3012 NT VARIO EK Peltronic 12 11 16 8 17 3 4...
Page 104: ...page 104 of 152 2 3 size 1 2x 4...
Page 105: ...page 105 of 152 6 5 7 4 4x...
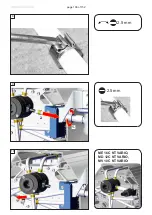
Page 106: ...page 106 of 152 9 8 1 2 2 5 mm 2 5 mm 10 ME 16C NT VARIO MD 12C NT VARIO MV 10C NT VARIO...
Page 108: ...page 108 of 152 12 Emission condenser Peltronic 4 4x 11A 13 4 2x...
Page 109: ...page 109 of 152 15 14 4 4x Don t loosen this screw 15A 16...
Page 110: ...page 110 of 152 16 17 5 2x 15A 1 2 3 1 4 1 4 3 2x 5...
Page 111: ...page 111 of 152 19 20 18 5 2x...
Page 113: ...page 113 of 152 21 2 5 mm Replacing the diaphragms 22 23 696867 696839 Clean 5 8x...
Page 114: ...page 114 of 152 24 25 26 1 2...
Page 115: ...page 115 of 152 27 3 28 29 Pay attention to number of washers...
Page 118: ...page 118 of 152 36 37 38 Clean...
Page 119: ...page 119 of 152 39 40 41 IN IN EX EX 696867 696839 4x...
Page 120: ...page 120 of 152 42 43 44 IN EX T20 4x 2 2 ft lbf 3 Nm...
Page 121: ...page 121 of 152 45 46 47 Maintain all pump heads in the same way...
Page 125: ...page 125 of 152 2 size 2 2x 3 4A Version A valve 24 4 mm...
Page 126: ...page 126 of 152 5A 696839 24 4 mm 26 mm 4B 5B 696839 37 mm 40 mm Version B valve 37 mm...
Page 127: ...page 127 of 152 6 7 size 2 2x 7A ME 16C NT VARIO MD 12C NT VARIO MV 10C NT VARIO size 2 2x...
Page 129: ...page 129 of 152 49 Assembling the pump housing 50 51 5 2x 8 9 ft lbf 12 Nm...
Page 130: ...page 130 of 152 52 53 54 5 2x 8 9 ft lbf 12 Nm...
Page 131: ...page 131 of 152 55 55A 1 2 3 3 2x 55A 56...
Page 132: ...page 132 of 152 56 4 4x 3 7 ft lbf 5 Nm 58 4 4x 3 7 ft lbf 5 Nm 57 4 2x 3 7 ft lbf 5 Nm...
Page 133: ...page 133 of 152 59 60 61...
Page 135: ...page 135 of 152 62 63 4 4x 3 7 ft lbf 5 Nm 64...
Page 136: ...page 136 of 152 65 66 67 size 1 2x...
Page 137: ...page 137 of 152 68 69...
Page 140: ...page 140 of 152 4 638821 638821 5 6...
Page 141: ...page 141 of 152 7 T20 4x size 1 4x 8...
Page 149: ...page 149 of 152...
Page 150: ...page 150 of 152...
Page 151: ...page 151 of 152...


