background image

3

Replace fuse/lamp only with the same type.
In the event of serious operating problem, stop using the unit immediately.
Never turn on and off the unit time after time.
The housing, the lenses, or the ultraviolet filter must be replaced if they are
visibly damaged.
DO NOT attempt to operate this unit if it becomes damaged. DO NOT attempt
any repairs
yourself. Repairs carried out by unskilled people can lead to damage or
malfunction. Please contact the nearest authorized technical assistance center
if needed.
Disconnect this product from its power source before servicing.
DO use the original packaging if the device is to be transported.
Avoid direct eye exposure to the light source while the product is on.
Never touch bulb with bare fingers, as it is very hot after using.
DO NOT operate this product if you see damage on the housing, shields, or
cables. Have the damaged parts replaced by an authorized technician at once

Installation:

The fixture should be fixed on the clamp. Always ensure that the unit is firmly
fixed to avoid vibration and slipping off during operation. Ensure that the
trussing or area of installation must be able to hold 10 times the weight without
any deformation. Always install a safety cable that can hold at least 12 times
the weight of the fixture when installing.DO install and operate by qualified
operator. It must be installed in a place where there is out of the reach of
people.

2.INSTALLATIONS

installations Note: In order to increase protection, please install the lamp on

the sidewalk, outside the seating area, or an area where unauthorized persons
may touch the lamp
Before installing the fixture on any surface, make sure that the installation area
can bear the minimum point load above 10 points of the weight of the
equipment. The installation of the fixing device must always be fixed with
auxiliary safety accessories (such as a suitable safety rope)
Do not stand directly under the equipment when installing, removing, or
servicing fixtures
From the ceiling or set on a flat surface (see the picture below). Ensure that
this fixture is kept at least 0.5m (1.5 feet) away from any flammable materials
(decorations, etc.)
Be sure to use and install the supplied safety rope to ensure safety and

Summary of Contents for B198

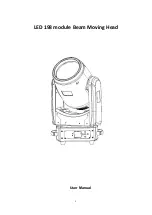
Page 1: ...1 LED 198 module Beam Moving Head User Manual...

Page 2: ...equate ventilation at least 50cm from adjacent surfaces Be sure that no ventilation slots is blocked otherwise the unit will be overheated Before operation ensure that you are connecting this product...

Page 3: ...y fixed to avoid vibration and slipping off during operation Ensure that the trussing or area of installation must be able to hold 10 times the weight without any deformation Always install a safety c...

Page 4: ...bracket and use the M10 screw that passes through the center hole of the bracket to fix it As an additional safety measure make sure to use at least one safety cable integrated in the base assembly t...

Page 5: ...e the UP DOWN button to select DMX Address press the ENTER button to confirm the present address will blink in the display use the UP DOWN button to adjust the address from 001 to 512 press the ENTER...

Page 6: ...6 5 Fixture size 6 Illuminance chart...

Page 7: ...7 7 Effect Wheels Color wheels Gobo wheels Colorful...

Page 8: ...ection function when the internal temperature reaches 40 the fan starts to work when the internal temperature reaches 70 and the brightness is reduced by half Features The appearance of the product is...

Page 9: ...ucture Main menu Secondary menu Three level menu parameter address 001 512 Add the number of channels each time subtract the normal System settings Operating mode DMX sound control self propelled 1 se...

Page 10: ...s motor 000 255 Y axis motor 000 255 Color wheel motor 000 255 Pattern motor 000 255 Reserved motor 000 255 Focus motor 000 255 Atomization motor 000 255 power 010 255 MIC sensitivity 000 255 change P...

Page 11: ...ial position calibration After entering the sub interface you can adjust the reset position of the X axis Y axis and other motors to compensate for the error in the hardware installation The adjustmen...

Page 12: ...er Lamp hardware information Software version number Lighting software version Total usage time Cumulative use time accurate to the minute 11 DMX512Channel NO Channel function Value Description 1 X 0...

Page 13: ...255 Flow clockwise from slow to fast 9 pattern 0 9 White light 10 12 Gobo1 13 15 Gobo2 16 18 Gobo3 19 21 Gobo4 22 24 Gobo5 25 27 Gobo6 28 30 Gobo7 31 33 Gobo8 34 36 Gobo9 37 39 Gobo10 40 42 Gobo11 43...

Page 14: ...Flow clockwise from slow to fast 128 190 Fast to slow rotation counterclockwise 191 192 stop 193 255 Slow to fast rotation clockwise 10 Colorful atomization 0 200 Atomization linear cut 201 255 Color...

Page 15: ...output and can also extend the service life of the lamp It is recommended to use high quality glass cleaner and a clean soft cloth to clean it The dust inside the lamp is cleaned at least once every s...

Reviews: