5
6
Installation & Operation
Battery and Spacer Ring Installation
4. Conduct a function check to ensure the
end cap is properly tightened following
the steps on page 6.
1. Unscrew the flashlight end cap by
twisting counter-clockwise and install
either two included CR123A Batteries or
one 18650 Rechargeable Battery.
3. Re-install the end cap by turning it
clockwise until it is completely seated.
1. Unscrew and remove the end cap.
Make sure to keep the cap in a safe place
for replacement when Pressure Switch is
not used.
2. Screw the Pressure Switch end cap
onto the flashlight body and firmly tighten.
3. Apply pressure to the pad surface of the
Pressure Switch to ignite the flashlight.
Press and release the button in the center of
the end cap to turn the light on or off.
(Note: Additional operation modes described on page 7)
Pressure Switch Operation
Push Button Operation
2. While the end cap is removed, the
pre-installed Rubber Spacer Ring for
everyday carry can be replaced with the
included Tactical Grip Assist for tactical
shooting needs.
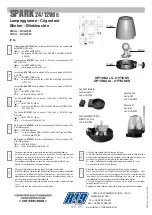
Rubber Spacer Ring
Tactical Grip Assist
1
2a
2b
3
4
1
2
3