background image

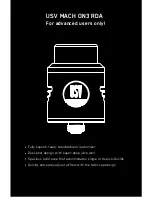
USV MACH ON3 RDA

For advanced users only!

Fully squonk-ready rebuildable drip atomizer

Dual-post design, with super deep juice well

Spacious build area that acommodates single or dual coil builds

Quickly and easily adjust airflow with the twist cap design

Summary of Contents for Mach ON3

Page 1: ...MACH ON3 ...

Page 2: ......

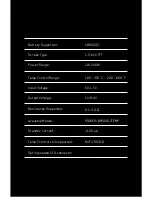
Page 3: ...240W 100 315 C 200 600 F 5V 1 5V 1V 8 4V 0 1 3 0Ω POWER BYPASS TEMP NI TI SS316 Power Range Temp Control Range Input Voltage Output Voltage Resistance Supported Available Modes Temp Comtrol coil supported Spring loaded 510 connector 130 µA Standby Current ...

Page 4: ...54mm 91mm 35 5mm 2 ...

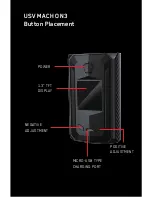
Page 5: ...POWER 1 3 TFT DISPLAY POSITIVE ADJUSTMENT NEGATIVE ADJUSTMENT MICRO USB TYPE CHARGING PORT USV MACH ON3 Button Placement ...

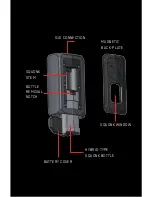
Page 6: ...MAGNETIC BACK PLATE SQUONK WINDOW 510 CONNECTION SQUONK STEM BOTTLE REMOVAL NOTCH HYBRID TYPE SQUONK BOTTLE BATTERY COVER ...

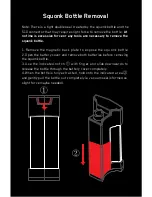
Page 7: ...e magnetic back plate to expose the squonk bottle 2 Open the battery cover and remove both batteries before removing the squonk bottle 3 Use the indicated notch with finger and slide downwards to release the bottle through the battery cover completely 4 When the bottle is fully extracted hold onto the indicated area and gently pull the bottle out completely a vacuum seal is formed so slight force ...

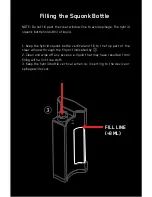
Page 8: ...onk bottle vertical and fill to the top part of the clear window through the fill port indicated by 2 Clean and wipe off any excess e liquid that may have resulted from filling with a lint free cloth 3 Keep the hybrid bottle vertical when re inserting to the device or spillage will occur Filling the Squonk Bottle 6 FILL LINE 8ML ...

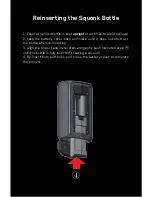
Page 9: ... open and make sure it does not obstruct the bottle when re inserting 3 Align the fill port and metal stem and gently push indicated area until the bottle is fully inserted creating a vacuum 4 Re insert both batteries and close the battery cover to complete the process Reinserting the Squonk Bottle ...

Page 10: ... avoid damage to the silicone seal 1 Remove the battery and hybrid squonk bottle and place aside 2 Gently use the q tip and swab away excess liquid or dirt lint 3 Wipe the rest of the internals with a lint free cloth 4 Let the device complete air dry before re installing squonk bottle and batteries Cleaning the internals of the MACH ON3 8 ...

Page 11: ...ced users only Fully squonk ready rebuildable drip atomizer Dual post design with super deep juice well Spacious build area that acommodates single or dual coil builds Quickly and easily adjust airflow with the twist cap design ...

Page 12: ...Press the power button 5 times in quick succession POWER OFF Select SYS OFF from within the MACH ON3 menu MACH ON3 MENU Press the power button 3 times in quick succession while device is on 10 Current user defined setting Current response time setting Current resistance voltage Total puff count Puff meter 7 seconds Battery life ...

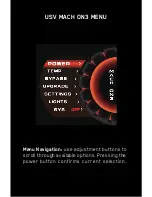
Page 13: ...Menu Navigation use adjustment buttons to scroll through available options Pressing the power button confirms current selection USV MACH ON3 MENU ...

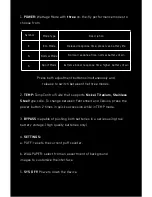
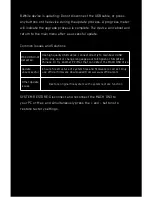
Page 14: ...in quick succession while in TEMP mode 3 BYPASS capable of pushing both batteries in a series using true battery voltage high quality batteries only 4 SETTINGS a PUFF resets the current puff counter b WALLPAPER select from an assortment of background images to customize the interface 5 SYS OFF Powers down the device Symbol Mode Type Description Relaxed response time preserves battery life Normal r...

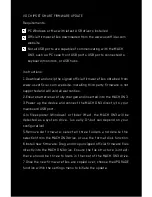
Page 15: ...ries are fully charged and inserted into the MACH ON3 3 Power up the device and connect the MACH ON3 directly to your mainboard USB port 4 In file explorer Windows or finder Mac the MACH ON3 will be detected as a system drive usually D but can depend on your configuration 5 Remove old firmware select all three folders and delete the selection from the MACH ON3 drive or use the format disk function...

Page 16: ...l com Restore original file system with system restore function Update unsuccessful Other Update issues Common Issues and Solutions SYSTEM RESTORE Disconnect and reconnect the MACH ON3 to your PC or Mac and simultaneously press the and buttons to restore factory settings 8 While device is updating Do not disconnect the USB cable or press any buttons on the device during the update process A progre...

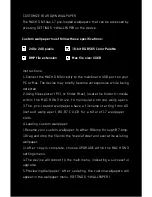
Page 17: ...lpaper to either B0 bmp through B7 bmp ii Drag and drop the file into the media folder and overwrite existing wallpaper iii After copy is complete choose UPGRADE within the MACH ON3 settings menu iv The device will reboot to the main menu indicating a successful upgrade 5 Previewing Wallpaper After updating the custom wallpapers will appear in the wallpaper menu SETTINGS WALLPAPER CUSTOMIZE YOUR O...

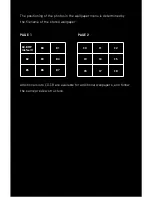
Page 18: ...er menu is determined by the filename of the stored wallpaper Additional slots C0 C8 are available for additional wallpapers and follow the same preview structure PAGE 1 A0 BMP default B0 C0 C1 C2 C3 C4 C5 C6 C7 C8 B1 B2 B3 B4 B5 B6 B7 PAGE 2 16 ...

Page 19: ...rting from the date of purchase that covers workmanship ofthe device including thechipset The warranty does not cover normal wear and tear or malfunction caused by physical damage to the device Do not disassemble the device to attempt repairs or the warranty will be void Within USA Allexchanges repairs replacements aresubjecttoa 10 00 handlingfee that covers return shippingtoyou Wearenotresponsibl...

Page 20: ...18 ...

Reviews: