


LSS−100P Installation & Operation Manual
v160817
29
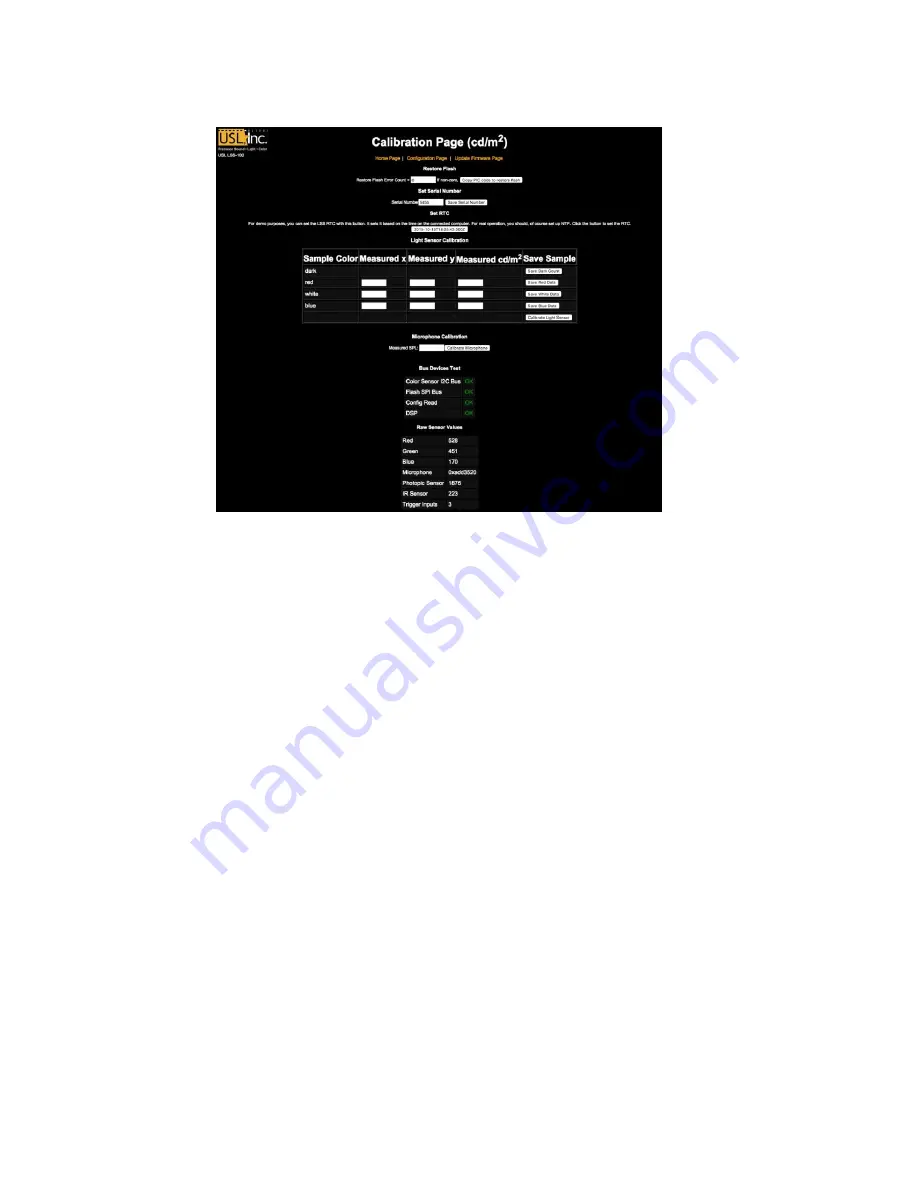
These screens are similar. A portion of the cal.html screen is shown in Figure 19.
Figure 20 - LSS-100P Calibration Screen
Besides calibration, these screens includes factory configuration features and debug information.
The Copy PIC code to restore flash copies the currently loaded firmware to external flash as a backup.
The number to the left of this button is a count of how many bytes disagree. We recommend not
clicking this button in the field. Keeping the factory firmware as a backup allows you to go back to it
should something go wrong.
The Set Serial Number button is not normally used in the field. The MAC address of the LSS-100P is
based on the serial number.
Use the procedure below to calibrate the light and IR portion of the LSS-100P:
1.
Present the LSS-100P with total darkness. This can be accomplished by putting a lens cap over
the lens or by dowsing the projector and removing power from any IR panels in the auditorium.
Once the LSS-100P is presented with total darkness, click the “Save Dark Count” button. This
sets a dark reference for both the luminance and IR sensors.
2.
Project a full-screen red test pattern on the screen. Measure the color (x,y) and luminance with
the spectrometer-based reference meter. While the test pattern is still on the screen, key these
values in the “red” line of the calibration form, then click “Save Red Data.”
3.
Project a full-screen white test pattern on the screen. Measure the color (x,y) and luminance
with the spectrometer-based reference meter. While the test pattern is still on the screen, key
these values in the “white” line of the calibration form, then click “Save White Data.”
4.
Project a full-screen blue test pattern on the screen. Measure the color (x,y) and luminance with
the spectrometer-based reference meter. While the test pattern is still on the screen, key these
values in the “blue” line of the calibration form, then click “Save Blue Data.”
5.
Click the “Calibrate Light Sensor” button.


