background image

DAX-602/802 INSTRUCTIONAL MANUAL

Ultra 

H

Stereo Labs, Inc.

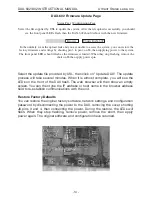
Select the update file provided by USL, then click on "Update DAX." The update
process will take several minutes. When it is almost complete, you will see the
LEDs on the front of the DAX flash. The web browser will then show an empty
screen. You can then type the IP address or host name in the browser address
field to re-establish communications with the unit.

Restore Factory Defaults

You can restore the original factory software, network settings, and configuration
password by disconnecting the power to the DAX, removing the cover, shorting
J8 pins 3 and 4, then connecting the power. During the restore, the LEDs will
flash. When they stop flashing, remove power, remove the short, then apply
power again. The original software and configuration have returned.

DAX-602 Firmware Update Page

Status Page 

I

Configuration Page

Select the file supplied by USL to update the system. After the file uploads successfully, you should

see the front panel LEDs flash, then the DAX-602 should reboot with the new firmware.

In the unlikely event the upload fails and you are unable to access the system, you can restore the

factory firmware and settings by shorting pin 3 to pin 4 on J8, then supplying power to the system.

The front panel LEDs should flash as the firmware is loaded. When they stop flashing, remove the

short on J8 then apply power spin.

Browse Update 

DAX-602

-14 -

Summary of Contents for DAX-602

Page 1: ...DAX 602 802 Digital to Analog Converter INSTRUCTION MANUAL 181 Bonetti Drive San Luis Obispo CA 93401 Ph 805 549 0161 Fax 805 549 0163 email uslinc uslinc com www uslinc com...

Page 2: ...s 7 Difference Between 602 802 7 AES Channel Assignments 8 Connector Tables 9 10 Software lntroduction Configuration 10 DHCP NETBIOS 10 Configuration Page 11 Surround Delay 12 Auditorium Data 12 Passw...

Page 3: ...satisfied does not conform with the foregoing warranty and which is returned to our factory freight paid or serviced by one of our authorized contractors The forgoing warranty is exclusive and in lie...

Page 4: ...lightning storms or when unused for long periods of time 12 Refer all servicing to qualified service personnel Servicing is required when the apparatus has been damaged in any way such as power suppl...

Page 5: ...s Both versions convert the Hearing Impaired Visual Narration channels without sacrificing any of the normal cinema channels The output of the DAX unit may connect to any cinema processor that has a m...

Page 6: ...Digital Input AES balanced line input Both DCI and DMA8 connector formats are supported 3 Ethernet Port For communication with the user interface 4 Hearing Impaired Vocal Narration Output Balanced or...

Page 7: ...st to the calculated value Differences between the DAX 802 and 602 The DAX 802 is the full featured version while the 602 provides economy but versatility Channel assignments In the 602 s Mono Surroun...

Page 8: ...de 1 Remove the four side screws that hold on the cover 2 Place the two jumpers in the position shown in the picture below 3 Replace the cover 4 Use the GUI to select the Mono Surround mode This autom...

Page 9: ...and not audio locations Left Right etc Until the relationship is specified USL will use those established previously in the cinema industry Since Dolby equipment does not currently follow the DCI spec...

Page 10: ...e the negative signal MUST be connected to ground Note In order to interface with existing cinema equipment the DAX box uses the current Industry standard cable connection definition rather than the D...

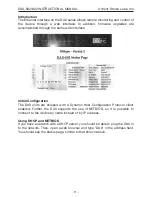
Page 11: ...Initial Configuration The DAX units are shipped with a Dynamic Host Configuration Protocol client enabled Further the DAX supports the use of NETBIOS so it is possible to connect to the device by nam...

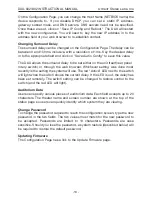
Page 12: ...P Address If your computer does not support IP Autoconfiguration or NETBIOS you should configure your network connection to be in the same subnet as the DAX and set its IP address to something other t...

Page 13: ...tch or through the web browser Whichever setting was done most recently is the setting the system will use The red Active LED next to the switch will light when the switch shows the current delay If t...

Page 14: ...3 and 4 then connecting the power During the restore the LEDs will flash When they stop flashing remove power remove the short then apply power again The original software and configuration have retur...

Reviews: