


4
B.
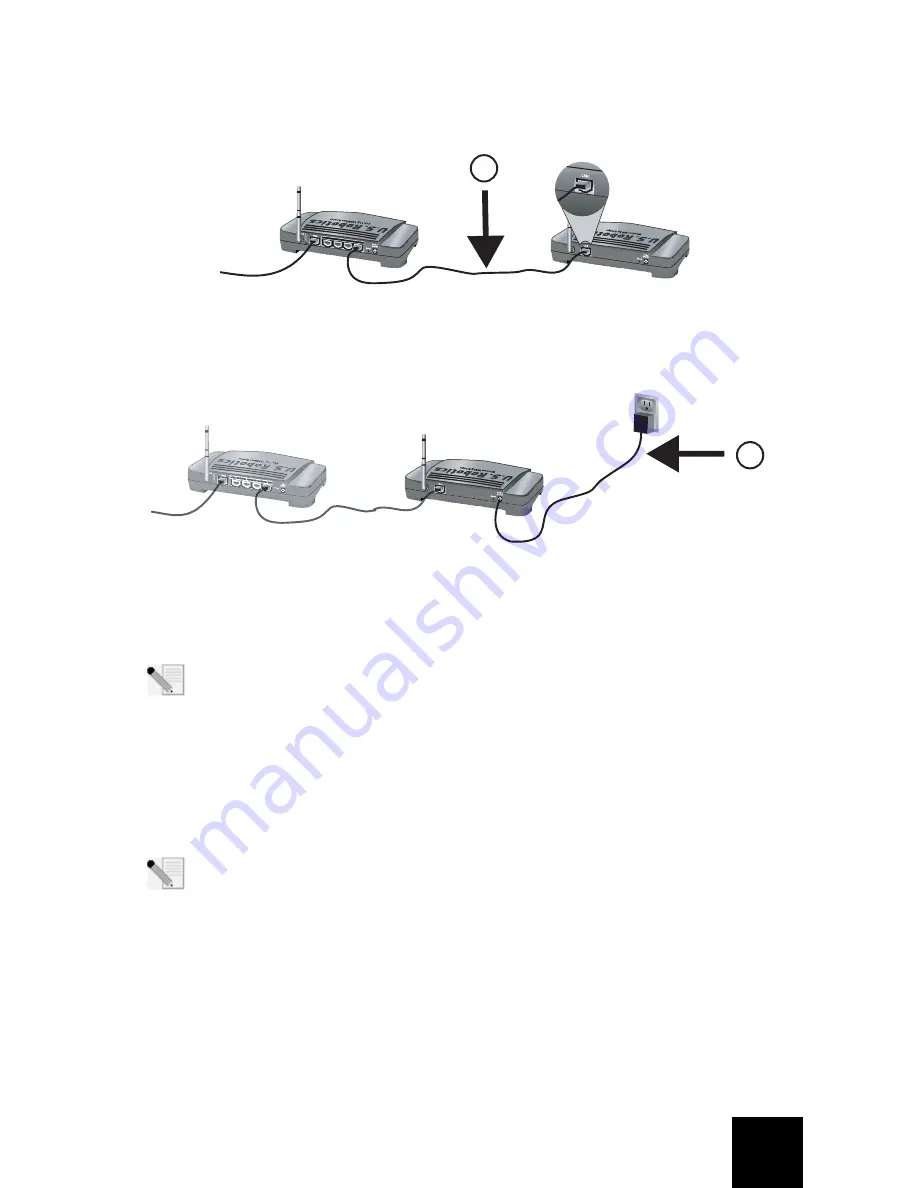
Connect the supplied Ethernet cable to the LAN port of the Wireless
MAX
g Bridge and to a
LAN port on a networking device, such as a router.
C.
Connect the power adapter to the Wireless
MAX
g Bridge and to a standard wall power out-
let.
Note to UK Users:
Attach the correct power plug to the power adapter.
Step Two: Locate the Bridge in your network
Note:
It is recommended that the Wireless
MAX
g Bridge is always configured via an Ether-
net connection. This will ensure the configuration changes are made without modifying
the properties of any wireless cards in your network.
Windows Users
A.
Insert your U.S. Robotics Installation CD-ROM into the CD-ROM drive of a computer con-
nected to the existing router. The Installation CD User Interface will appear on your screen.
If prompted, select your preferred language. Follow the on-screen instructions to install and
launch the Detection Utility.
Note:
If your CD-ROM does not automatically launch, click Windows
Start
,
Run
, type
D:\setup
(or the appropriate letter of your CD-ROM drive), and click
OK
.
B.
When the Detection Utility opens, follow the on-screen instructions.
C.
After the devices on your network are detected, determine which is your Wireless
MAX
g
Bridge by matching the LAN MAC addresses. The LAN MAC address of the Wireless
MAX
g
Bridge is located on the label on the bottom of the Wireless
MAX
g Bridge. If you do not see
the LAN MAC address for your Wireless
MAX
g Bridge, make sure it is connected properly
and click
Detect
to scan your network again. Select the LAN MAC address for your Bridge
and click
Next
.
D.
Click
Finish
to exit the Detection Utility and to open the Web User Interface in a new browser
window.
4
3
2
1
B
Wireless
MAX
g Bridge
existing router
C
Wireless
MAX
g Bridge
existing router


