2.2 CAMERA
MENU
Description
This menu is used to edit the display and configuration settings of each video signal.
Position the “Active Frame” on the “
CAMERA
” icon and press “
ENTER
”.
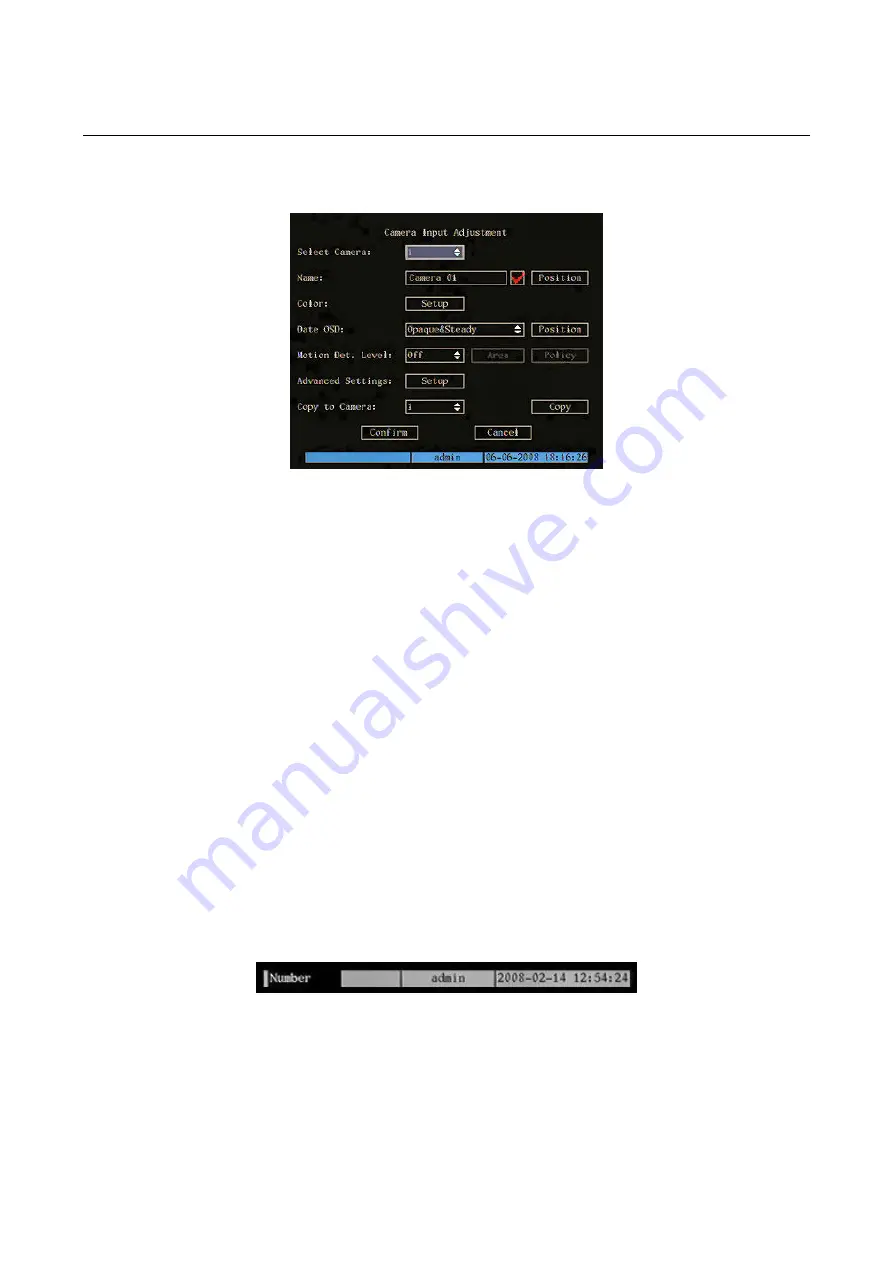
The following window will appear.
Figure 25: cameras menu (basic settings)
u items.
Point th
e required item and press “
ENTER
” to edit it. Use buttons “
▲▼
” to change the available options for the
selected
Select “
R
” to make the changes effective.
Select “
R
” to cancel the changes.
Press “
.
Press “
mes until the configuration window closes to quit the configuration menu.
2.2.1.1 Select
camera
era (video input)
settings. Use “
▲▼
” to select.
2.2.1.2 Name
This option can be used to assign a name to the DVR device. The unit name is a 32 character combination.
mode. The character input bar will appear in the lower part of the screen.
lower case alphabetic
symbolic
Press “
A
” repeatedly on the front panel of the device to edit the character type to be entered as shown below.
NUMBER TYPE CHARACTER
The numeric character input bar is:
This page contains the basic menu settings.
Select “
ADVANCED SETTINGS
” and press “
ENTER
” to access advanced settings.
The selected item is highlighted.
Press arrows “
◄►▲▼
” to point the cursor to the various men
e cursor to th
menu item.
CONFIRM
” and press “
ENTE
CANCEL
” and press “
ENTE
ESC
” to go back by one step
ESC
” several ti
2.2.1
CAMERAS MENU BASIC SETTINGS
This menu is used to select the cam
were to edit the display and configuration
Press “
EDIT
” to access edit
Press “
ENTER
” to quit edit mode.
The following character types can be entered:
numeric
upper case alphabetic
How to enter a character
Press the “SHIFT” button to enable numeric functions.
Use the number keys 0
÷
9 on the front panel to enter a character.
Use the arrow buttons “
◄►
” to move the cursor.
Press “
EDIT
” to delete a character.
DS1093-022
37


